Cluster Creation and Component Installation
After the Apache Ambari service installation, the next step is the creation of the Big Data Cluster, including the installation of the desired services/components.
Let's Get Started!
-
Use a browser to access the Ambari web interface available at the IP/hostname of the Ambari Server machine, port 8080. For example:
http://192.168.56.100:8080 Figure 1 - Ambari login pagenote
By default, the username / password are, respectively, admin / admin.
- Instructions
- Video
-
On the first access, a welcome page will be displayed. To start the Cluster deployment process, click the LAUNCH INSTALL WIZARD button:
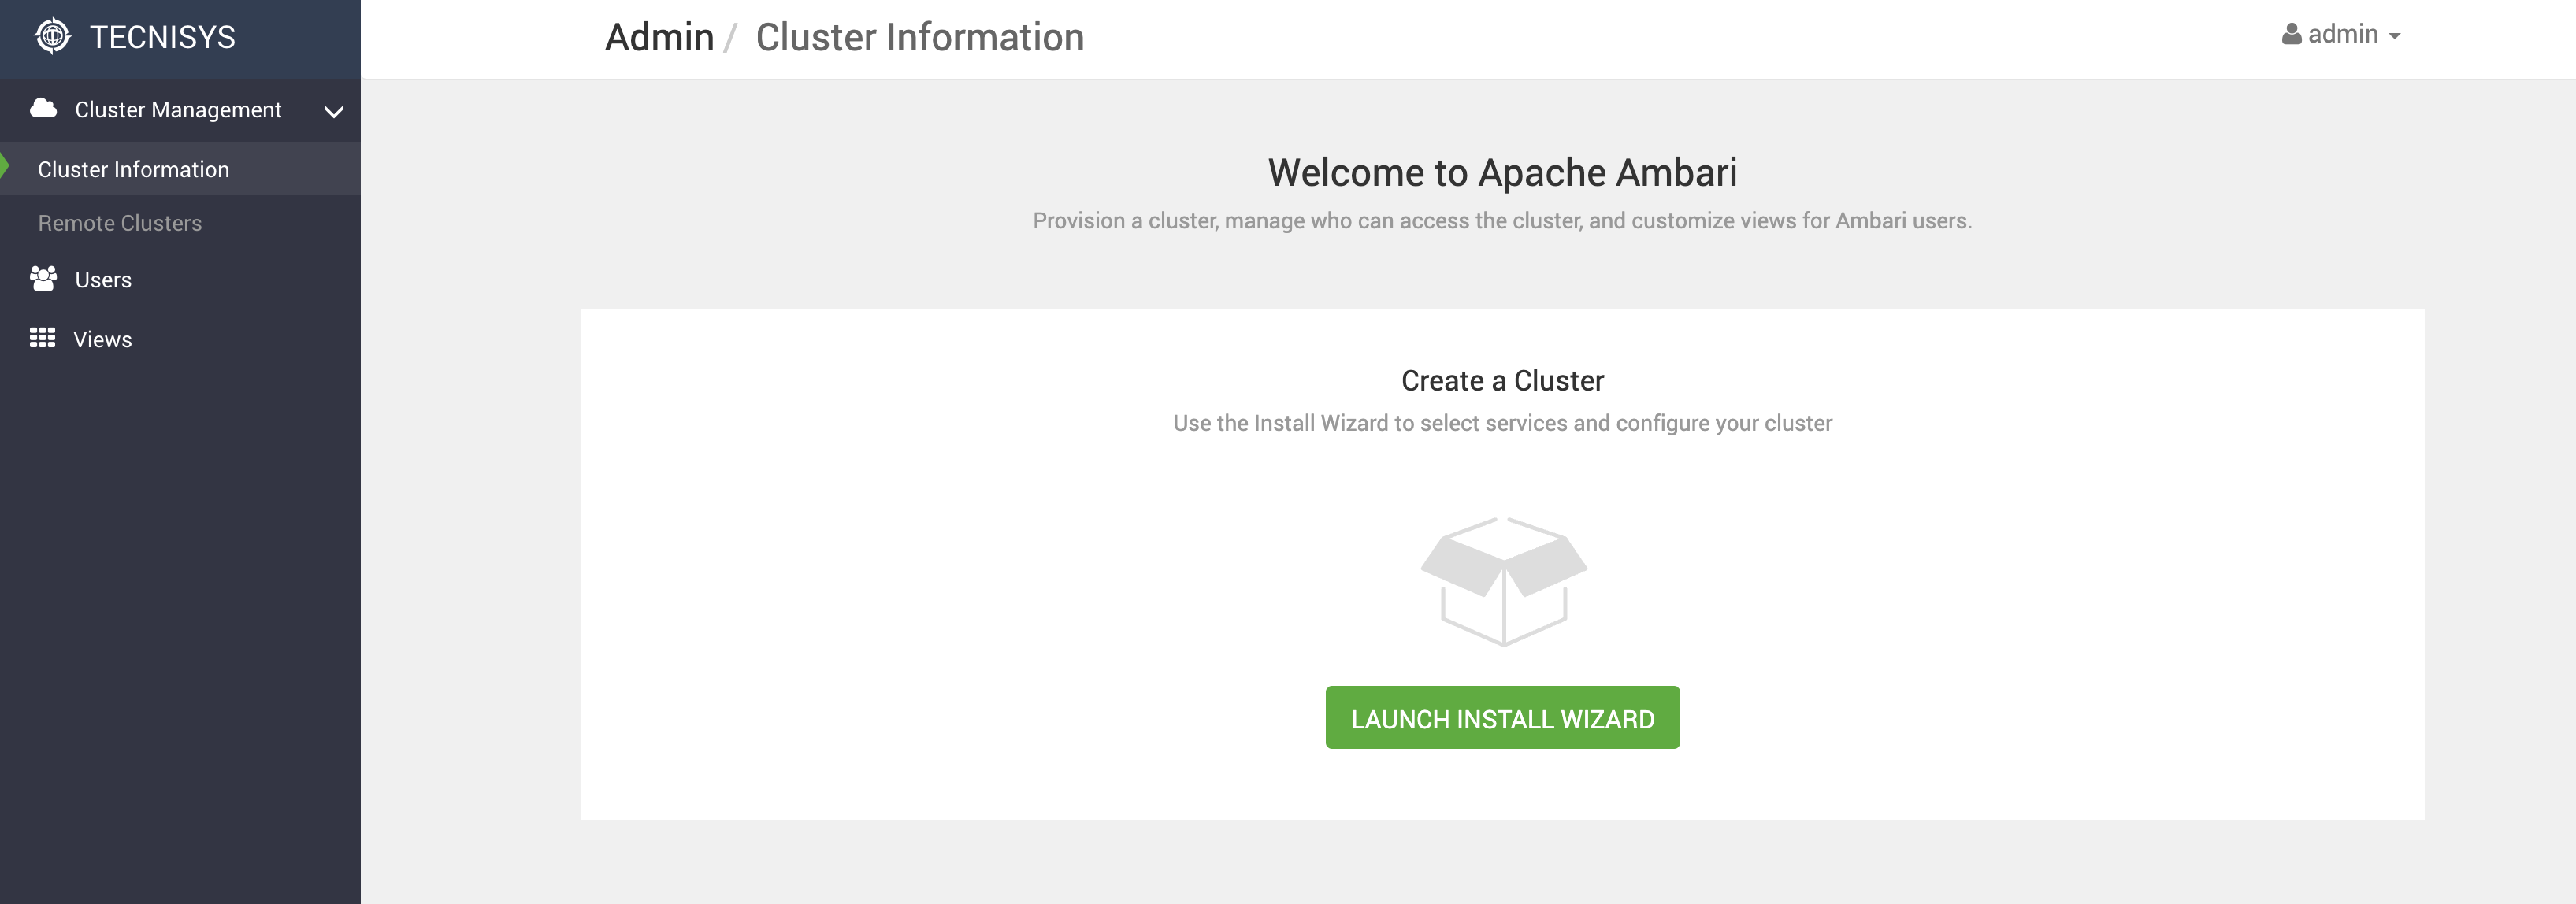 Figure 2 - Ambari Welcome Page
 -
Enter a name for the Cluster and click NEXT:
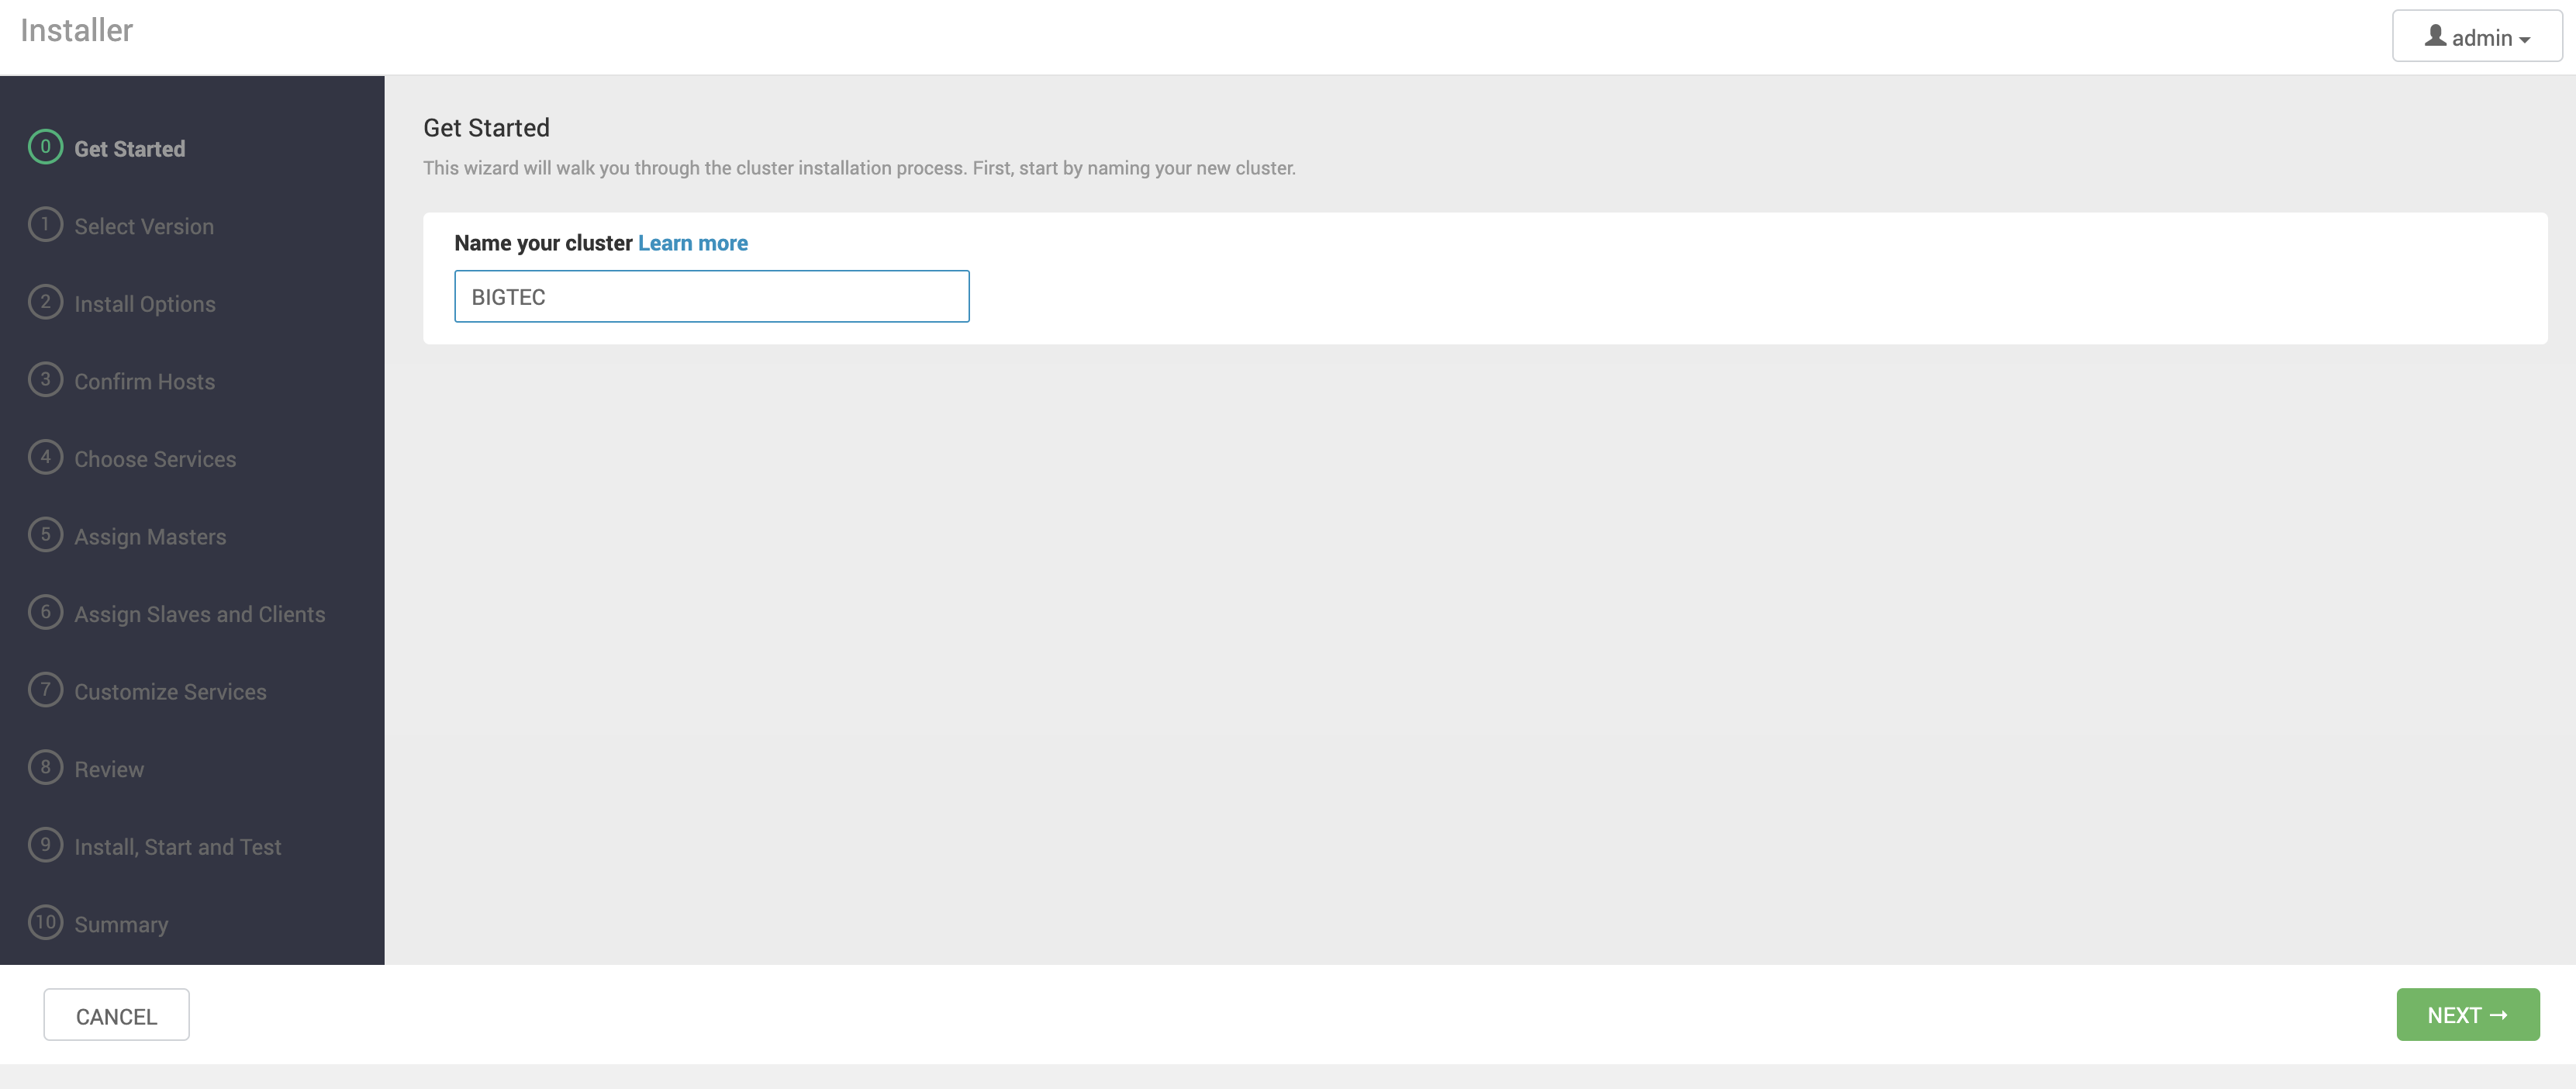 Figure 3 - Cluster Name
Version Selection
-
Select the desired TDP version:
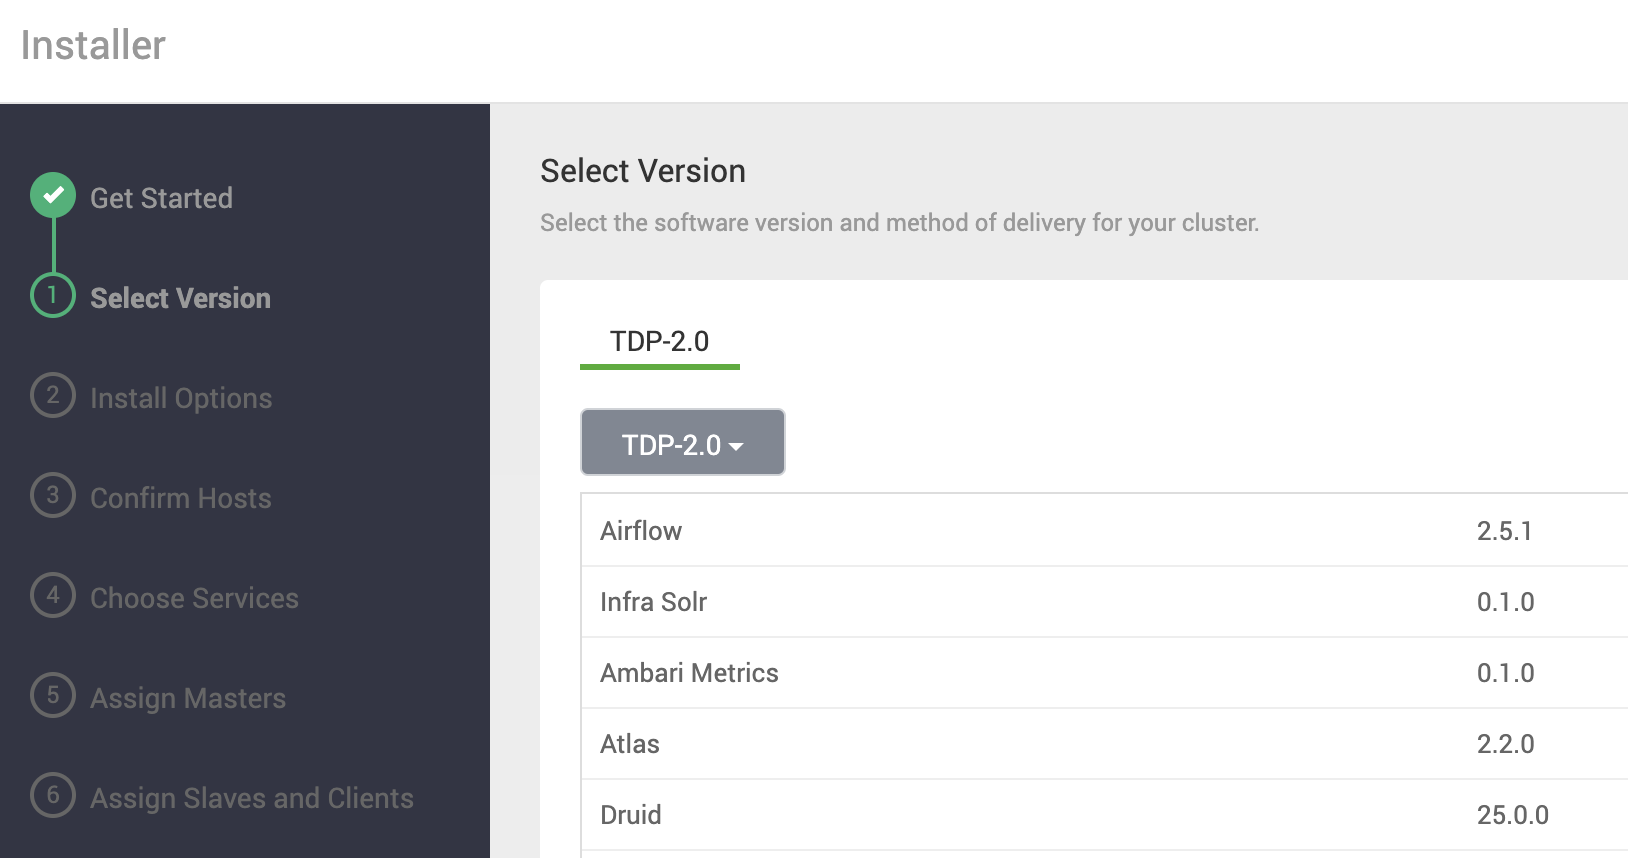 Figure 4 - TDP Version
 -
Select the package repository type (Public or Local) and enter the URL for Components (TDP-3.0) and Utils (TDP-UTILS-3.0):
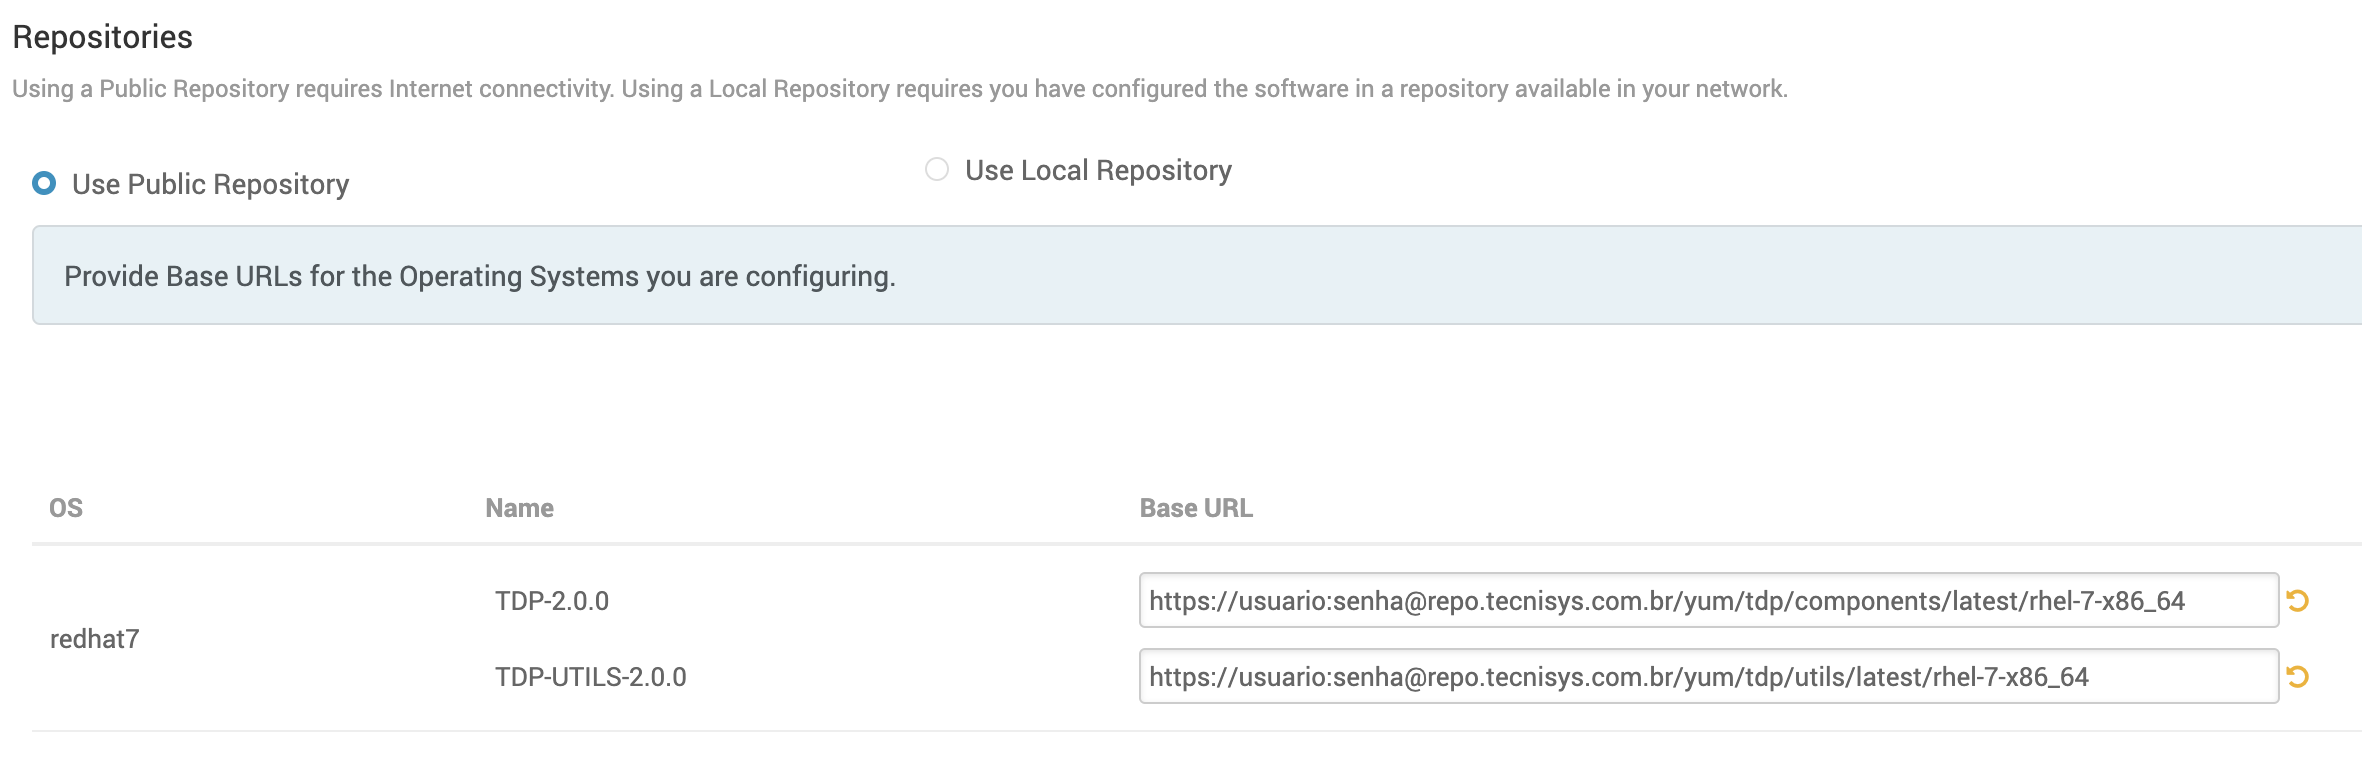 Figure 5 - Package repositories
 -
Next, click NEXT.
importantIf you choose to use the Tecnisys Public Package Repository, the access credentials (username and password) must be provided directly in the URL, as demonstrated in the image above.
Installation Options
-
In Target Hosts, enter the Fully Qualified Domain Name (FQDN) of the hosts (machines) that will compose the Cluster.
The Ambari Server needs to have access to the specified machines. Make sure that the FQDN resolution of the machines works correctly, either through a DNS Server (recommended) or locally (
/etc/hostsfile).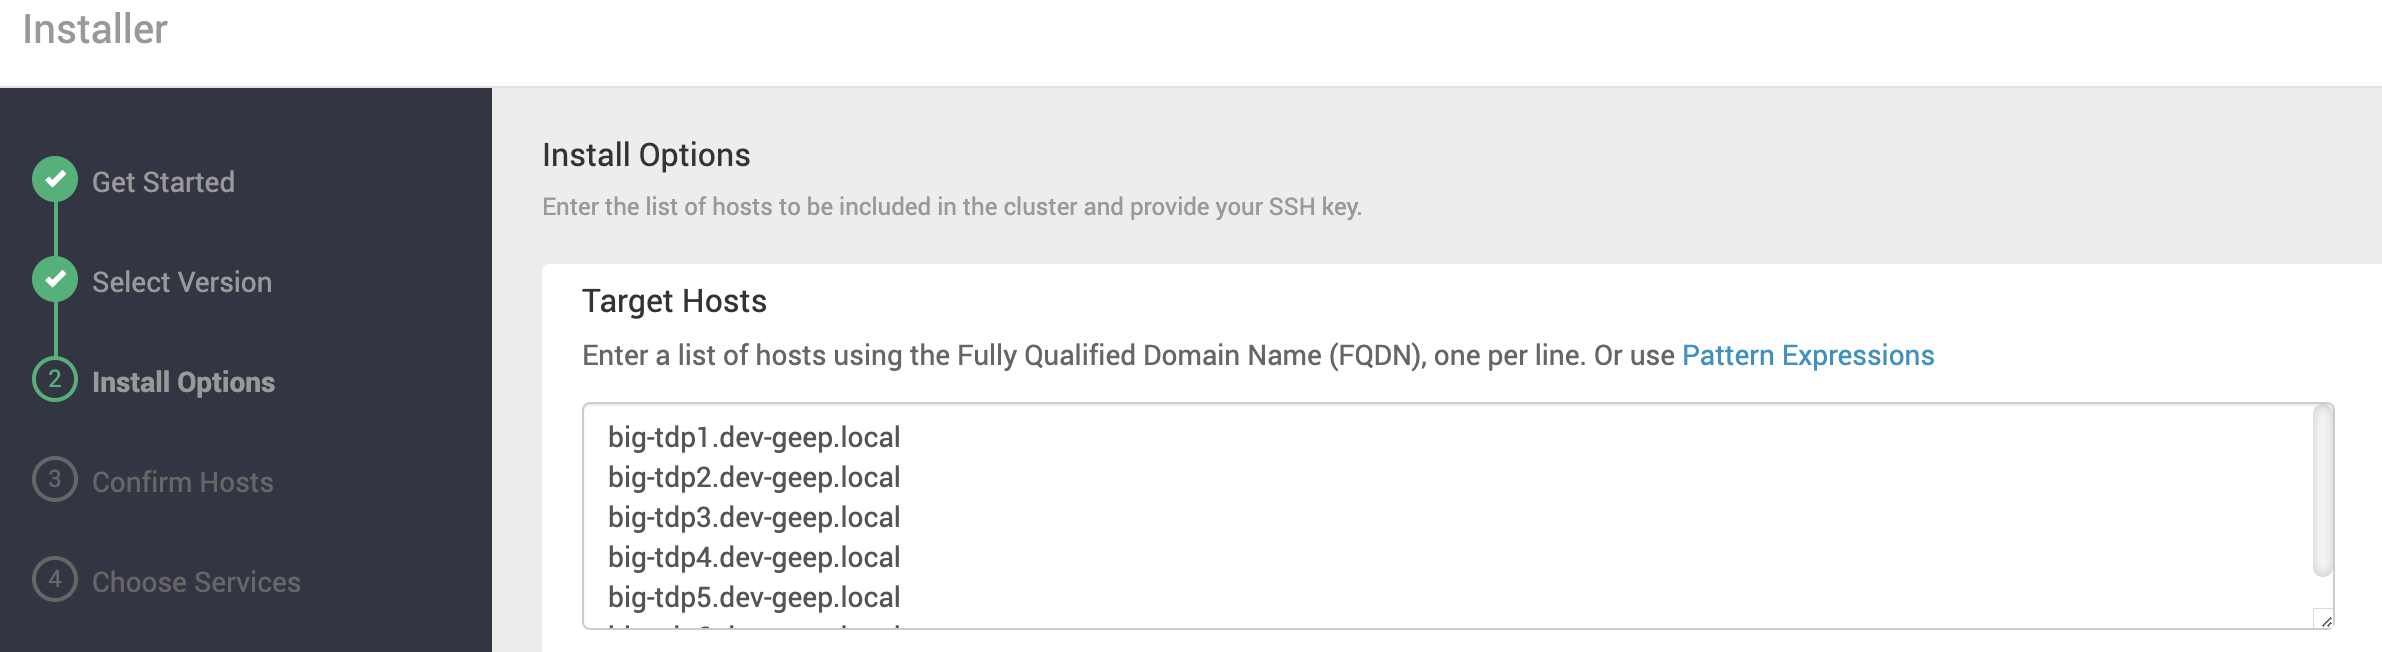 Figure 6 - Cluster host informationtip
In Target Hosts, it is possible to enter machines using Pattern Expressions. The example shown in the figure above would be:
big-tdp[1-7].dev-geep.local. -
In Hosts Registration Information, select how the Cluster machines will be registered.
-
If you choose to provide the Ambari Server machine's private SSH key for automatic registration of the Cluster machines, paste its content in the text field below or upload its file. Next, confirm the SSH user and port to be used. Also, make sure that the Trust Relationship (SSH key exchange) has been performed correctly, allowing access from the Ambari Server machine to all machines via SSH without entering the password of the Ambari Server daemon user (by default, root).
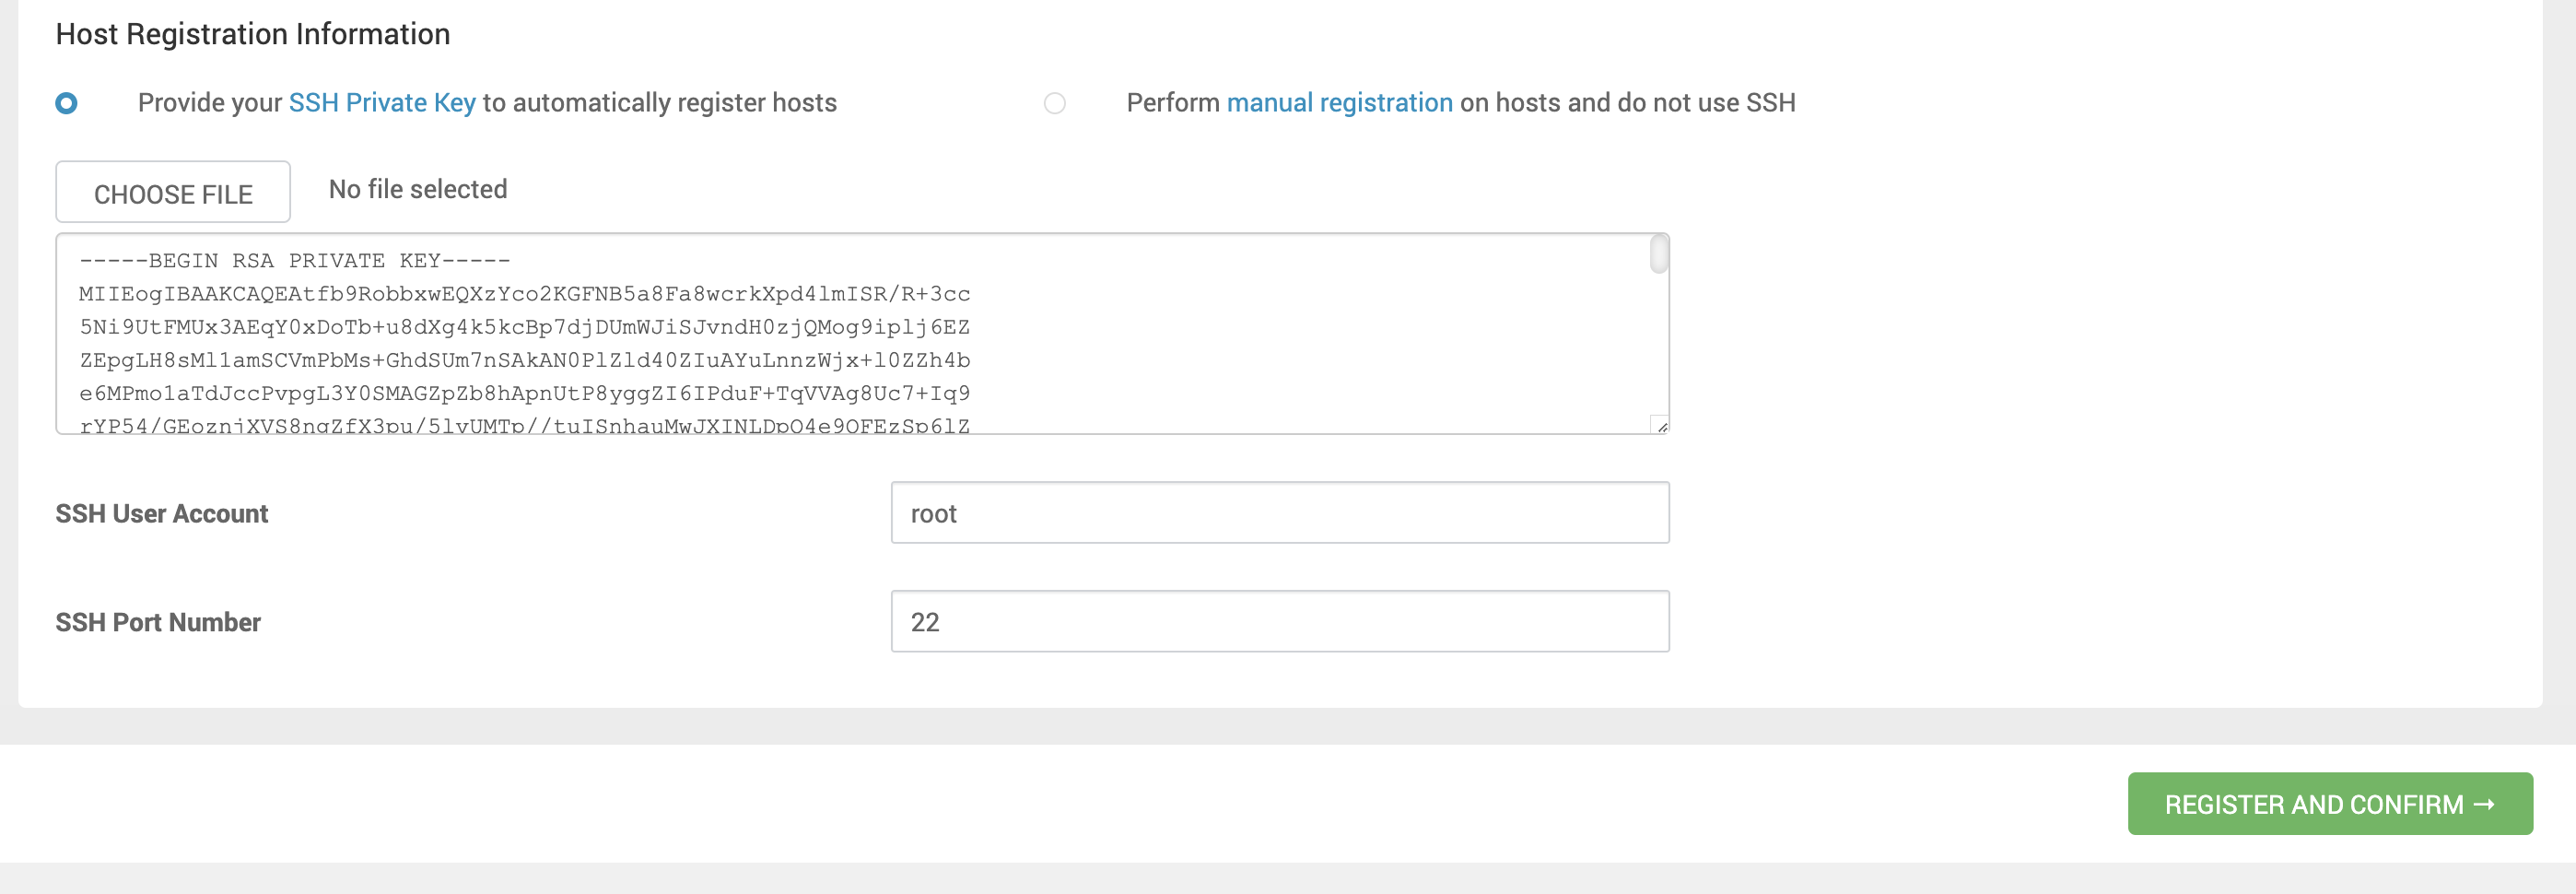 Figure 7 - Host registration
 -
If you choose to perform manual machine registration, install the Ambari Agent yourself on all machines before proceeding.
tipThe RSA private SSH key can be obtained by running the following command:
Terminal inputcat ~/.ssh/id_rsanoteTo manually install the Ambari Agent:
Terminal inputyum install ambari-agent
-
-
Next, click REGISTER AND CONFIRM.
Trust Relationship Configuration
-
On the Ambari Server machine, generate a private SSH key:
Terminal inputssh-keygen -
Copy the SSH key to ALL Cluster machines. For example:
Terminal inputssh-copy-id tdp-mn01.tecnisys.com.br -
Test SSH access to ALL Cluster machines without entering the user password. For example:
Terminal inputssh root@tdp-mn01.tecnisys.com.br
Host Confirmation
After the Ambari Agent installation on all machines specified in the previous step, Ambari performs a series of checks to ensure that the prerequisites have been met (JDK, Firewall, THP, among others).
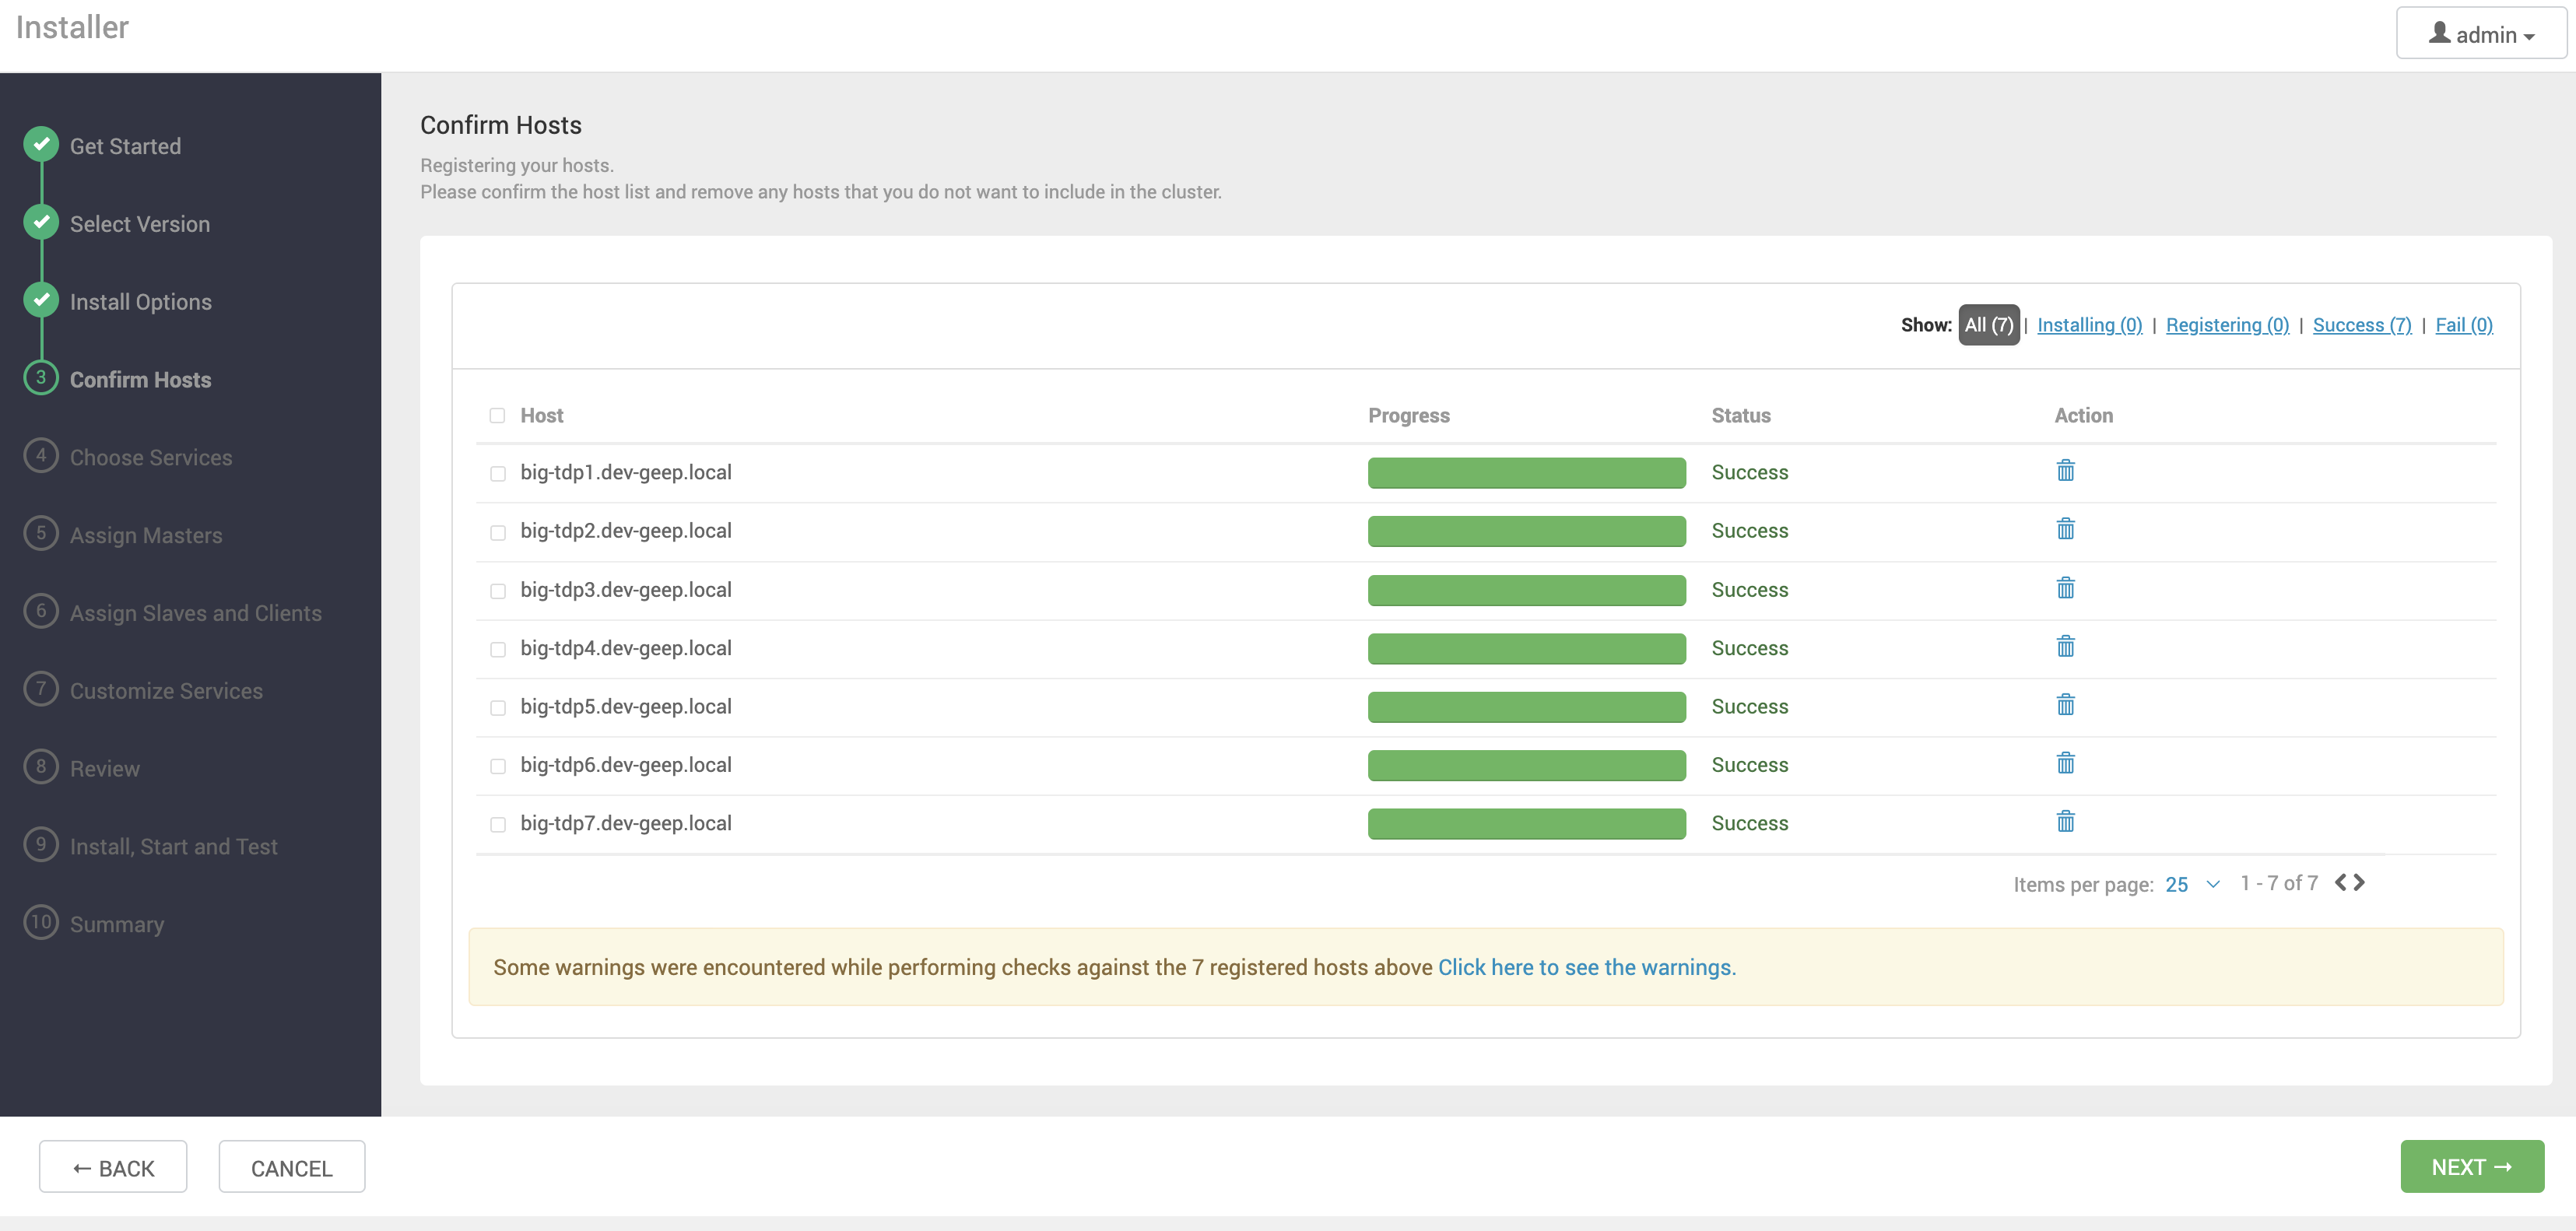
Any errors need to be corrected and the check re-run to proceed.
Click NEXT to advance.
Package Issues type alerts, referring to PostgreSQL packages already installed, can be disregarded.
Service Selection
-
Select the service responsible for the Cluster storage layer.
 Figure 9 - Storage layer service selection
 -
Select the remaining Cluster services.
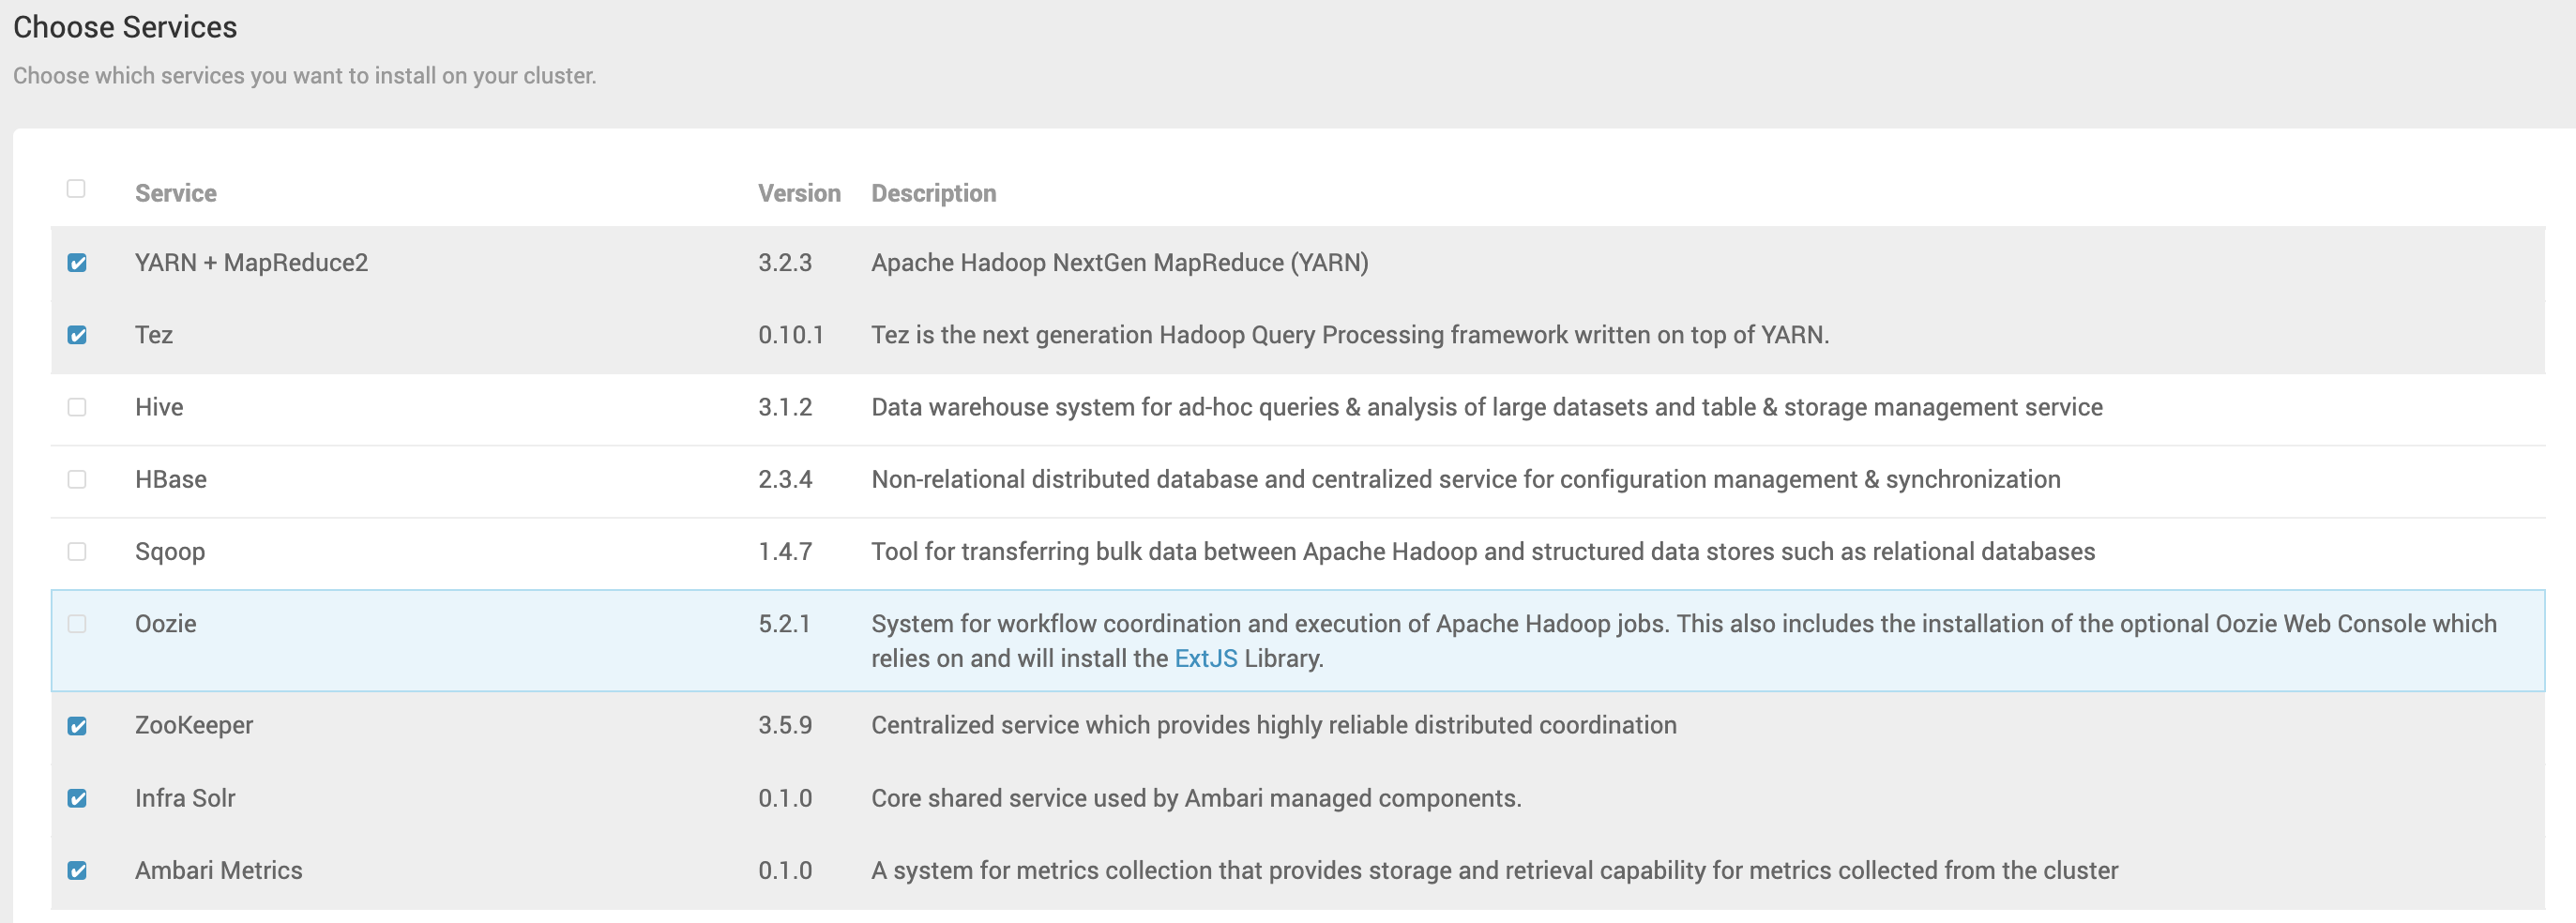 Figure 10 - Remaining Cluster service selectiontip
We recommend initially selecting the basic services, such as YARN + MapReduce2, Tez, Zookeeper, Infra Solr, and Ambari Metrics. The remaining services, if needed, can be added after the Cluster creation. This makes it easier to deal with possible component installation problems.
noteThe Cluster requires certain services to operate fully, such as Apache Ranger for the security layer and Apache Atlas for the data governance layer. Therefore, Ambari will display alerts if any functionality is limited by not installing a specific service. Ignore the alert (click the PROCEED ANYWAY button) if the service in question will be installed later, or if you are aware of such limitation.
-
Next, click NEXT.
Master Component Assignment
-
Indicate the machine for each of the Master components (generally management and coordination components) of the selected services. Note that the right side of the page shows the component organization per machine.
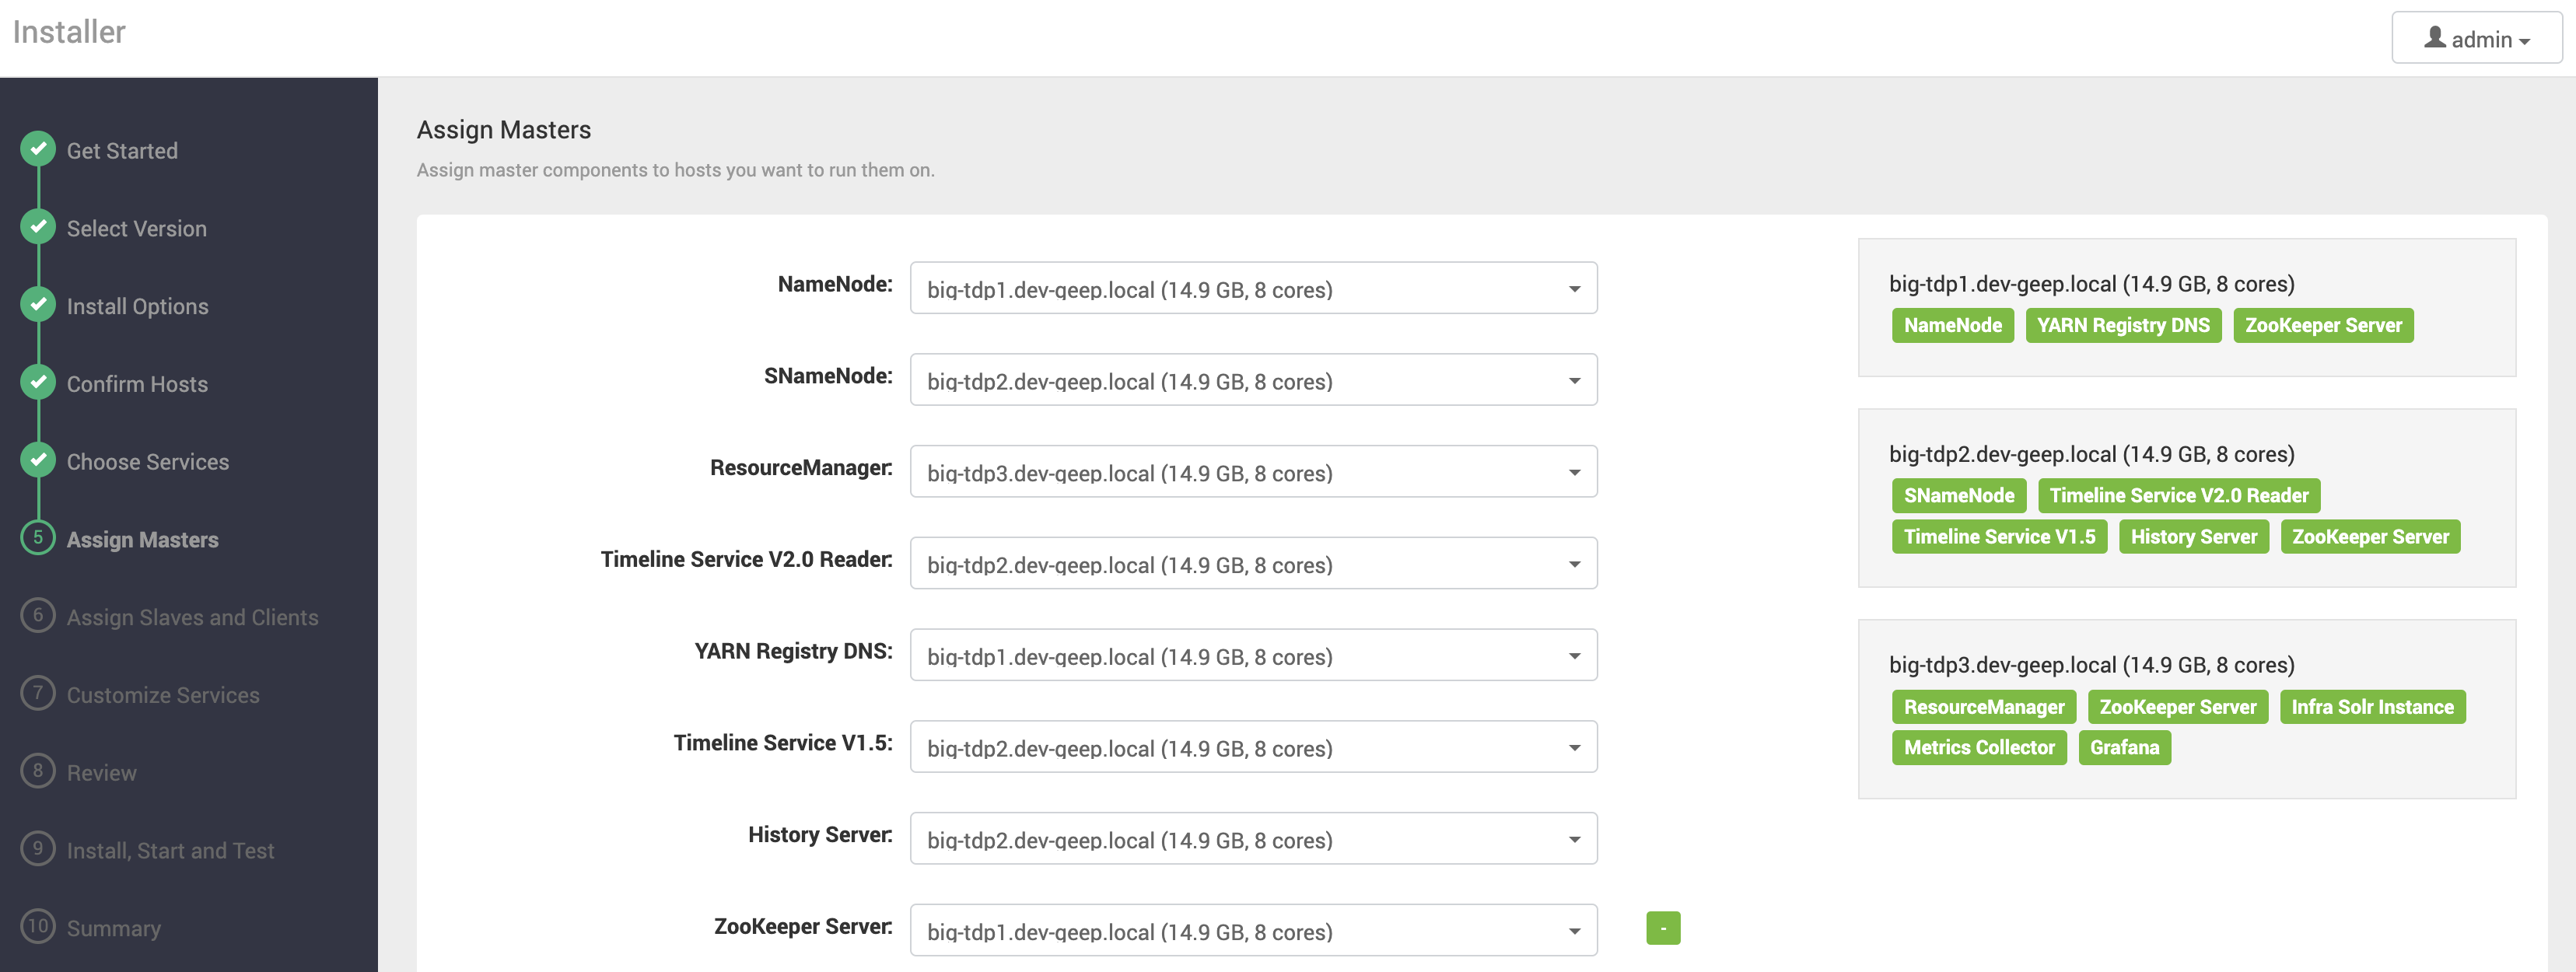 Figure 11 - Master component assignmentnote
The organization should be done considering the needs of each component and the available resources on each machine. Some recommendations can be observed:
- Avoid installing services other than Edge or Gateway services on the Ambari Server machine. If possible, keep a dedicated machine for the Ambari Server.
- Components responsible for high availability of services should be installed on different machines. For example, NameNode and Secondary NameNode (SNameNode).
- Install Zookeeper on an odd number of machines, greater than one (01). That is, initially, on at least 3 machines.
-
Next, click NEXT.
Slave and Client Component Assignment
-
Indicate on which machines the Slave components (generally storage and processing components) and Clients will be installed.
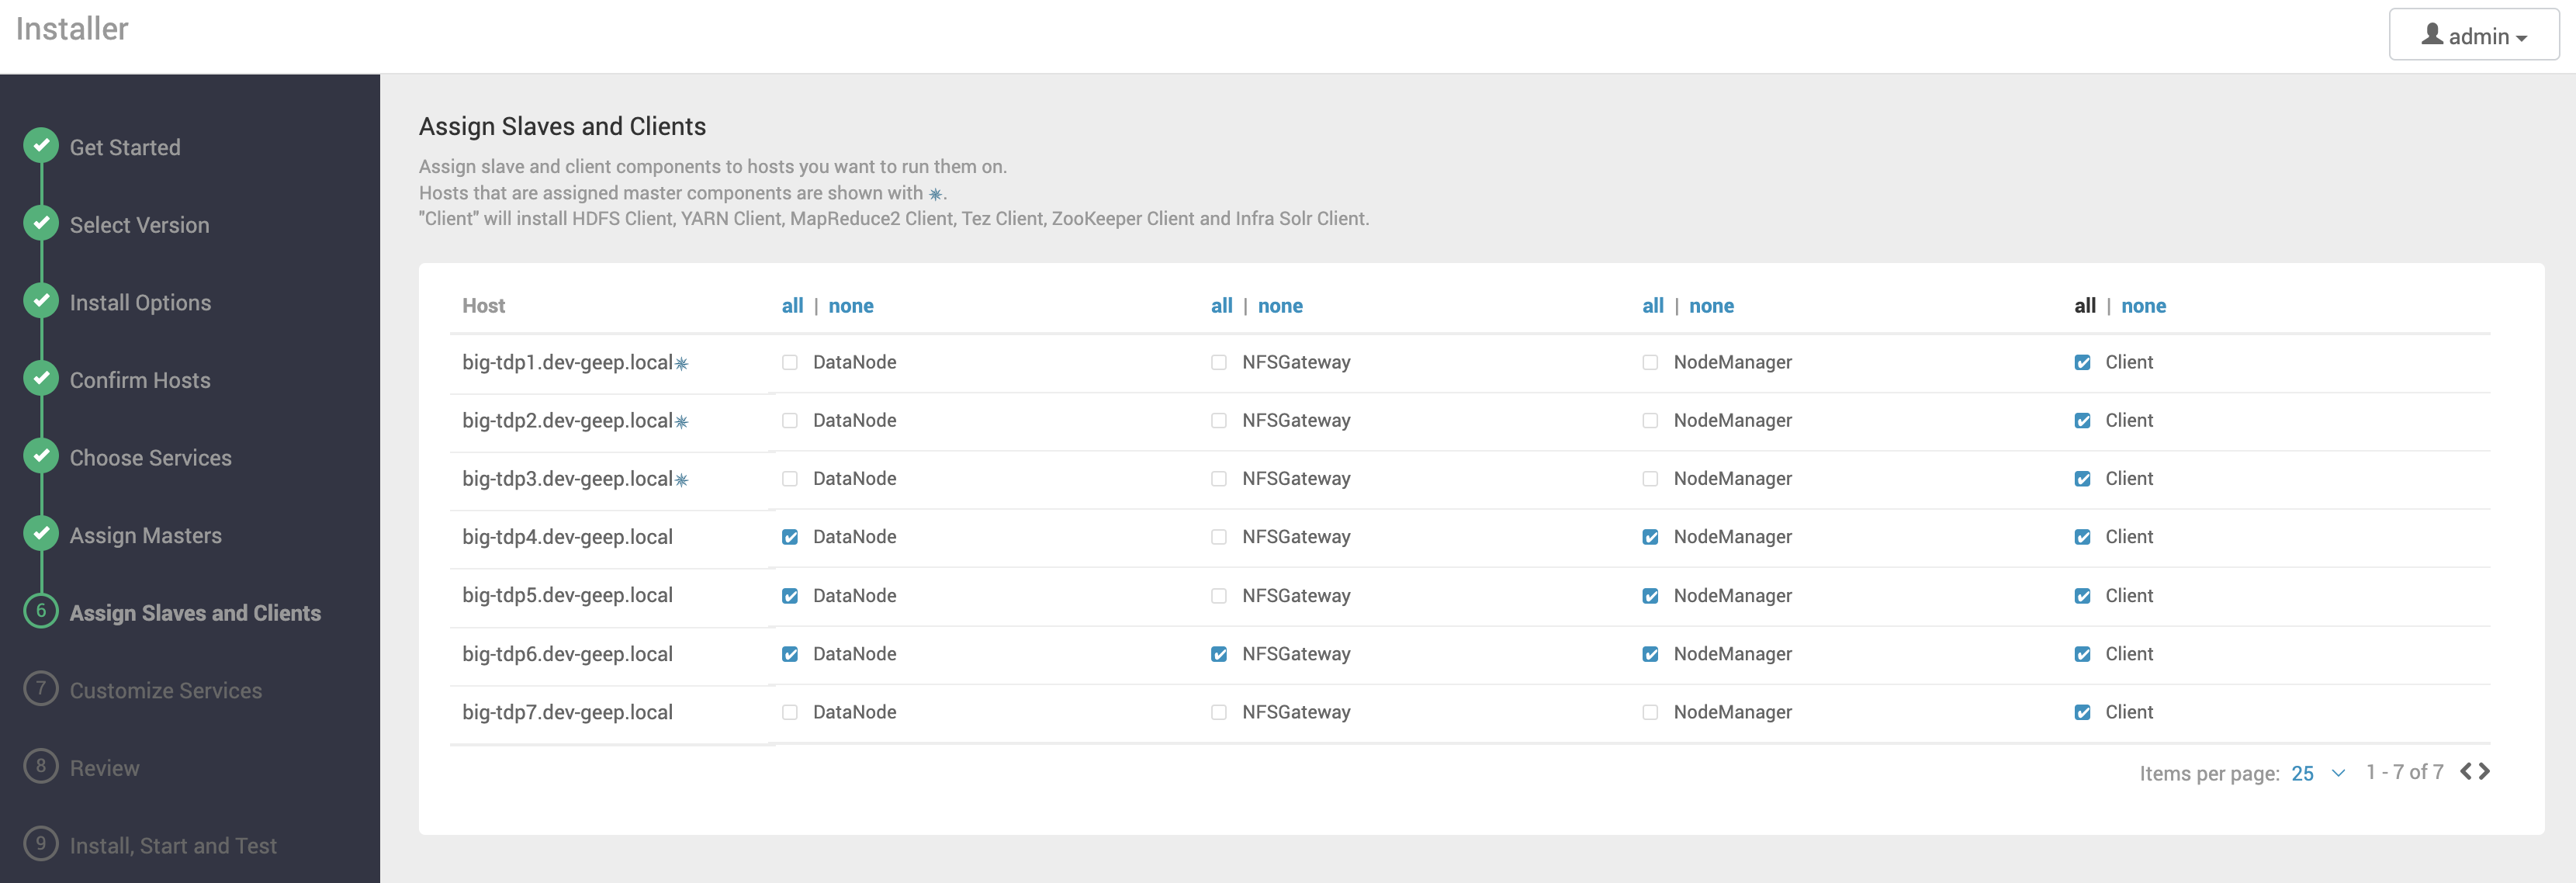 Figure 12 - Slave and Client component assignmentnote
Whenever possible, avoid installing Slave components on Master component machines.
-
Next, click NEXT.
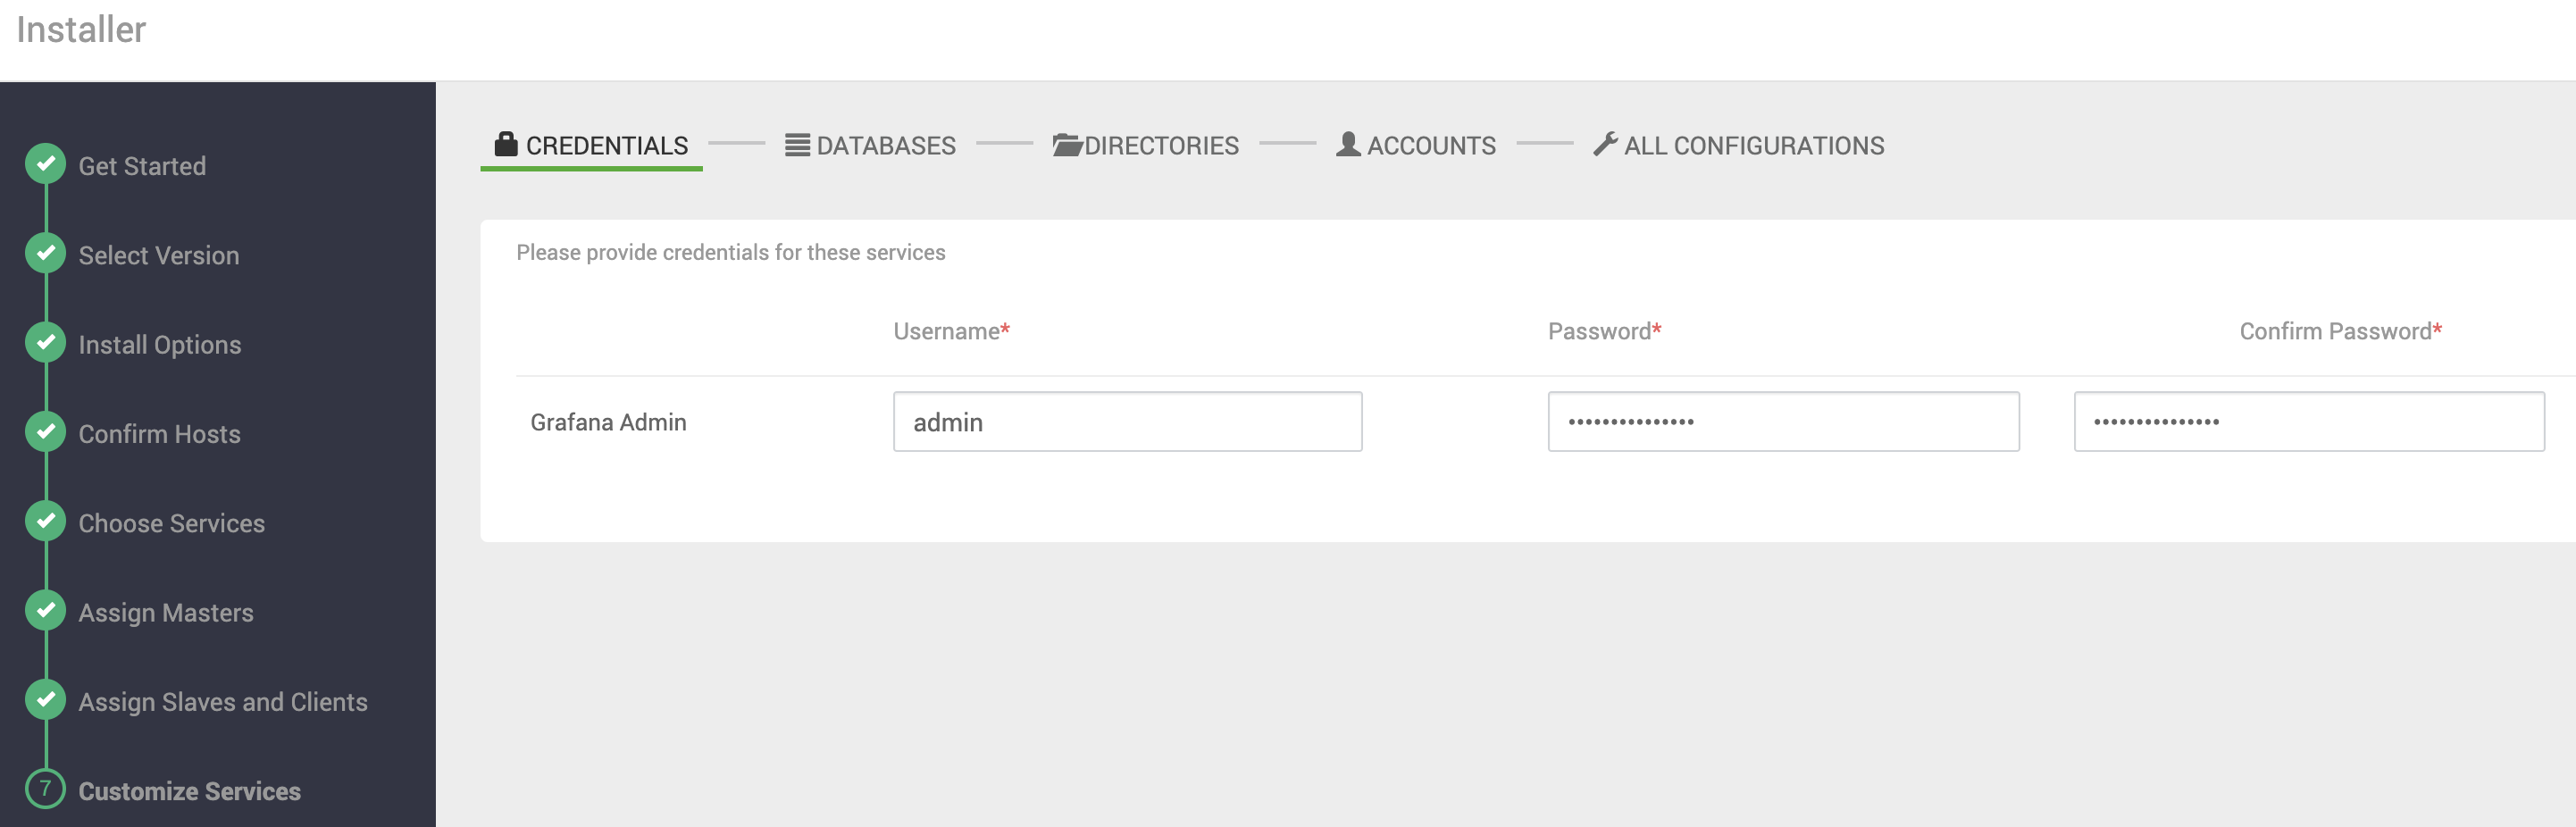
Service Customization
In this step, access credentials, database connection data, directories, users, and other service-specific information necessary for installation must be defined.
Resolve the pending items in all sections of this step and click NEXT to advance.
Credentials
Illustrating this section, we have Grafana, an Ambari Metrics component, which requires the definition of the tool's administration username and password:
Databases
Illustrating this section, we have Hive, which requires a database for metadata persistence. In this example, we provide the connection data for an existing PostgreSQL instance:
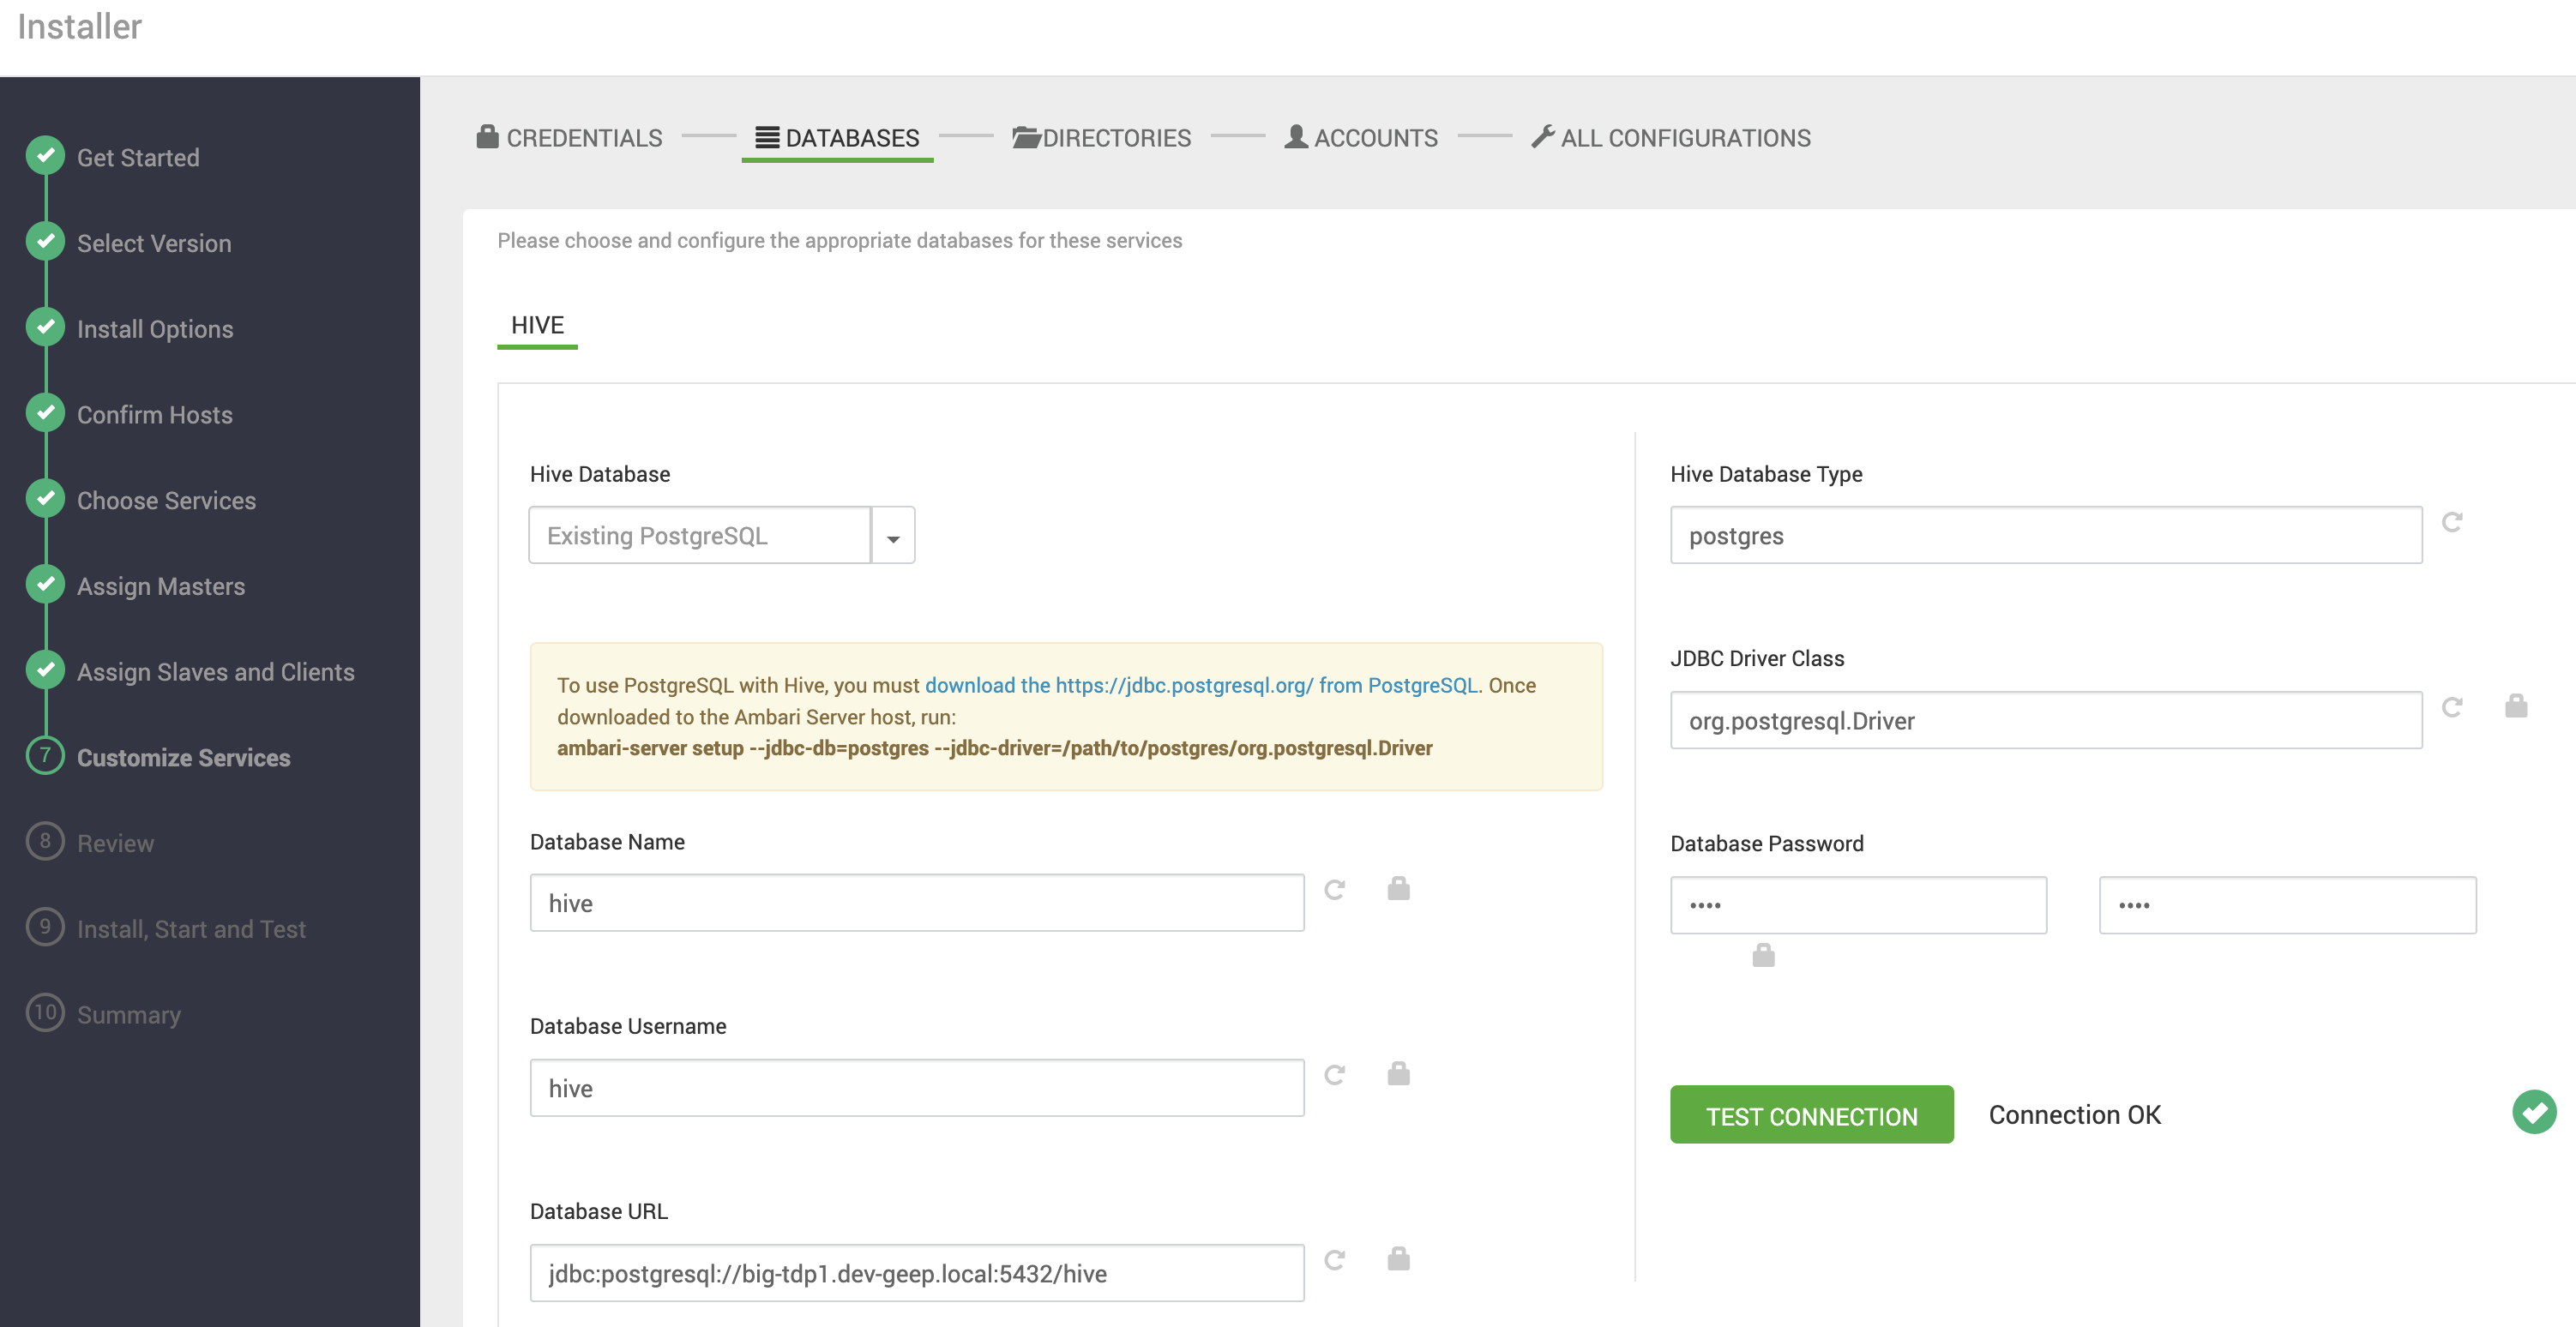
Click the TEST CONNECTION button to test the connection with the specified database.
Directories
In this section, it is possible to customize the service directories, such as the DataNode data directories, the NameNode namespace directories, log directories, etc.
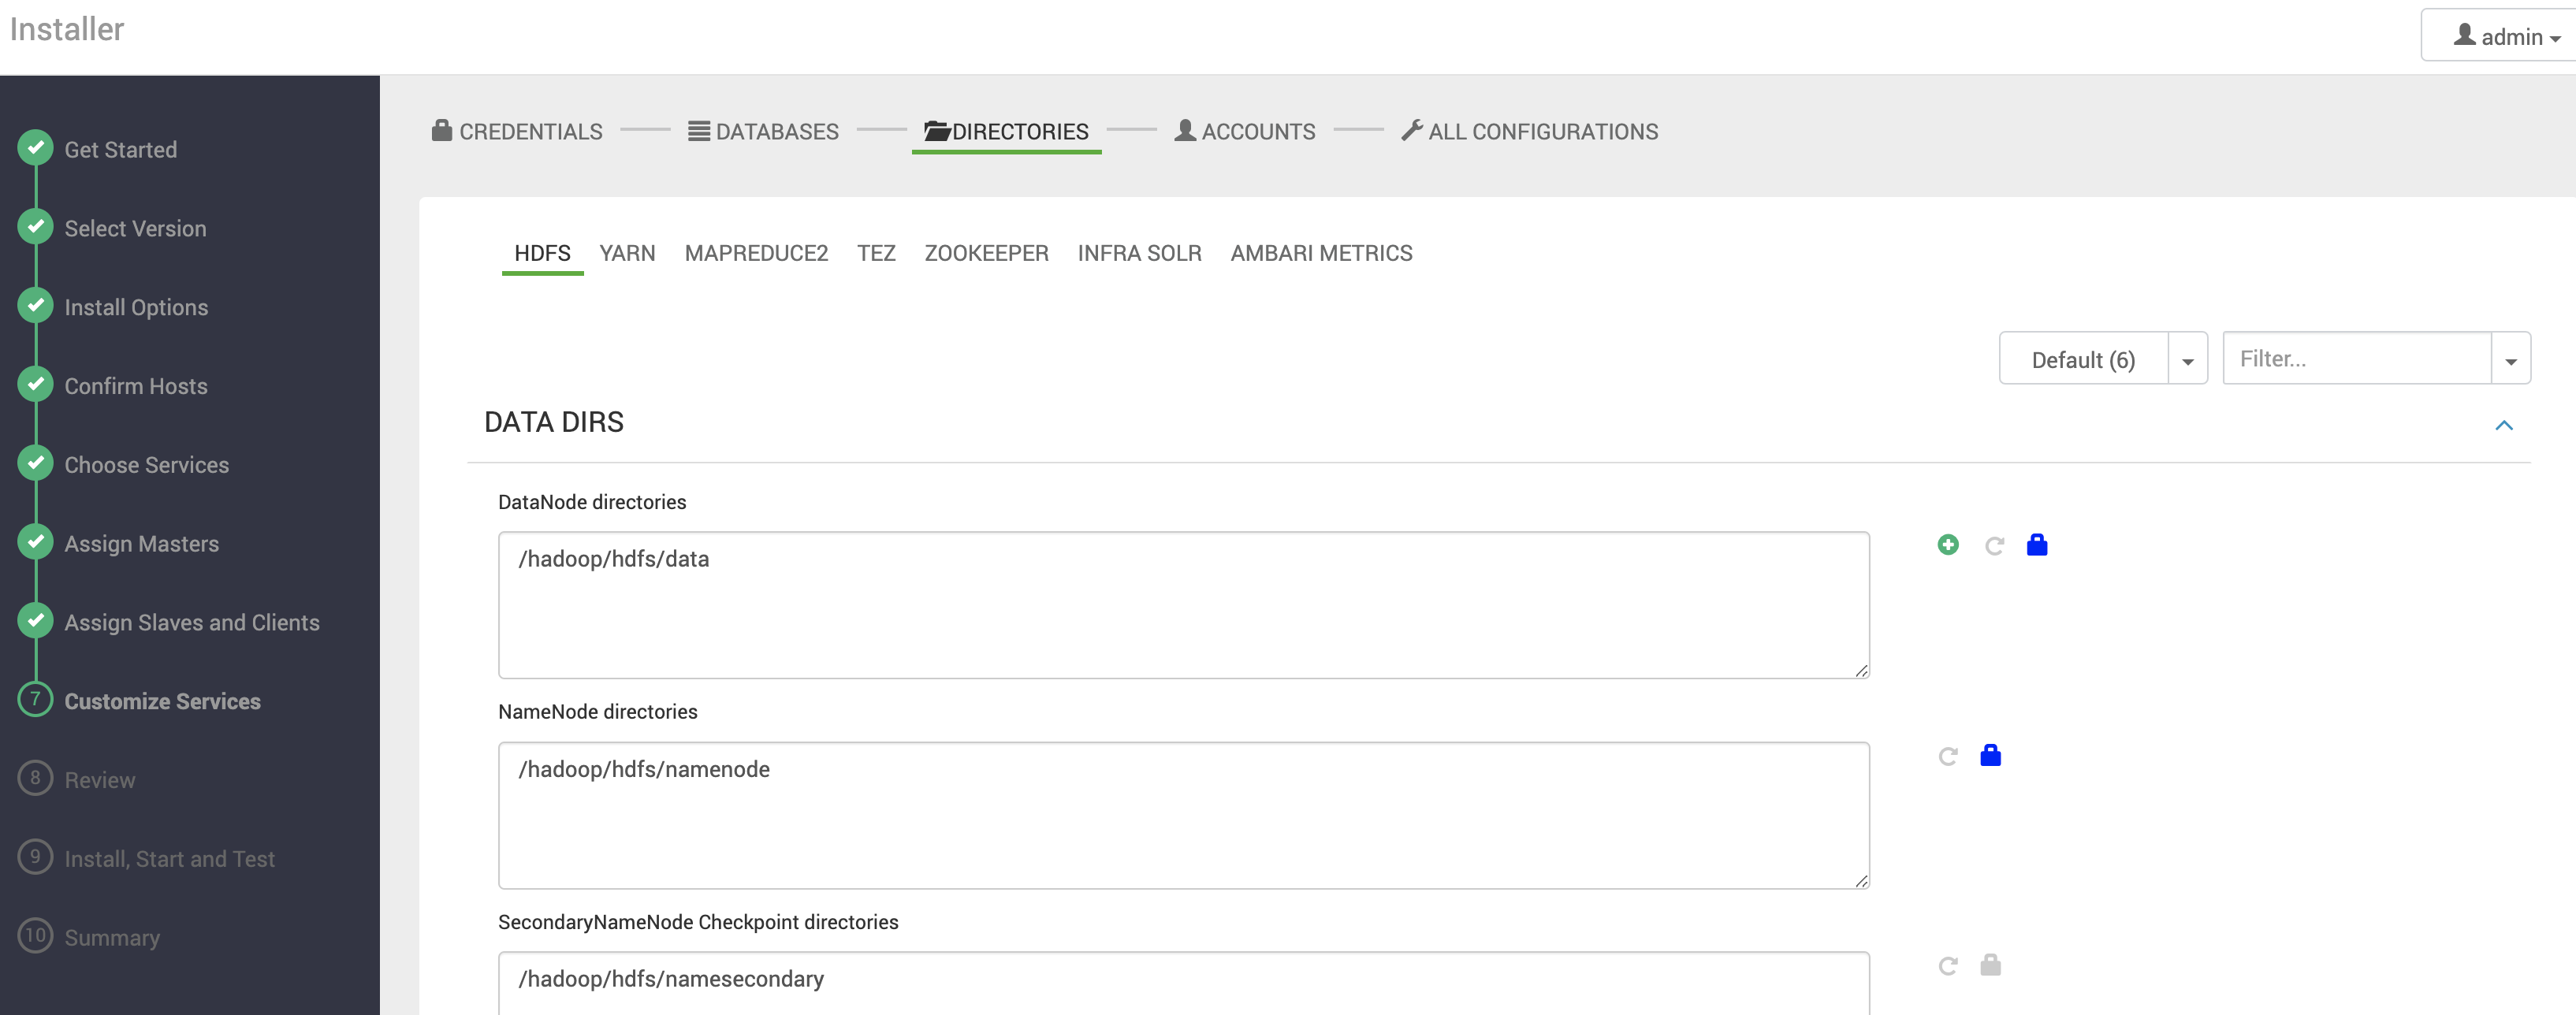
If possible, use exclusive storage devices (disks, SSDs, among others), volumes, and directories for DataNode, NameNode, JournalNode, NodeManager, Timeline Service, and Zookeeper files.
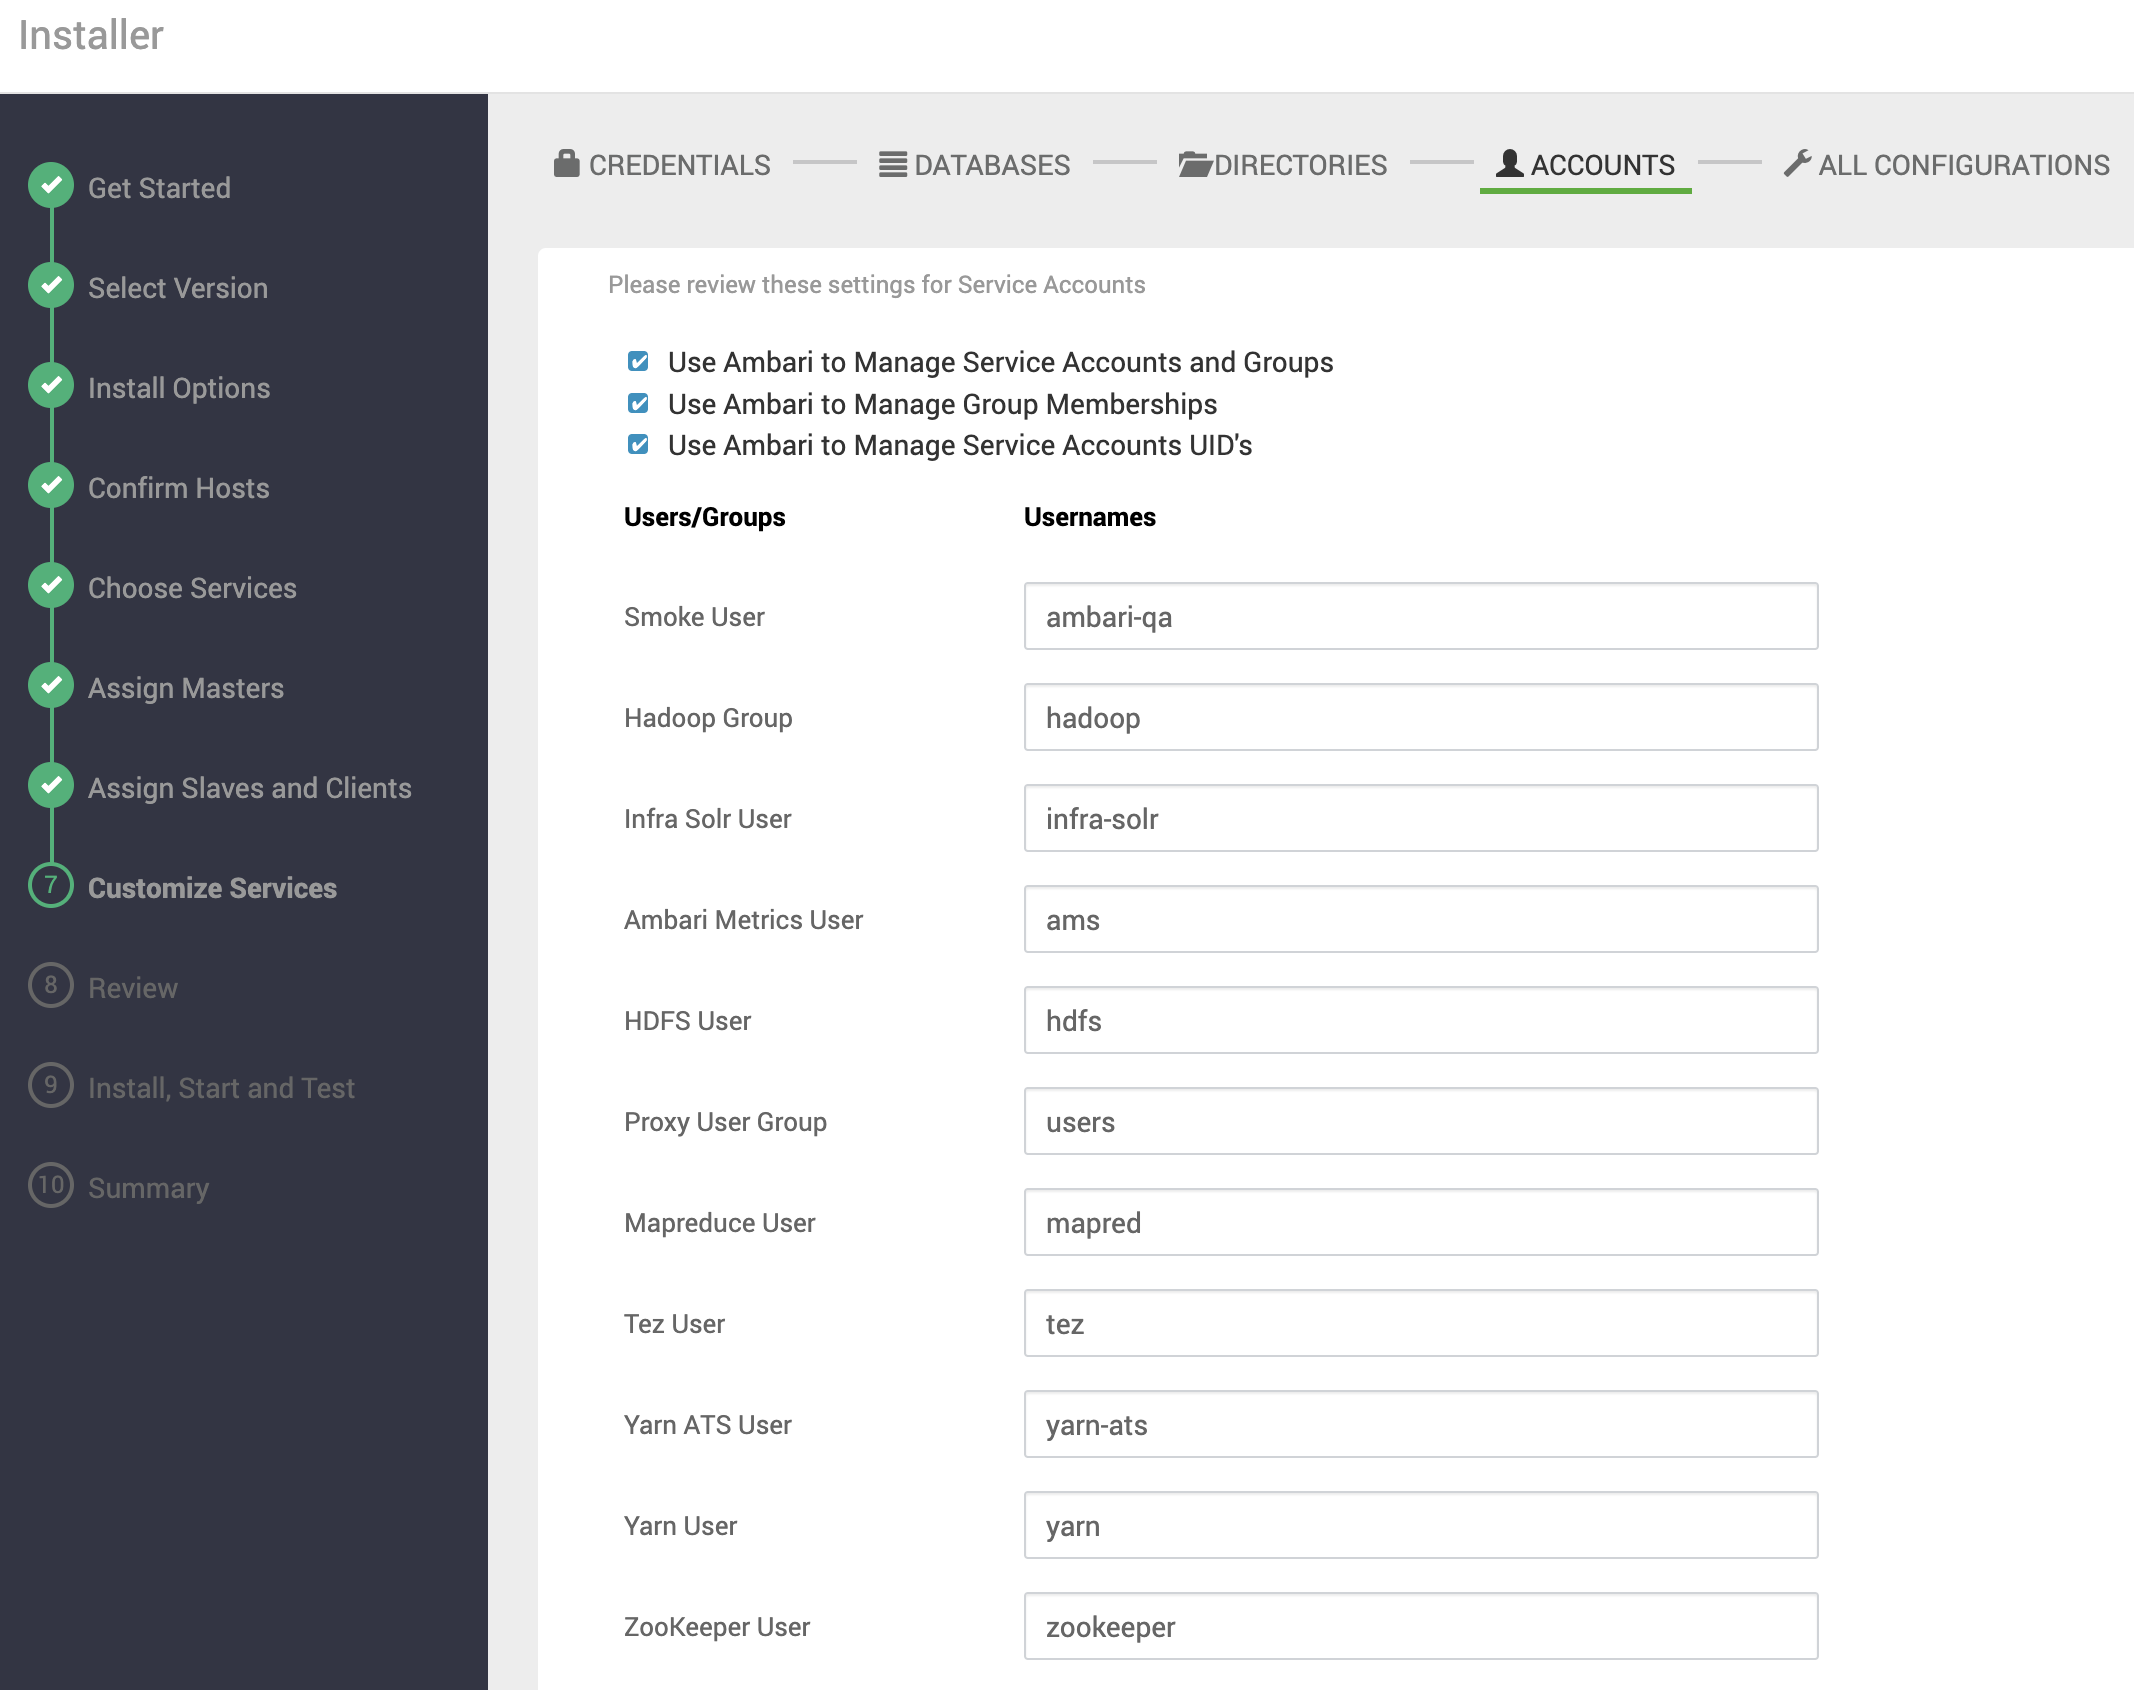
Service Users
In this section, it is possible to customize the operating system users that will be created for each service.
All Configurations
This last section provides access to all configurations of the services to be installed. Take the opportunity to review and adjust what is necessary.
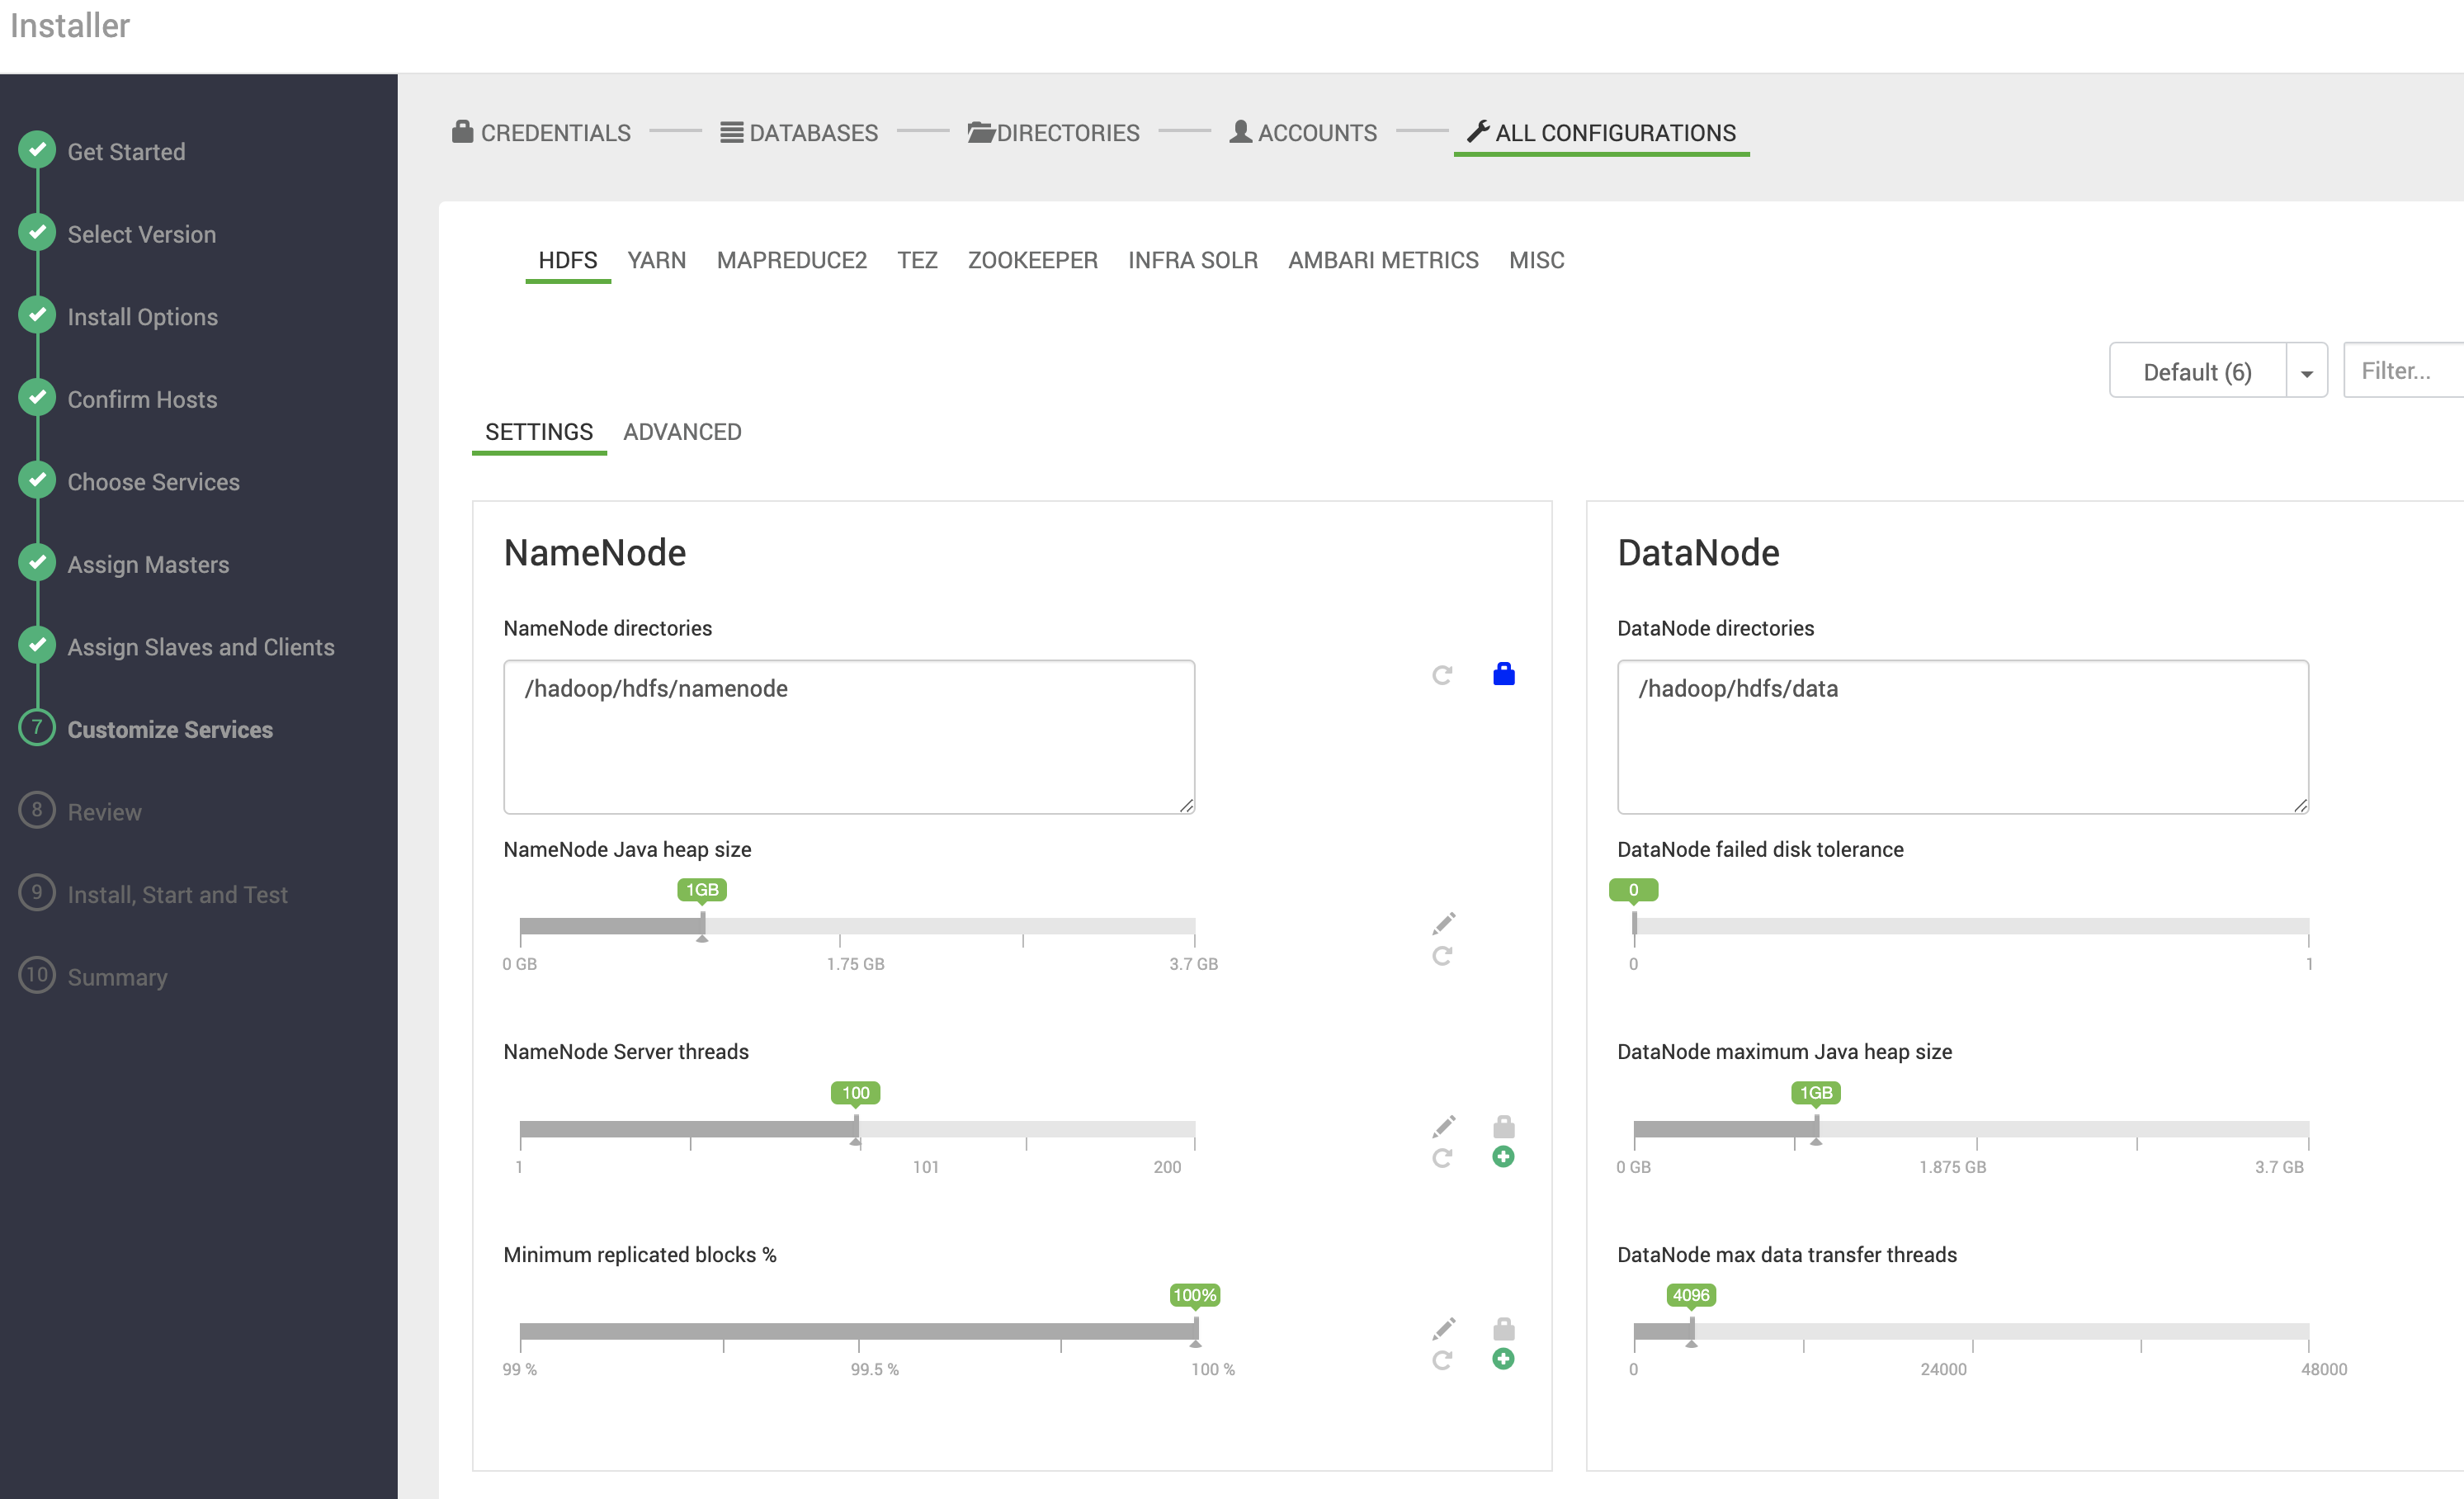
If you forgot any configuration, don't worry. After installation, all these configurations will also be available for modification via Ambari.
Configuration Review
In this step, the last one before Cluster creation, a review of the defined configurations is presented. Carefully check all information and, if you need to change any configuration, use the left sidebar navigation area to return to the desired step.
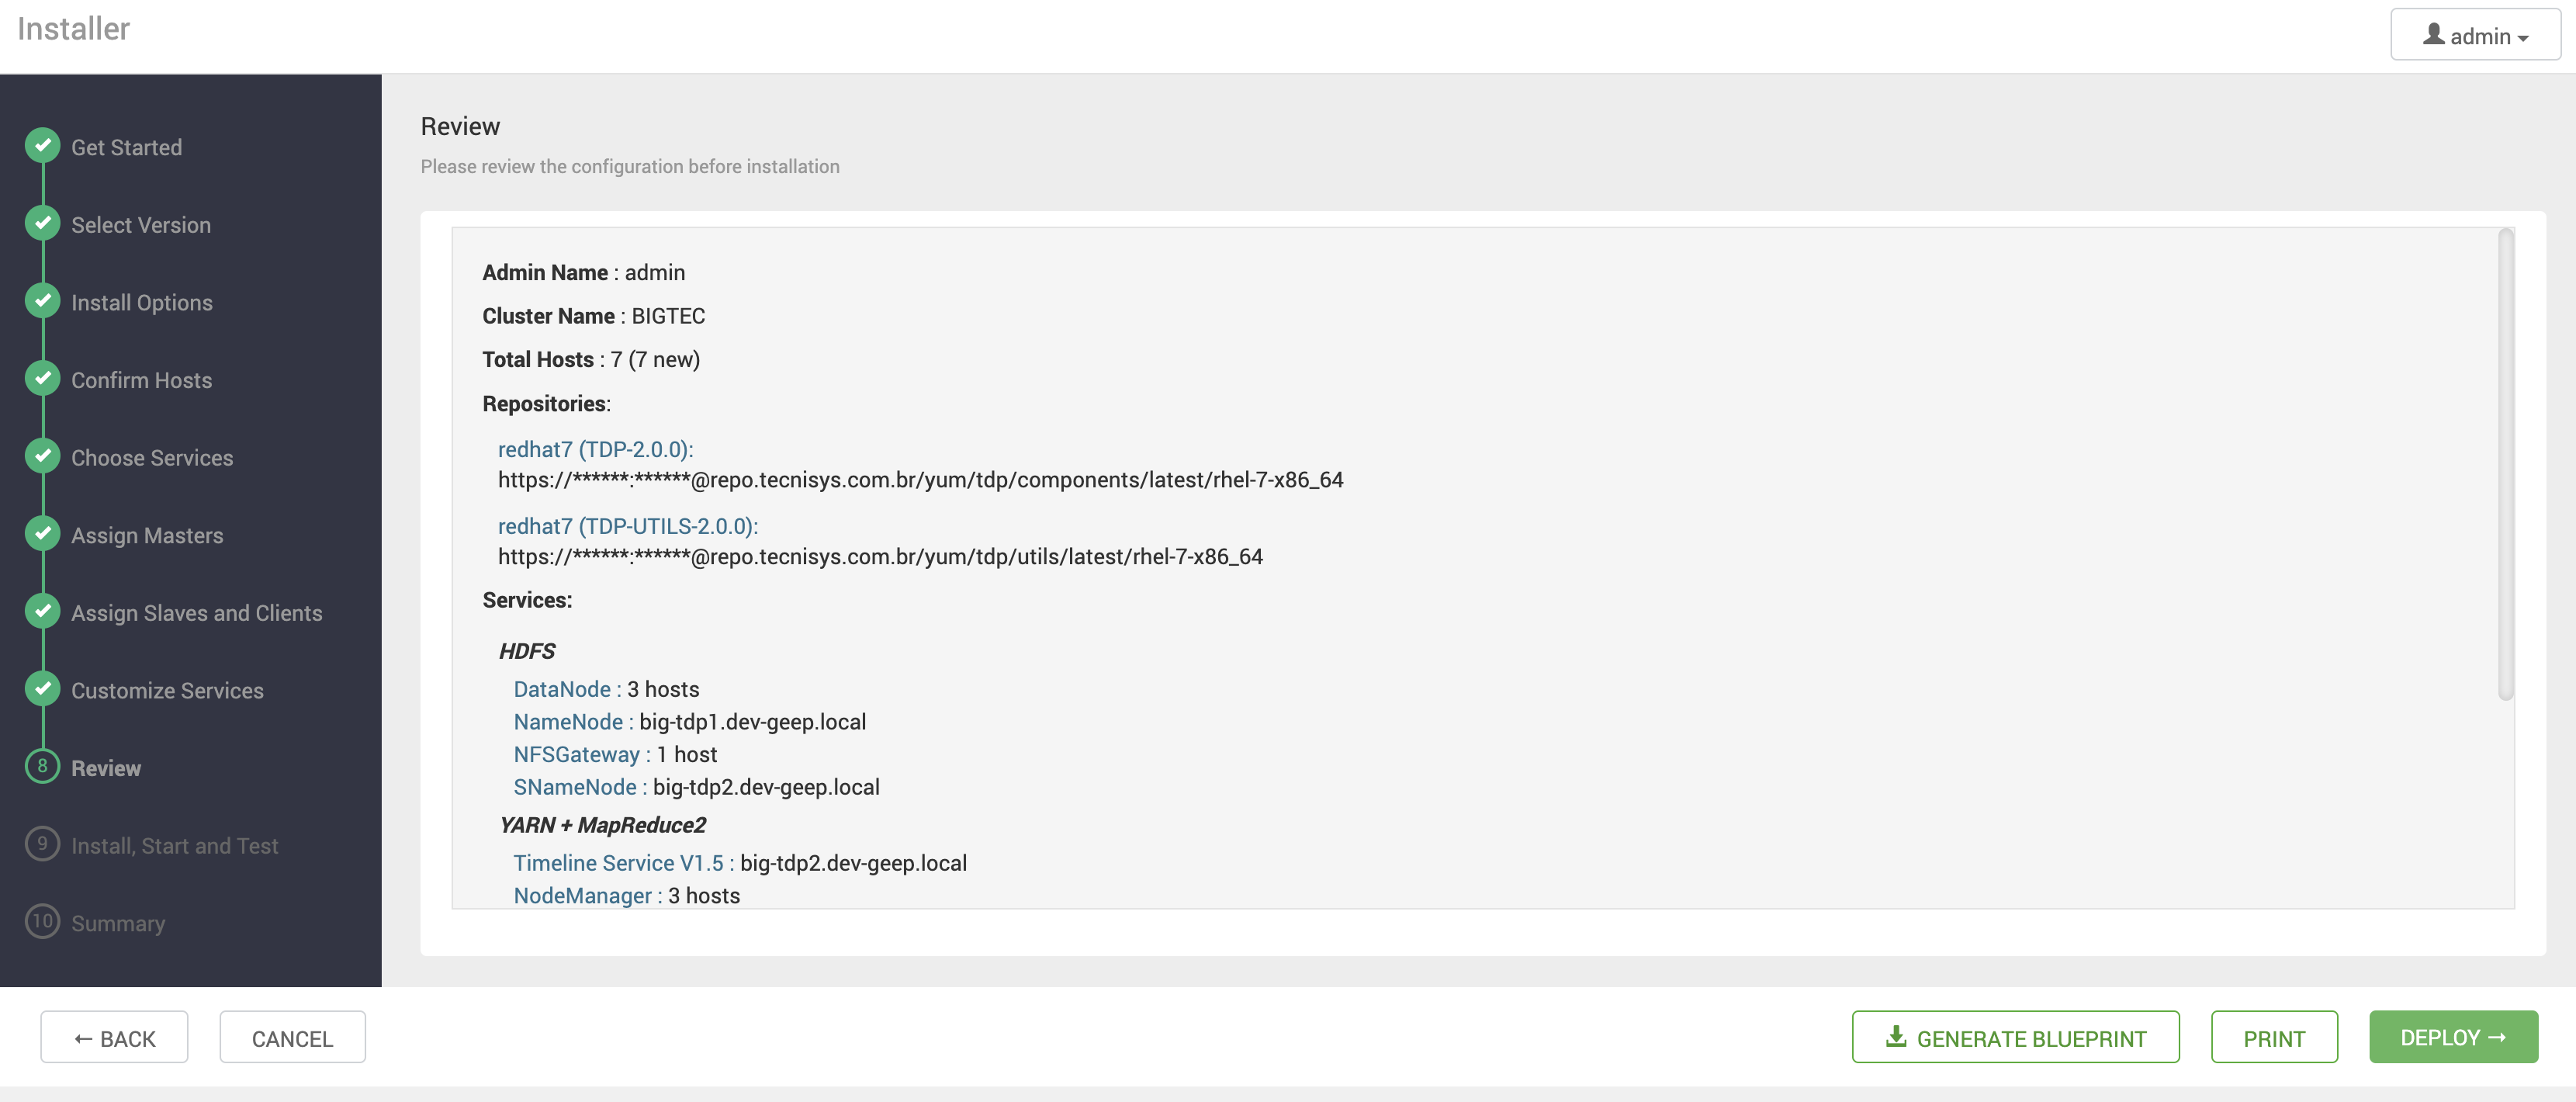
Use the PRINT button to generate an installation report and the GENERATE BLUEPRINT button to generate an XML file with all defined configurations that can later be used to recreate the Cluster via the Ambari REST API.
To start the Cluster deployment, click the DEPLOY button.
Service Installation, Startup, and Testing
In this step, the services will be installed, started, and tested, respecting the dependencies and integrations of each one.
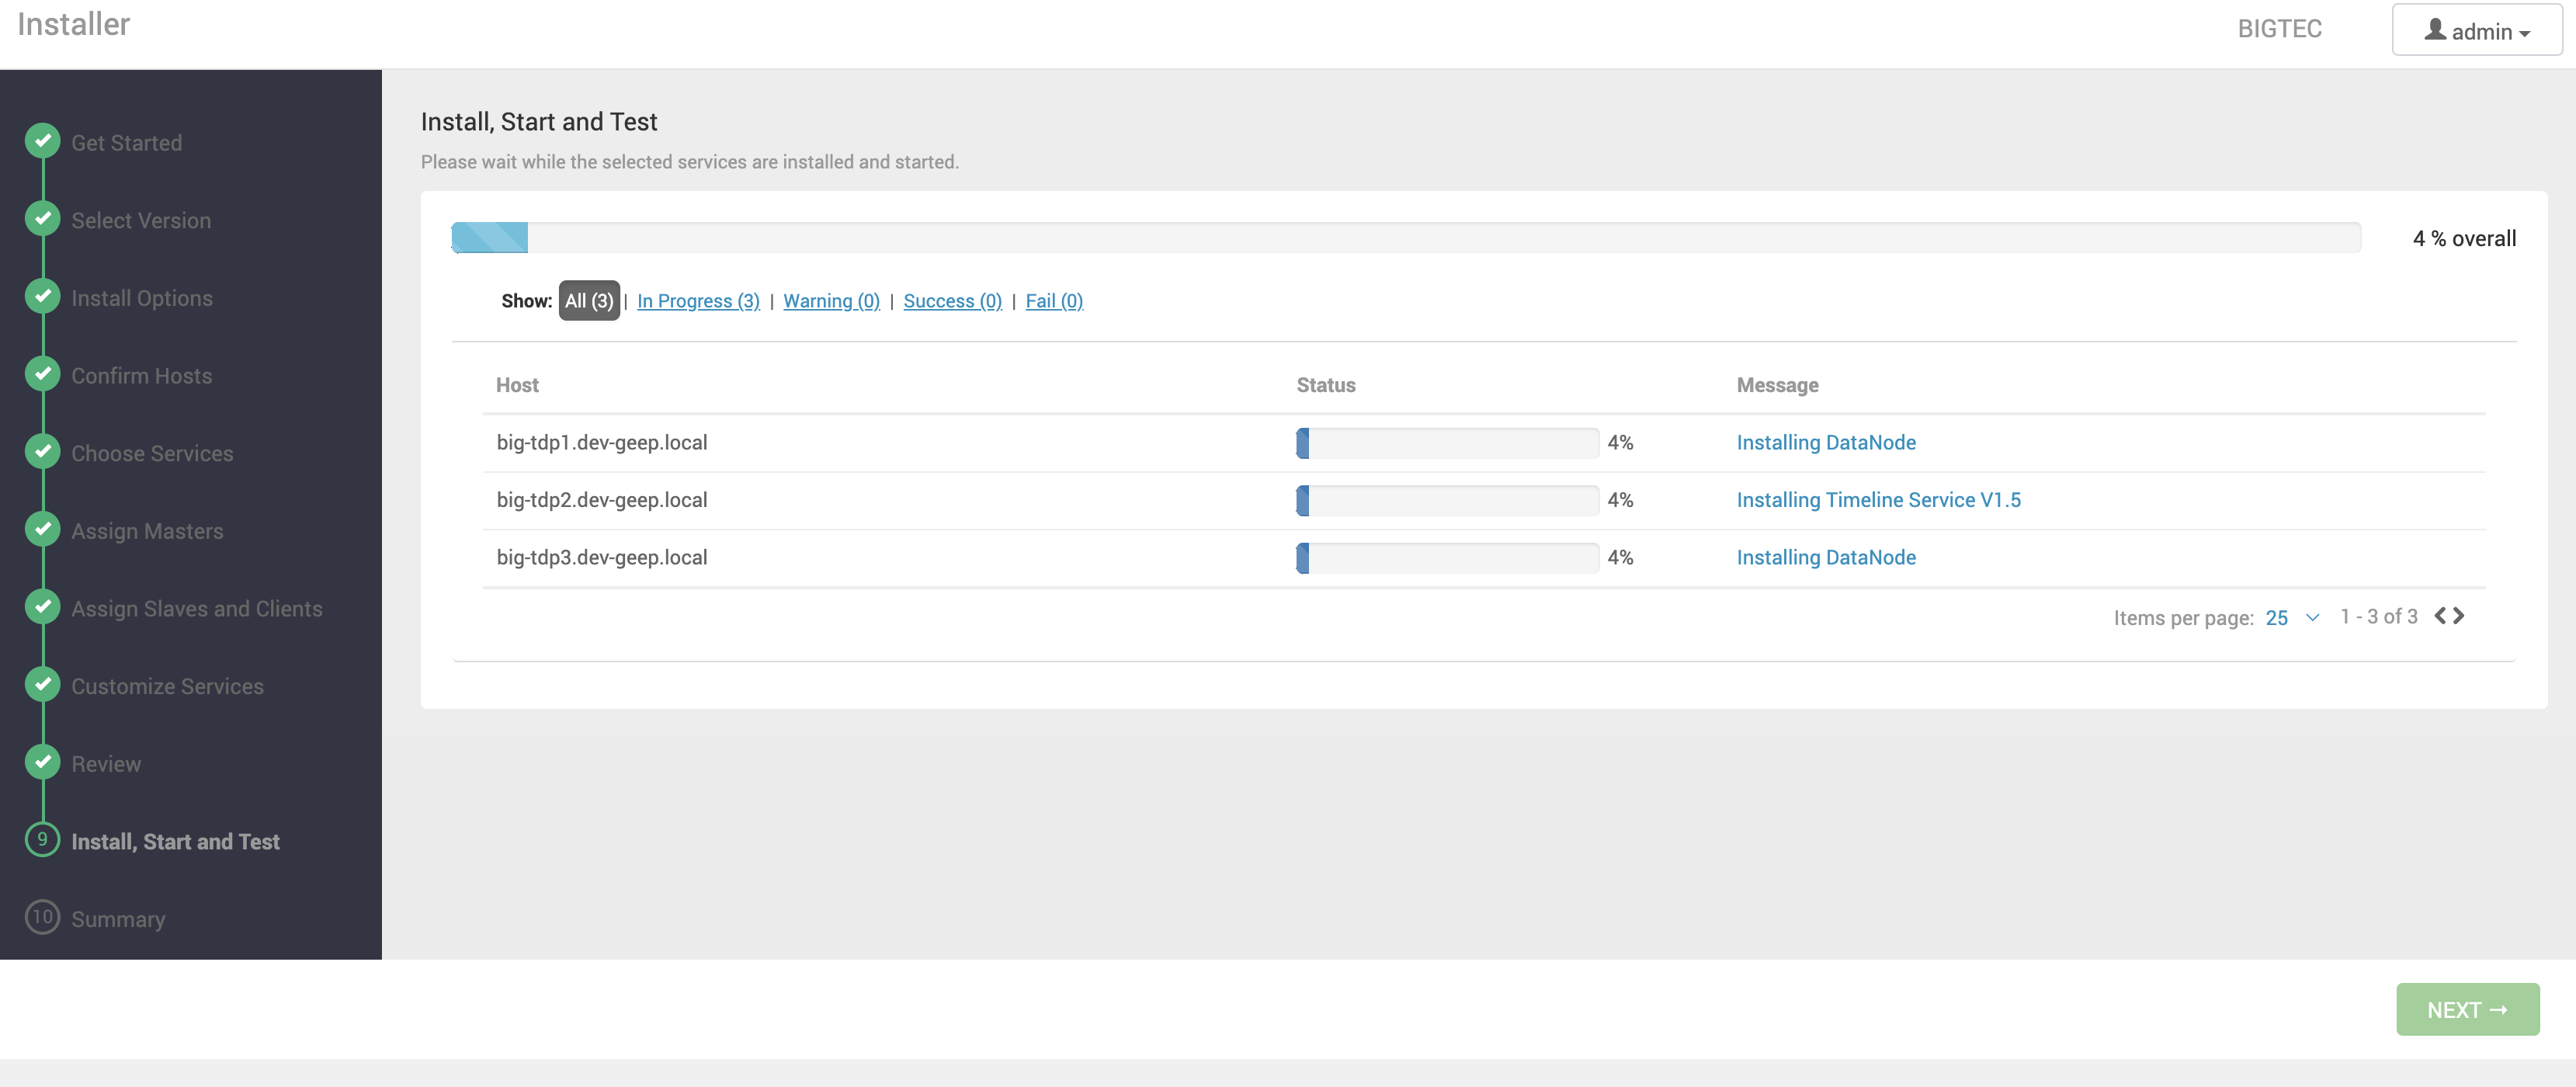
Click the link text in the Message column to view the tasks scheduled for each machine.
In the event of failures, Ambari may interrupt the deployment, and it can be resumed after correcting the problem by clicking the RETRY button.
However, depending on the progress already made, Ambari may complete the deployment and make the Cluster available as it is, even if not all components of a particular service have been successfully installed, started, or tested. In this case, after the Cluster is created, it is possible, through Ambari itself, to change configurations or remove and reinstall only the problematic service.
Once the deployment is complete, click NEXT.

Summary
In the last step of the process, a deployment summary is presented.
Click the COMPLETE button to finalize the operation and access the administration area of the created Cluster.