Apache Ambari Installation
With the minimum requirements met, all environment machines prepared, and the installation packages available, we proceed to install the Apache Ambari service.
Once installed, Apache Ambari will be responsible for creating the Big Data Cluster, either through its web interface or via REST API.
Script Installation
Run the command below to install, via the installation script, the Ambari Server on a utility or edge machine 1:
sh ambari-tdp-installer-el-9.sh -b URL_BASE_PARA_OS_PACOTES_DOS_COMPONENTES -u USUARIO -p SENHA;
The USERNAME (-u) and PASSWORD (-p) parameters are optional and should only be provided when the package repository requires access credentials, as is the case with the Tecnisys Public Package Repository.
The following options are available for the ambari-tdp-installer-el-9.sh installation script:
-
-b, --baseurl Base URL for the component packages. Default:
Terminal inputhttps://repo.tecnisys.com.br/yum/tdp/ambari/3.0/el-9-x86_64 -
-u, --username Username for access to the package repository. Must be provided when using the Tecnisys Package Repository URL.
-
-p, --password Password for access to the package repository. Must be provided when using the Tecnisys Package Repository URL.
-
-c, --component (agent | server | all) [ default:
server] Apache Ambari component to be installed.
Ambari Server Installation Scenarios
- Instructions
- Video
Below are examples for different scenarios:
-
Installation using the Tecnisys Public Package Repository:
Terminal inputsh /repo/yum/tdp/installer/3.0/el-9-x86_64/ambari-tdp-installer-el-9.sh --username "user" --password "pass"The access credentials (username and password) are defined when registering for free on the website
-
Installation using a local package repository:
Terminal inputsh /repo/yum/tdp/installer/3.0/el-9-x86_64/ambari-tdp-installer-el-9.sh --baseurl "file:///opt/repo/tdp/ambari/3.0/el-9-x86_64" -
Installation using a local package repository on the machine with IP 192.168.32.100 accessible via HTTP:
Terminal input/repo/yum/tdp/installer/3.0/el-9-x86_64/ambari-tdp-installer-el-9.sh --baseurl "https://192.168.32.100/tdp/ambari/3.0/el-9-x86_64"
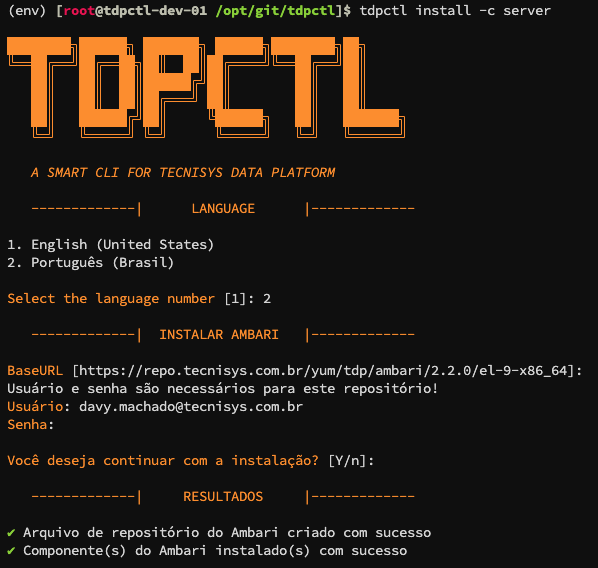
Installation via tdpctl
The Ambari Server installation can also be performed through tdpctl, the TDP Command Line Interface:
tdpctl install --help
The available options, as well as the information required for the Ambari Server installation, are the same as those requested by the installation script.
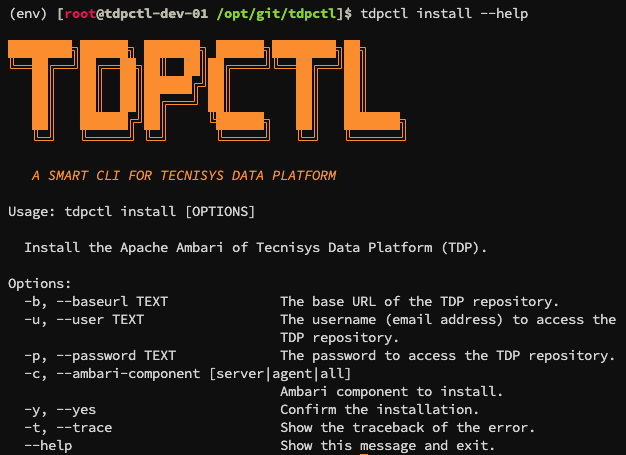
Note that it is possible to specify the desired component through the -c or --component option (agent | server | all).
To install tdpctl, follow the instructions available here.
Configurations
- Instructions
- Video
JDBC Driver Configuration
Configure the JDBC driver to be used by Ambari Server to connect to the metadata database:
ambari-server setup --jdbc-db=postgres --jdbc-driver=postgresql-42.2.16.jar
The PostgreSQL JDBC driver is also available in the public/ambari/3.0.0.4 directory of the Tecnisys Package Repository


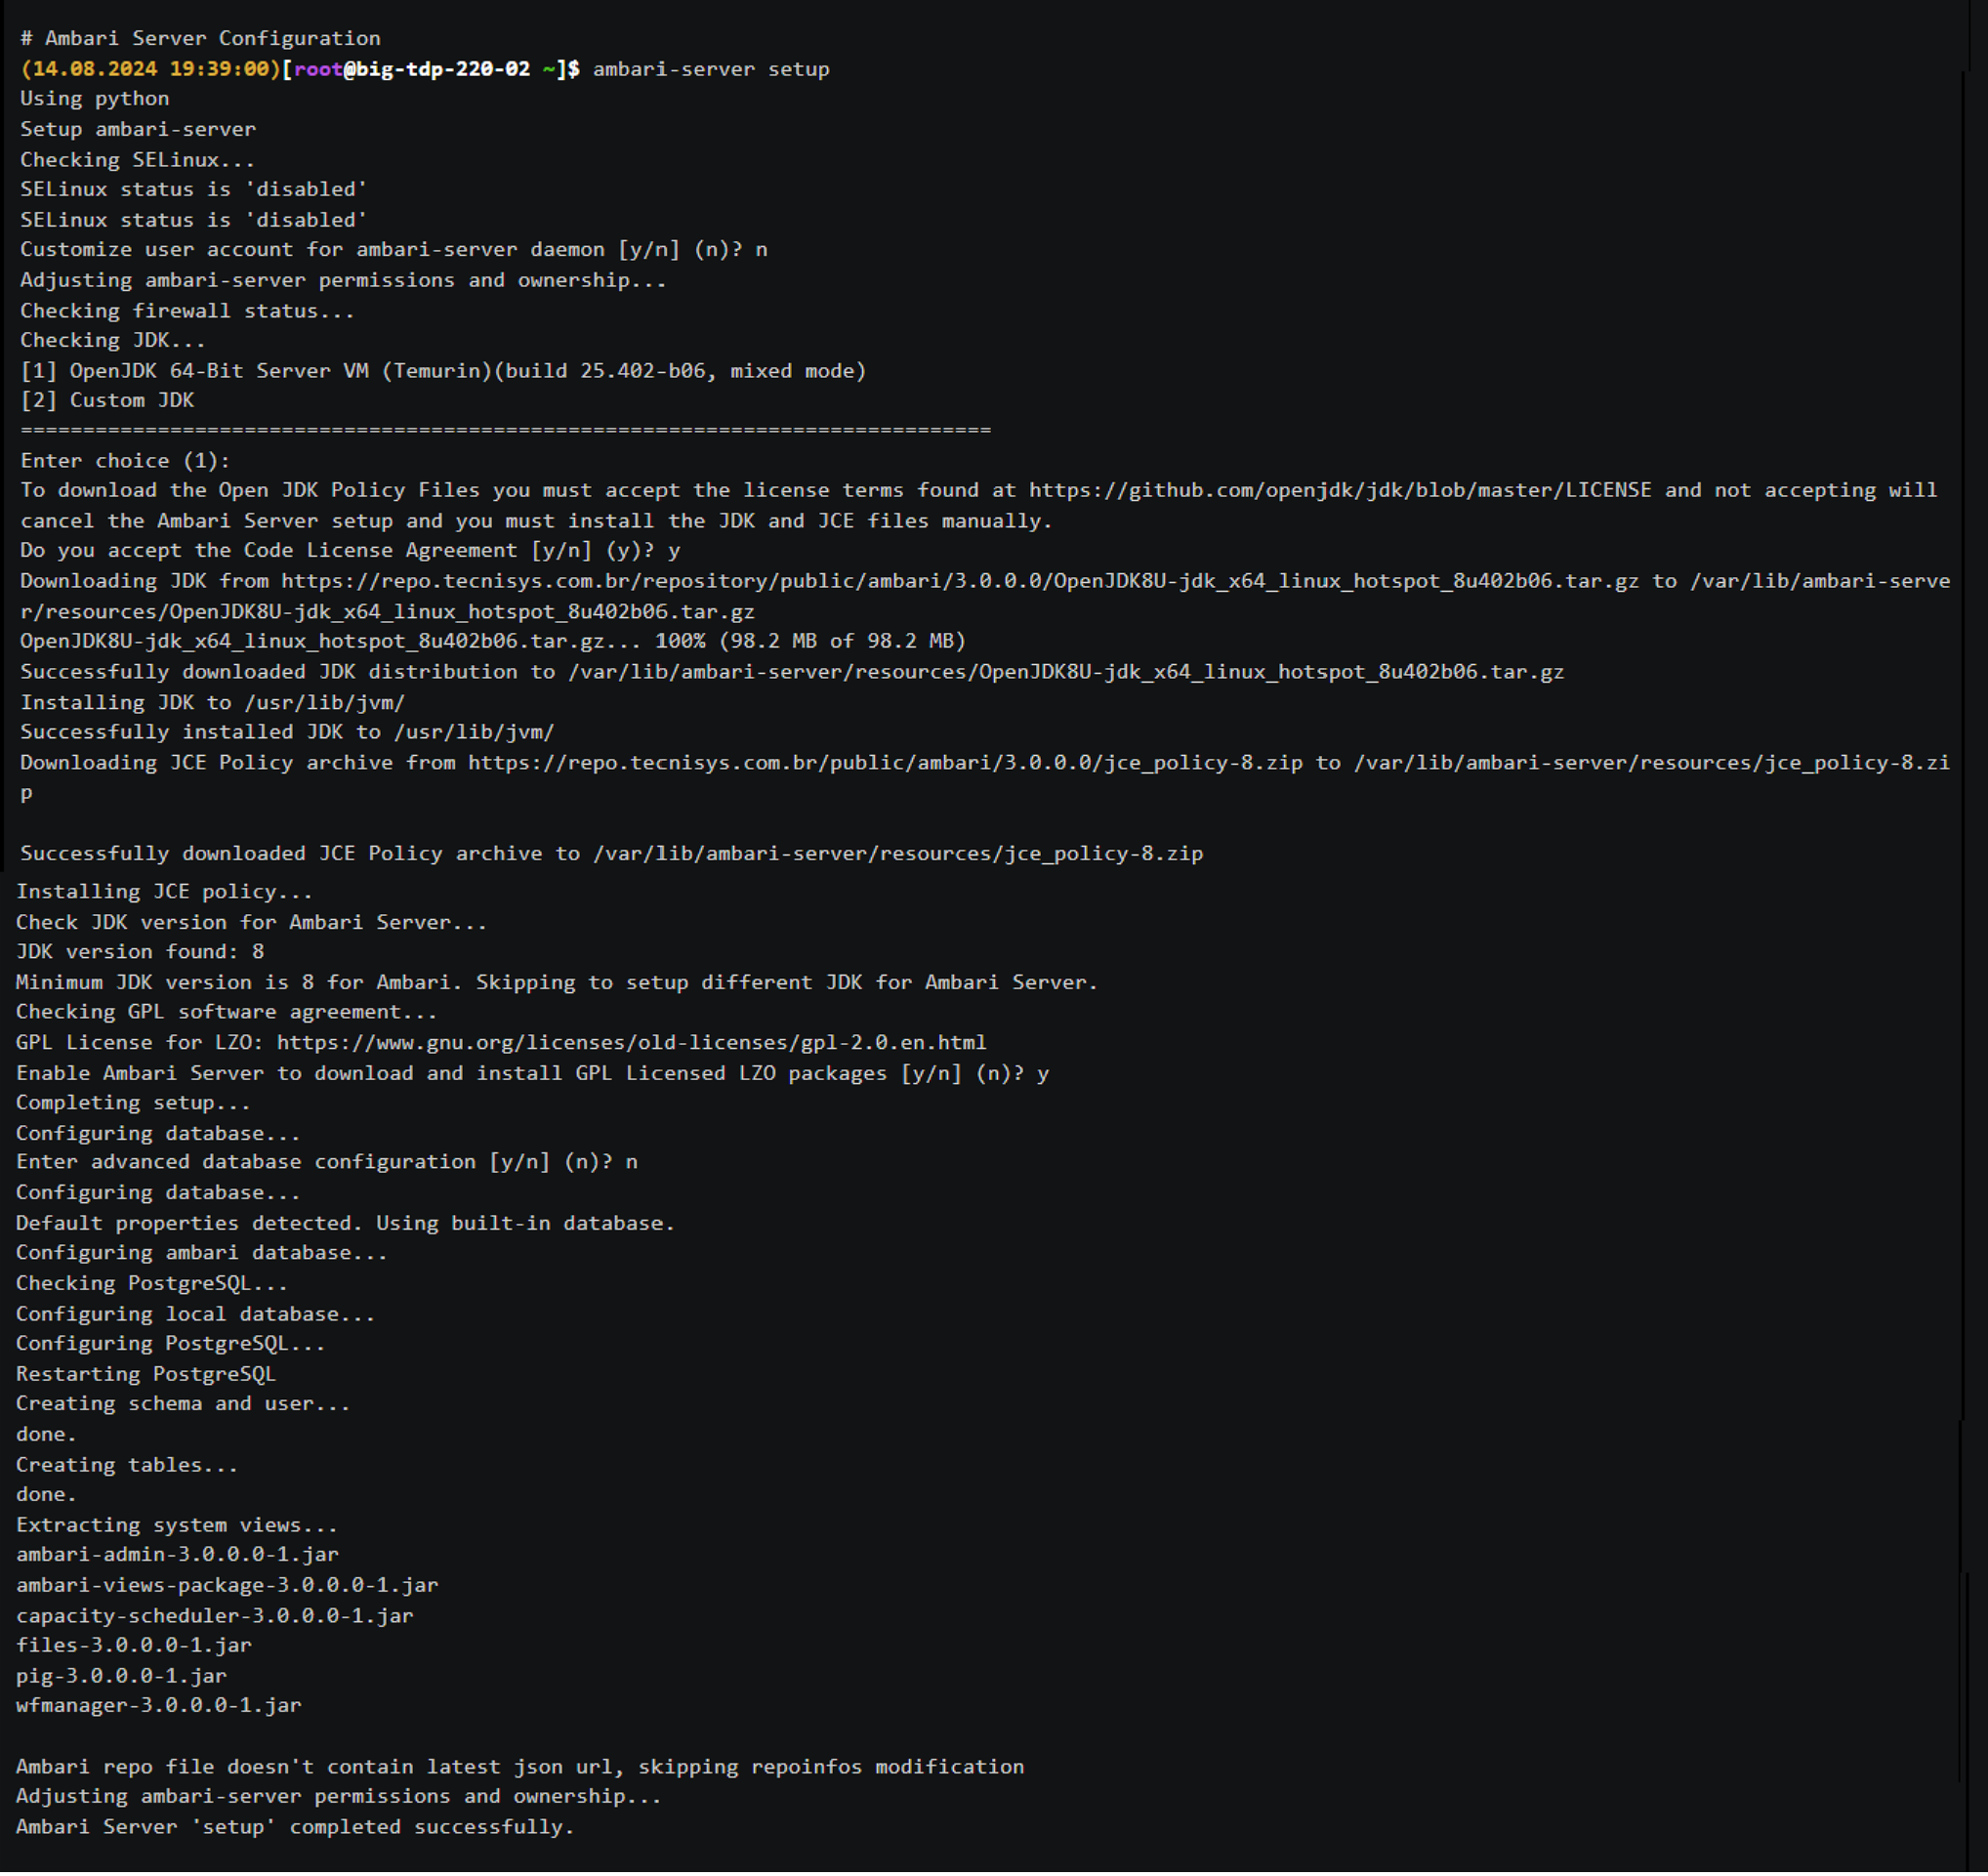
Ambari Server Configuration
Configure the Ambari Server:
ambari-server setup
Next, provide the information requested in the prompt:
1- If SELinux is active, an alert will be displayed. Confirm whether SELinux can be changed to permissive mode and temporarily disabled. Default (y)
2- Confirm whether you want to use a custom OS user for the Ambari Server daemon. Default (n)
(a) - If yes (y), enter the desired user.
3- If the Firewall (iptables) is active, an alert will be displayed. Confirm whether the ports used by Ambari are accessible. Default (y)
(a) - If there is a port conflict, an error will be displayed and the configuration aborted.
4- Choose the JDK to be used. Default (1) Oracle JDK 1.8 + Java Cryptography Extension (JCE) Policy Files 8 (automatically downloaded from the public/tdp/2.0.0/rhel-7-x86_64 directory of the Tecnisys Public Package Repository.
(a) - If option (1) is chosen, confirm whether you accept the license agreement. Default (y)
(b) - Choose option (2) to provide the JAVA_HOME path for a different JDK.
5- Confirm whether you want the Ambari Server to download and install additional LZO compression packages. Default (n)
6- Confirm whether you want to proceed with the Advanced Database Settings. Default (n)
(a) - If no (n), the Ambari automatically initializes a PostgreSQL instance (Ambari Server installation dependency), creates its own metadata database, schema, user, metadata tables, etc.
(b) - If yes (y), database connection information will be requested, such as the Database Management System (DBMS), hostname, port, and Ambari database name, so that the Ambari Server can connect and automatically create its metadata tables and other structures.
Ambari Server Startup
Start the Ambari Server daemon:
ambari-server start
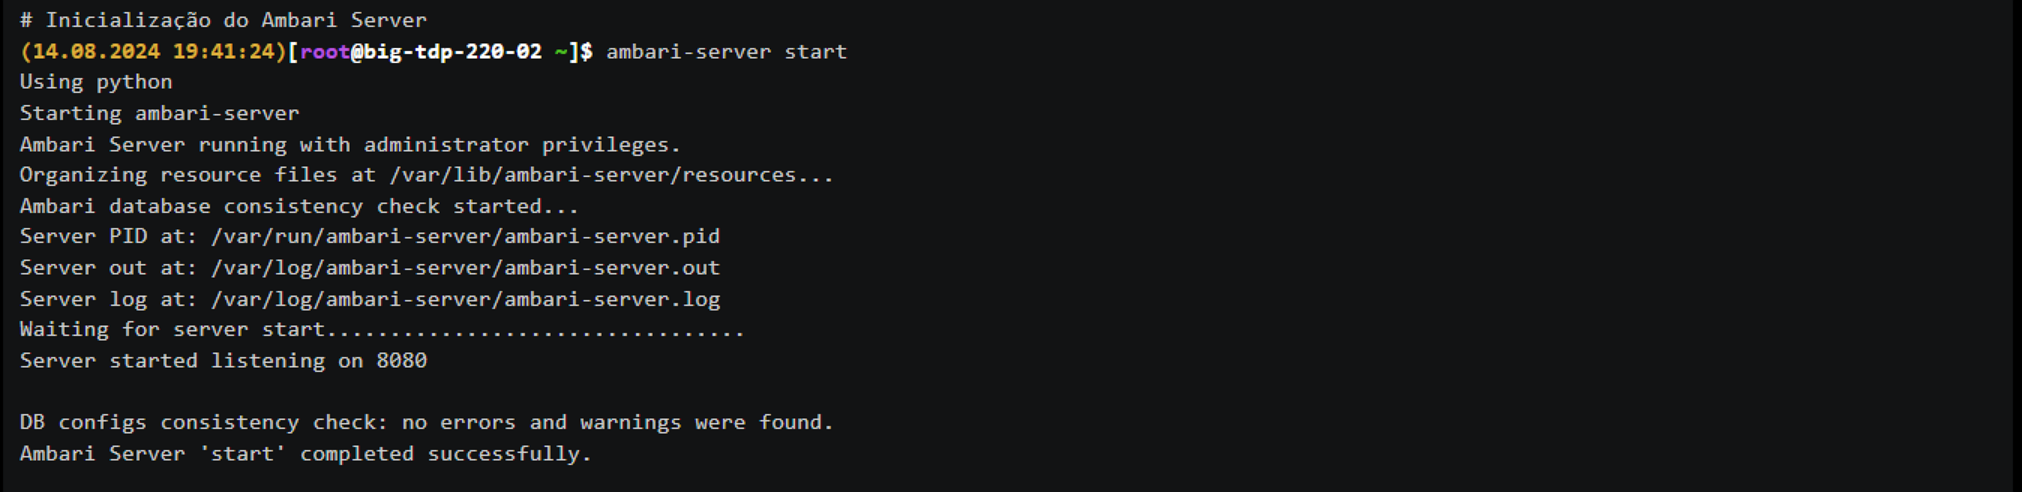
After the Ambari Server startup, the Ambari web interface will be accessible by default on port 8080.

If necessary, the Ambari web interface port can be changed in the /etc/ambari-server/conf/ambari.properties file.
Metadata Database Creation
Many of the TDP Platform services/components require databases for metadata persistence.
Below, we provide guidelines for the pre-creation of these databases in PostgreSQL (the default DBMS for Ambari Server). If you have chosen a different DBMS for your environment, consult its official documentation.
The passwords used in the following commands are intended only to illustrate the procedure presented. Please use strong passwords in your environment. Additionally, the usernames and database names are just suggestions; feel free to change them.
Pay attention to the collation (locale and encoding settings, for example: en_US.UTF-8 and pt_BR.UTF-8) of the metadata databases. Some components may not function correctly or may experience problems in displaying, comparing, and sorting data and information if the collation is not configured correctly.
Apache Airflow Metadata Database Creation
-
Create the airflow user:
Terminal inputsu -c 'createuser -s -d -l airflow' - postgres; -
Set the airflow user password:
Terminal inputsu -c "psql -U postgres -c \"alter user airflow with password 'airflow'\"" - postgres; -
Create the airflow database:
Terminal inputsu -c 'createdb -O airflow airflow' - postgres;
Apache Druid Metadata Database Creation
-
Create the druid user:
Terminal inputsu -c 'createuser -s -d -l druid' - postgres; -
Set the druid user password:
Terminal inputsu -c "psql -U postgres -c \"alter user druid with password 'druid'\"" - postgres; -
Create the druid database:
Terminal inputsu -c 'createdb -O druid druid' - postgres;
Apache Hive Metadata Database Creation
-
Create the hive user:
Terminal inputsu -c 'createuser -s -d -l hive' - postgres; -
Set the hive user password:
Terminal inputsu -c "psql -U postgres -c \"alter user hive with password 'hive'\"" - postgres; -
Create the hive database:
Terminal inputsu -c 'createdb -O hive hive' - postgres;
Jupyterhub Metadata Database Creation
-
Create the Jupyterhub user:
Terminal inputsu -c 'createuser -s -d -l jupyterhub' - postgres; -
Set the Jupyterhub user password:
Terminal inputsu -c "psql -U postgres -c \"alter user jupyterhub with password 'jupyterhub'\"" - postgres; -
Create the Jupyterhub database:
Terminal inputsu -c 'createdb -O jupyterhub jupyterhub' - postgres;
Openmetadata Metadata Database Creation
-
Create the Openmetadata user:
Terminal inputsu -c 'createuser -s -d -l openmetadata' - postgres; -
Set the Openmetadata user password:
Terminal inputsu -c "psql -U postgres -c \"alter user openmetadata with password 'openmetadata'\"" - postgres; -
Create the Openmetadata database:
Terminal inputsu -c 'createdb -O openmetadata openmetadata' - postgres;
Apache Ranger Metadata Database Creation
-
Create the ranger user:
Terminal inputsu -c 'createuser -s -d -l ranger' - postgres; -
Set the ranger user password:
Terminal inputsu -c "psql -U postgres -c \"alter user ranger with password 'ranger'\"" - postgres; -
Create the ranger database:
Terminal inputsu -c 'createdb -O ranger ranger' - postgres;
Ranger KMS Metadata Database Creation
-
Create the ranger user:
Terminal inputsu -c 'createuser -s -d -l rangerkms' - postgres; -
Set the ranger user password:
Terminal inputsu -c "psql -U postgres -c \"alter user rangerkms with password 'rangerkms'\"" - postgres; -
Create the ranger database:
Terminal inputsu -c 'createdb -O rangerkms rangerkms' - postgres;
Apache Superset Metadata Database Creation
-
Create the superset user:
Terminal inputsu -c 'createuser -s -d -l superset' - postgres; -
Set the superset user password:
Terminal inputsu -c "psql -U postgres -c \"alter user superset with password 'superset'\"" - postgres; -
Create the superset database:
Terminal inputsu -c 'createdb -O superset superset' - postgres;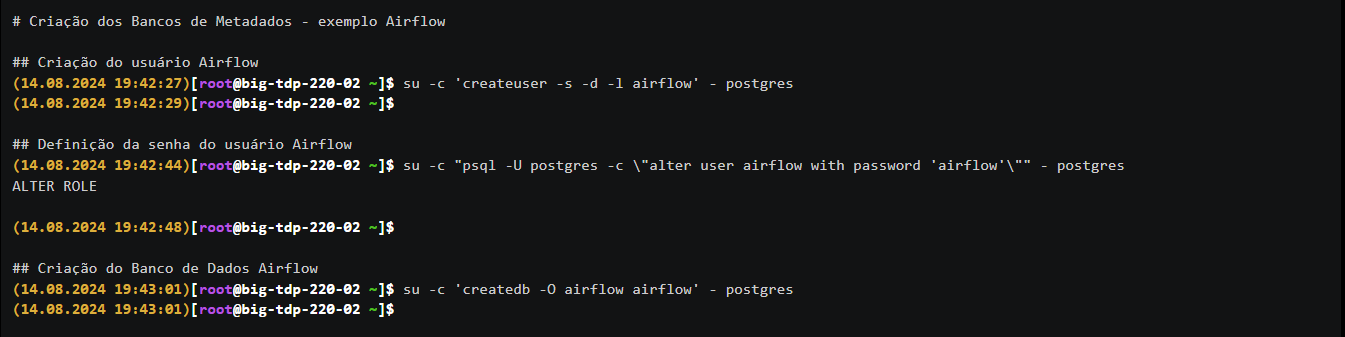 Figure 7 - Metadata creation
Metadata Database Instance Configuration
Below, we provide guidelines and code examples for configuring access rules and PostgreSQL properties (the default DBMS for Ambari Server). If you have chosen a different DBMS for your environment, consult its official documentation.
Check, and if necessary change, the major PostgreSQL version present in the configuration file paths.
-
Add the other databases to the Ambari access rule:
Terminal inputsed -i 's/ambari,mapred/ambari,druid,jupyterhub,openmetadata,airflow,ranger,rangerkms,hive,superset,mapred/g' /var/lib/pgsql/14/data/pg_hba.conf -
Configure the PostgreSQL instance to accept connections from all network interfaces:
Terminal inputsed -i "s/#listen_addresses = 'localhost'/listen_addresses = '*'/g" /var/lib/pgsql/14/data/postgresql.conf -
Increase the maximum number of connections supported by the PostgreSQL instance:
Terminal inputsed -i "s/max_connections = 100/max_connections = 500/g" /var/lib/pgsql/14/data/postgresql.conf -
Restart the PostgreSQL service for all changes to take effect:
Terminal inputsystemctl restart postgresql-14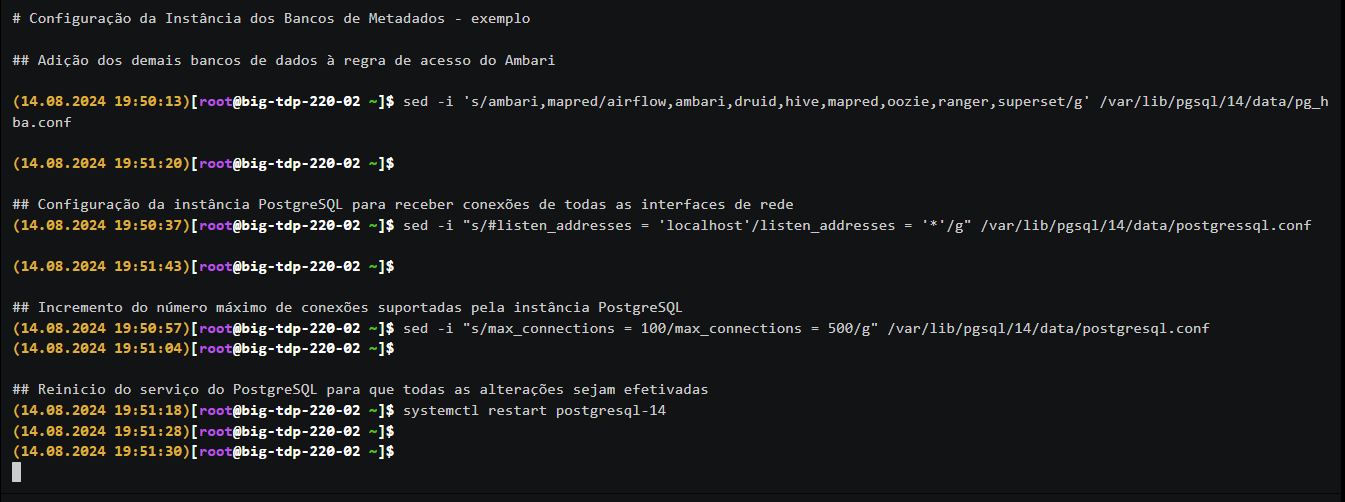 Figure 8 - Metadata Configurationwarning
Evaluate the impacts of such configurations on the security and performance of your environment. If you need assistance, Contact us, it will be a pleasure to help you.
Footnotes
-
Utility type machines are typically used for auxiliary tasks, such as cluster management, while Edge type machines are dedicated to graphical interfaces or components used by users at the "edge" of the environment. ↩