Connection Pool Installation
PgSmart enables connection pooling by integrating with PgBouncer, a lightweight connection pooler for PostgreSQL.
-
PgSmart CLI must be installed, after meeting the minimum requirements.
-
Additional package repository to resolve indirect dependencies. According to each organization's security and support policies, Tecnisys does not provide such packages. However, for Enterprise Linux family distributions, the Extra Packages for Enterprise Linux - EPEL generally provides the necessary indirect dependencies.
-
The PgSmart Agent service must be started on all database nodes.
Terminal inputsystemctl start pgsmart-agent -
Access with the local PgSmart user. For example:
Terminal inputsu - pgsmart -
PgSmart Agents Registration via the PgSmart Client.
pgsmart install -s pool [Flags]
pgsmart install --service=pool [Flags]
Flags:
-M, --pg-version=11–17 => Defines the PostgreSQL major version to install. The latest available release will be used.-a, --agent=<value>=> Alias, hostname, or IP where a PgSmart Agent is installed.-h, --help=> Displays help.-q, --quiet=> Non-interactive execution for service installation. Used with --service, --pgversion, and --agent options.-s, --service=pool=> PostgreSYS Platform Connection Pool Service.
This installation mode is activated by the quiet option (--quiet, -q) and uses default values for parameters not provided. However, it is disabled on the first installation, as repository creation requires interactive input.
- Command
- Video
pgsmart install -q -a <agent> --service=pool
- Instructions
- Video
pgsmart install
-
Select the
PgSmart Agent(or register a new one). -
Select the
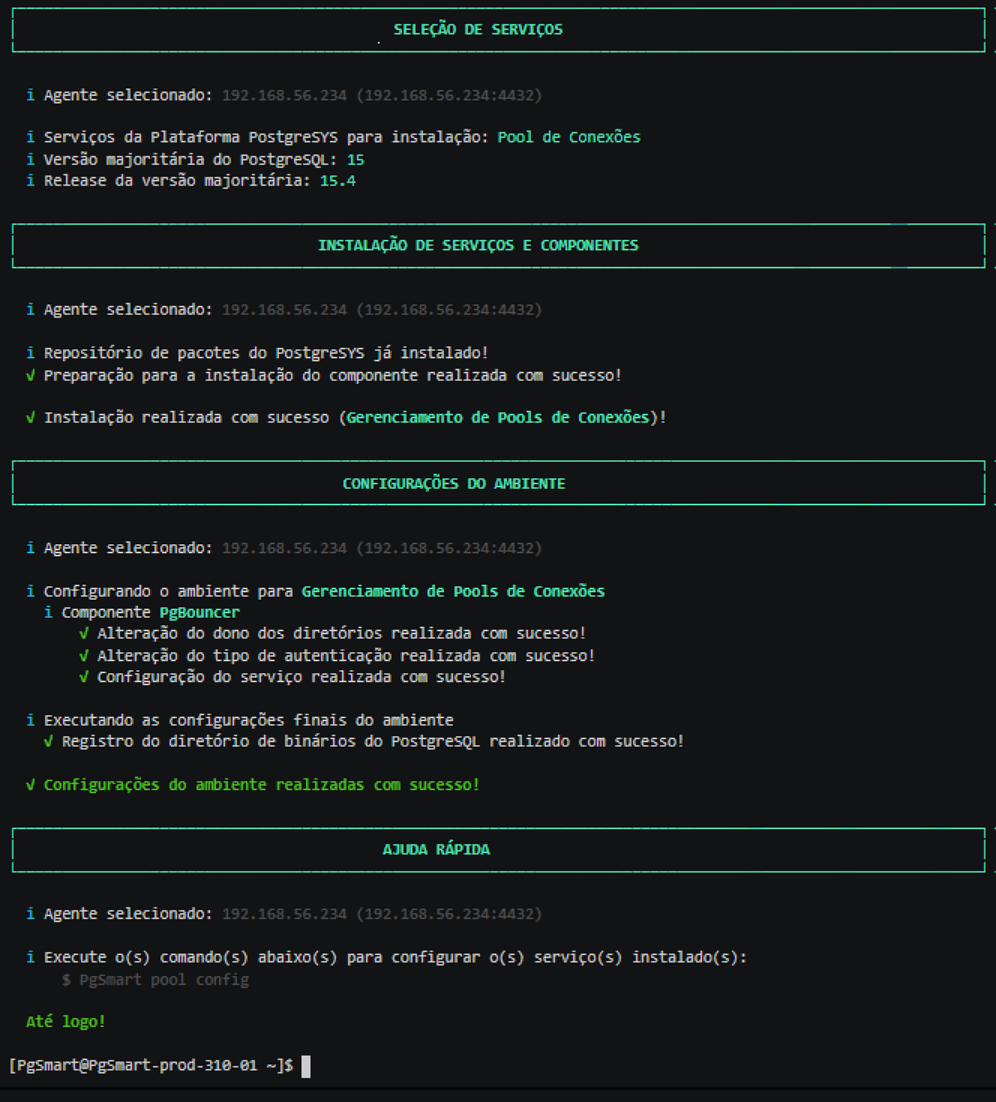
Pool de Conexõesservice (be sure to deselect the defaultBanco de Dadosoption). -
Select the PostgreSQL
major version. -
Select the
releaseof the major version. -
Confirm the installation.
-
Confirm whether to install/update the PostgreSYS Package Repository.
6.1 If yes, select
Provideand enter:-
Repository URL -
Identification code -
Repository name -
Access user(optional if different from Tecnisys default) -
Access password(optional if different from Tecnisys default) -
Confirm GPG key verification
-
If yes, provide the path to the GPG key file
note- For a local installation, remember to download and import the repository public GPG key (RPM-GPG-KEY-PGSYS).
For RHEL 8 distributions:
File pathhttps://repo.tecnisys.com.br/repository/yum/pgsys/repos/4.0.0/rhel-8-x86_64/RPM-GPG-KEY-PGSYS- Compressed package files (tar.gz) already include the GPG public key.
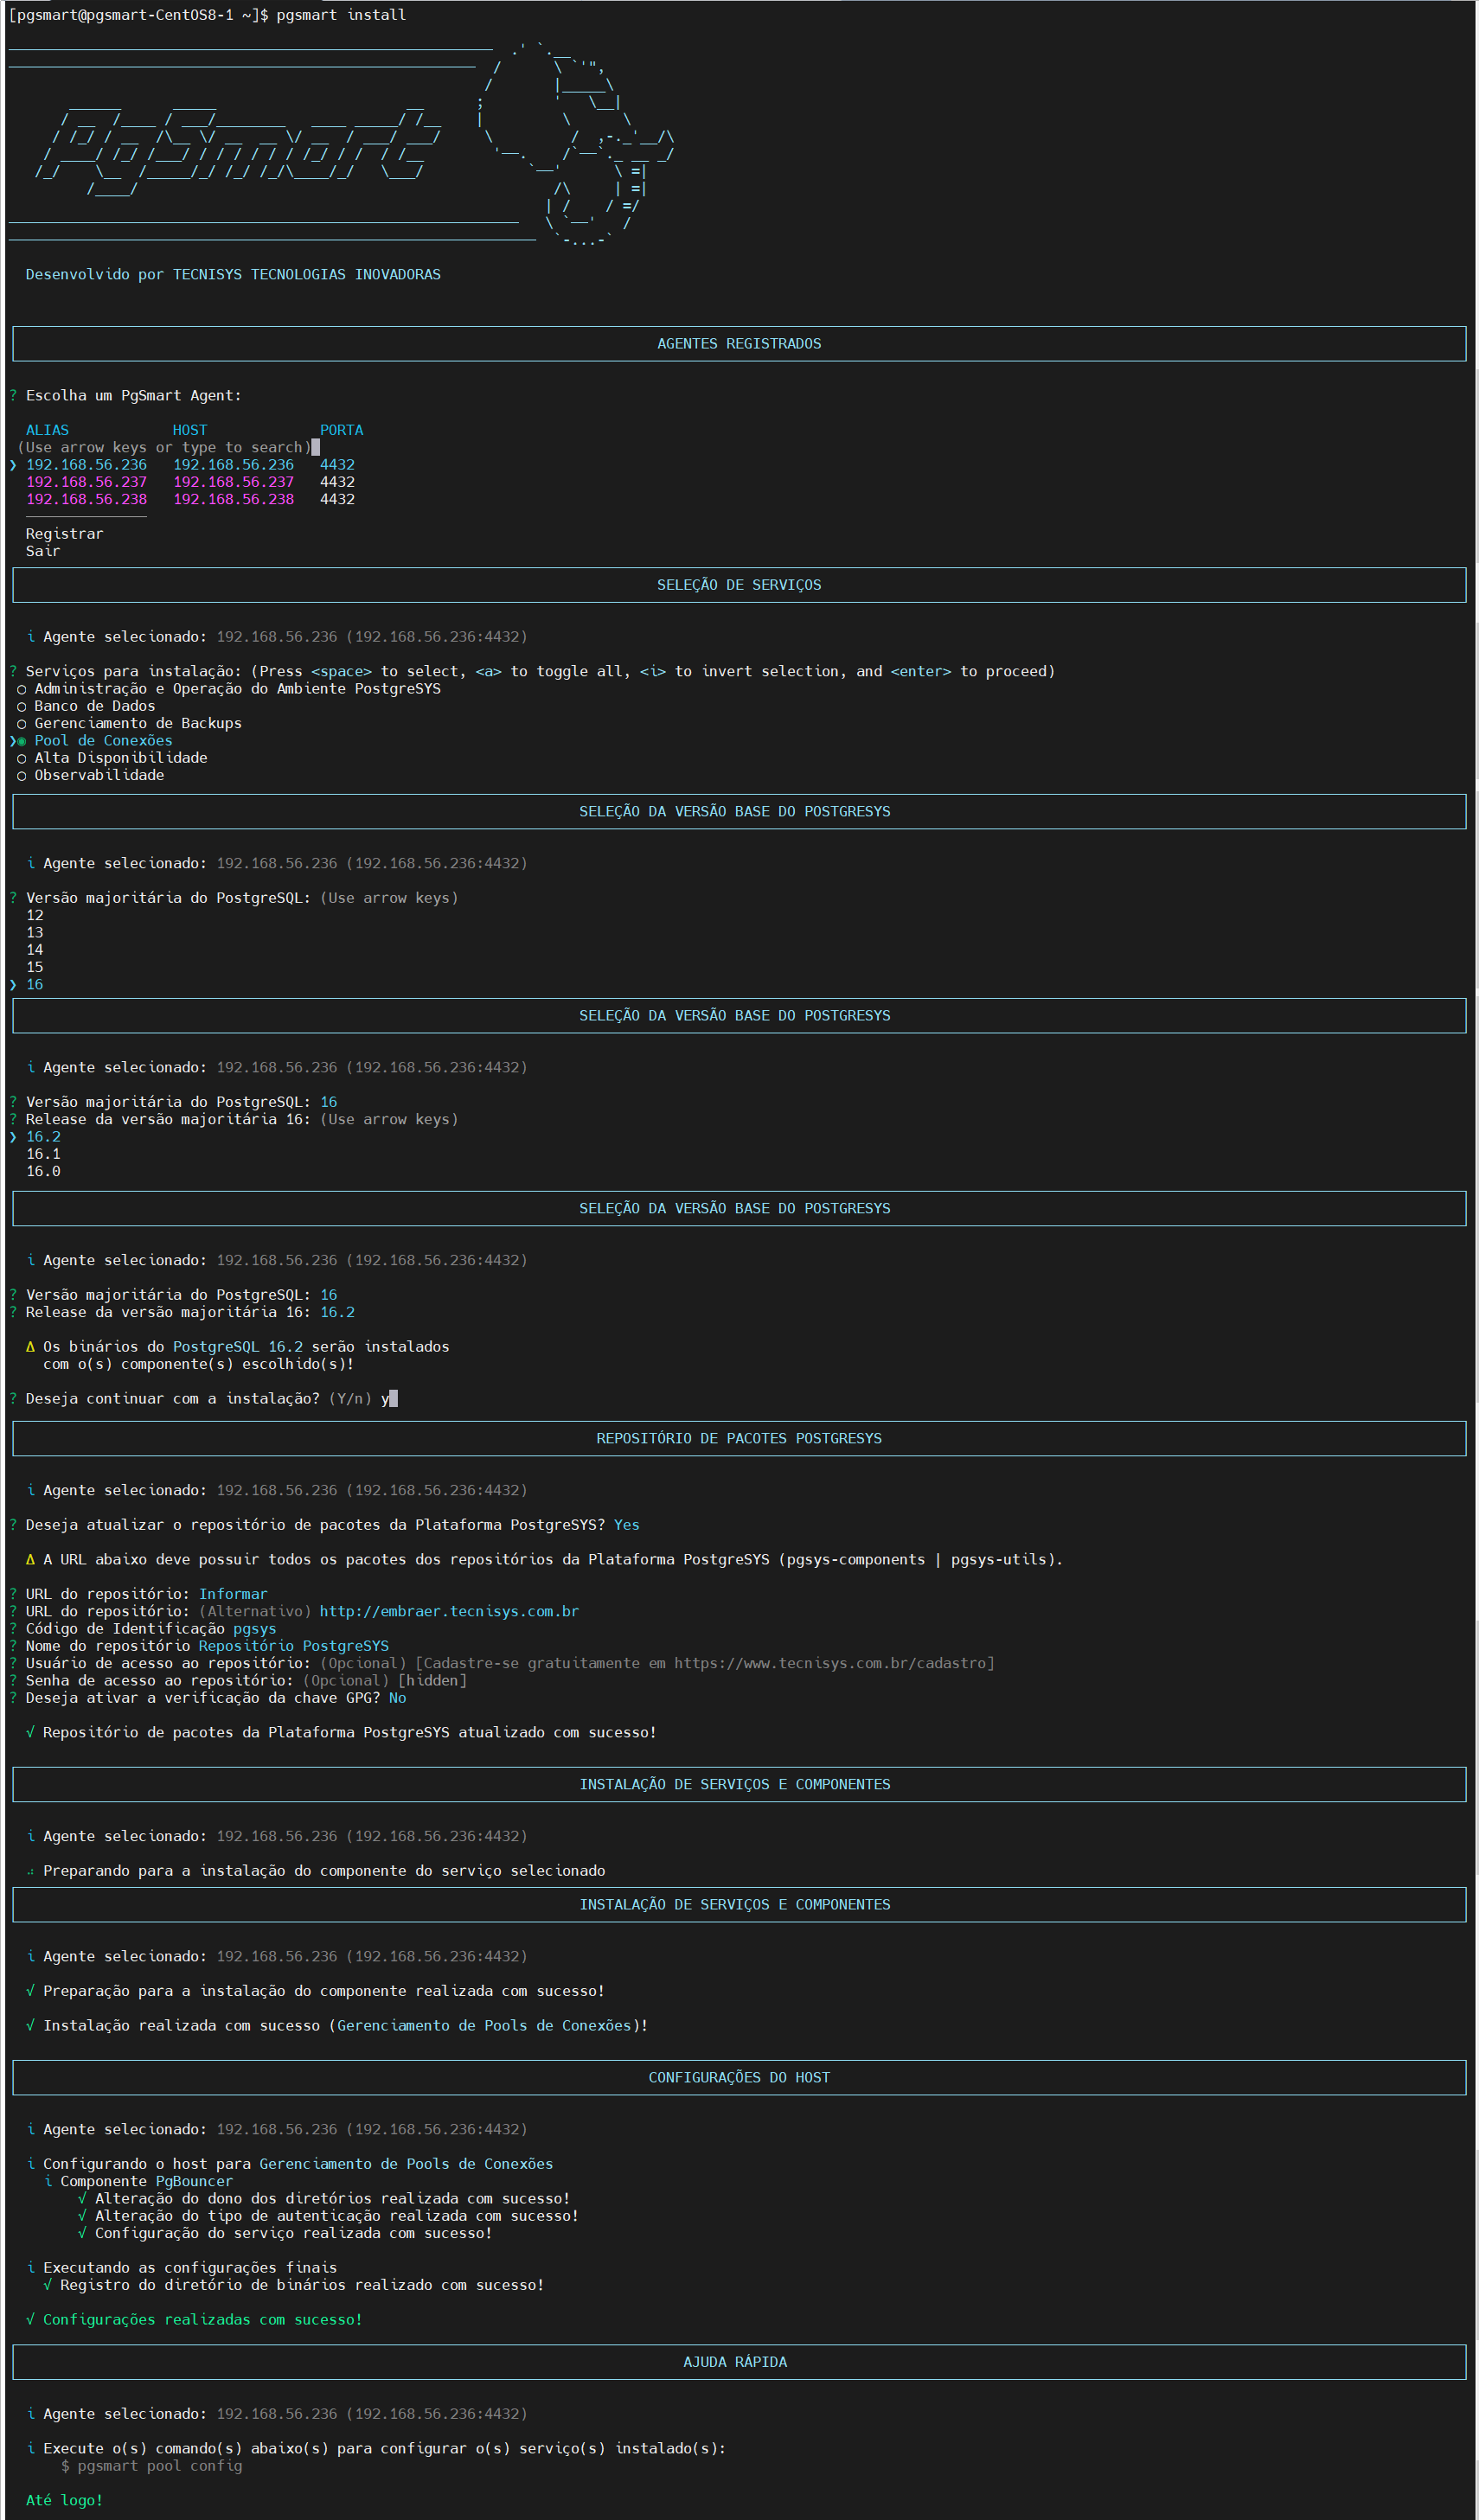 Figure 2 - Pool Installation - Interactive
-
-
Command Variations for Interactive Installation
Some parameters can be pre-passed; however, the execution remains interactive, and prompts will request confirmation and defaults for others.
Examples:
pgsmart install --service=pool
pgsmart install --service=pool --pg-version=15
PgSmart defines environment variables (PGDATA, PGBIN, etc.) in the current user's bash_profile, which are loaded into new sessions. Run the following command to apply them immediately:
source ~/.bash_profile