High Availability Agent Configuration via PgSmart Web
Here are the necessary commands to configure the high availability Agent in the PostgreSQL Ecosystem:
- PgSmart Client and Agent installed.
- All high availability components installed, respecting the minimum requirements.
- Instance on the same server as the High Availability Agent installed and initialized.
- For a high availability environment, it is recommended to use dedicated servers for each component.
- Distributed Configuration Repository (DCS) configured.
In a high availability environment, it is recommended to use dedicated servers for each component.
- Instructions
- Video
-
Select the desired
Environmentfrom the dropdown in the top bar. -
Select the
Alta Disponibilidadeoption in the sidebar. If there are registered High Availability Services, thecardsfor the registered components (Patroni) for the selected Environment will be displayed. -
Select the
Agentetab. -
Click
Inicializar.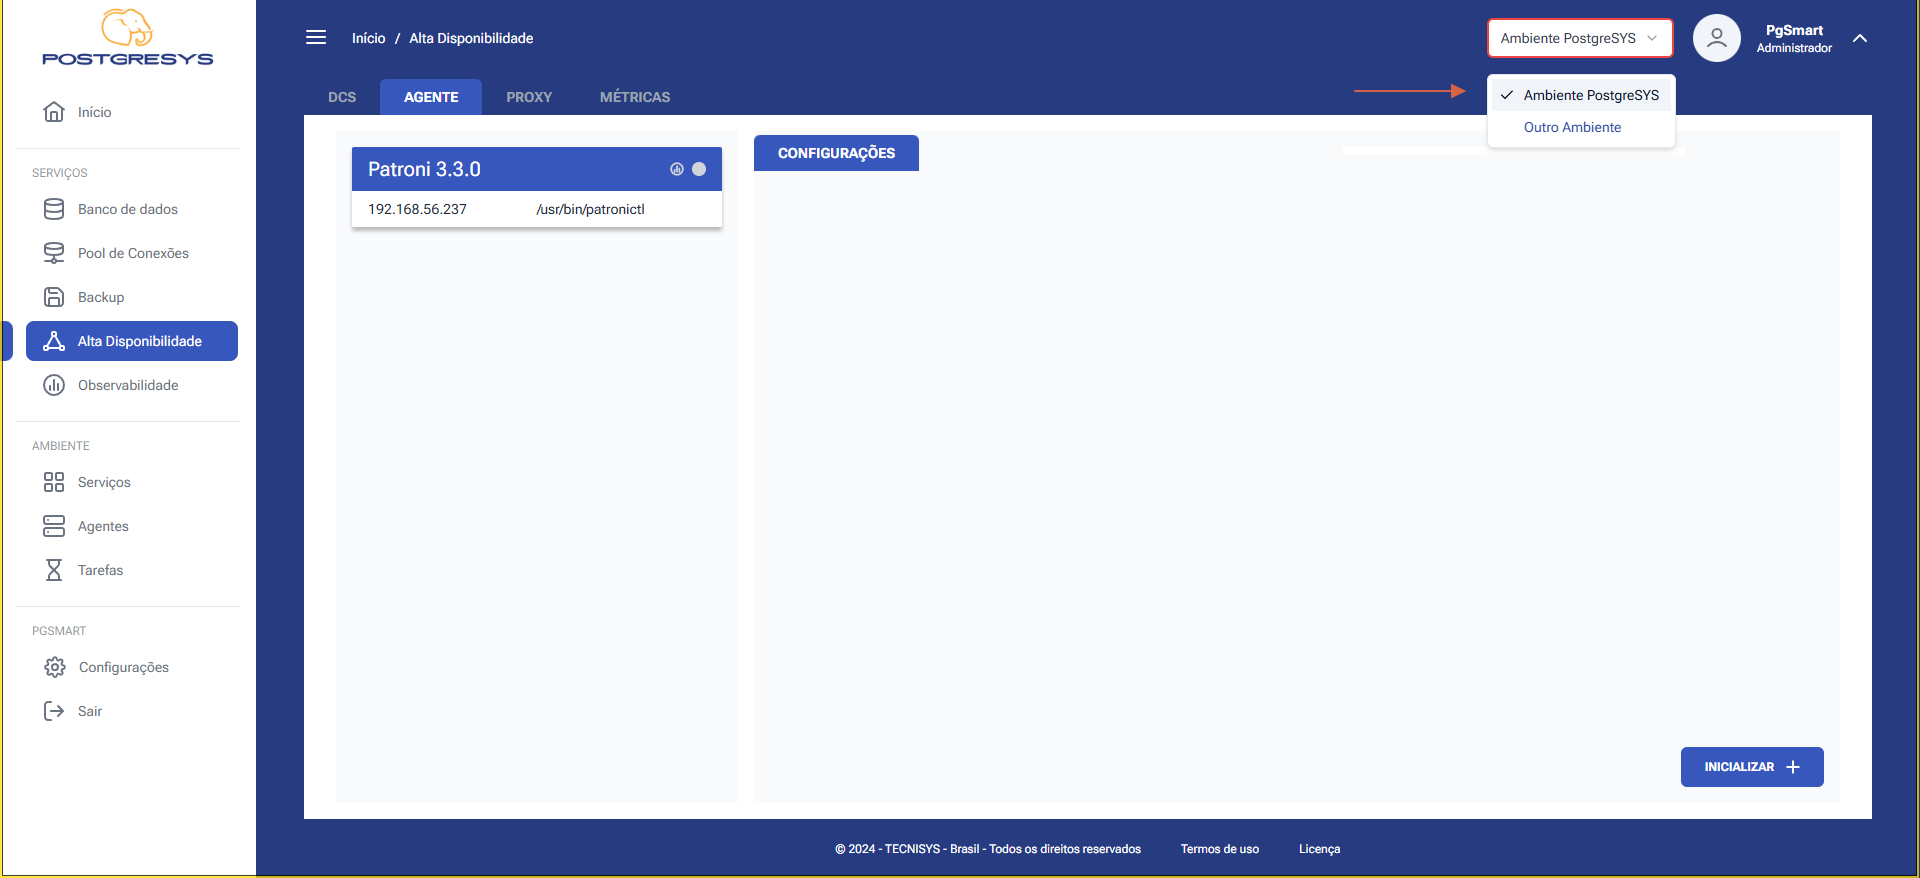 Figure 1 - High Availability Agent Configuration - Select Option
 -
Enter the
Nameof the server identification. -
Select the
Connection Interfaceof the high availability Agent. -
Enter the
Portof the high availability Agent connection. -
Click
Avançar.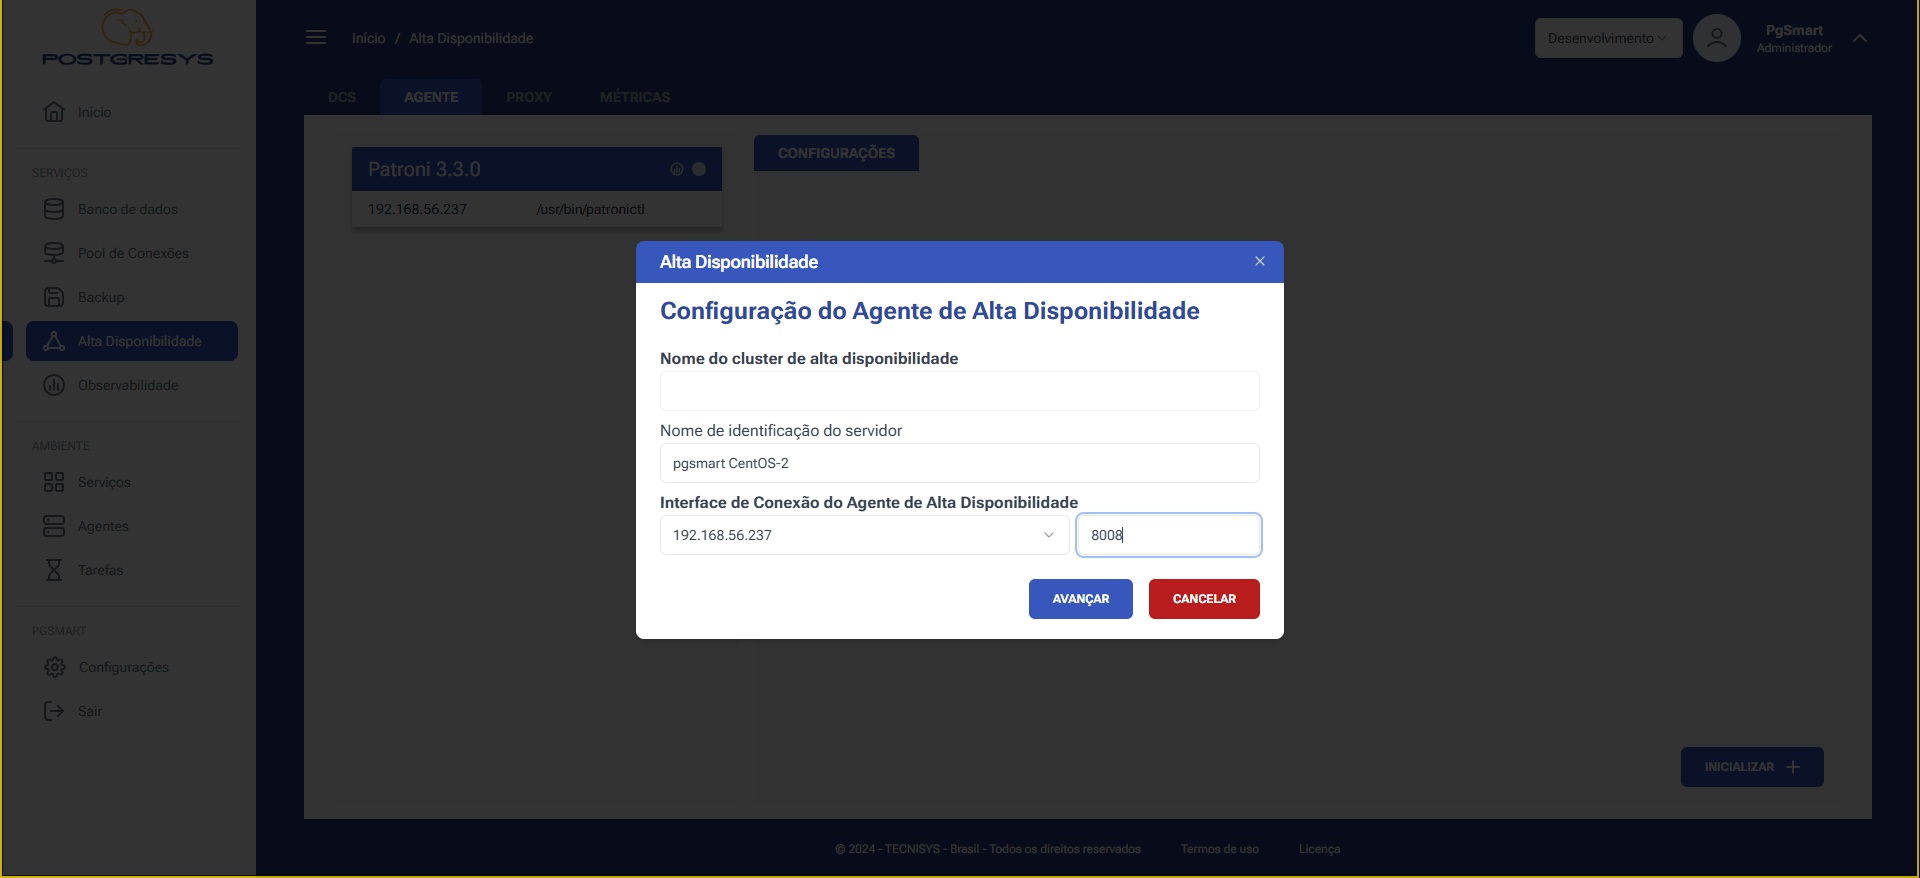 Figure 2 - High Availability Agent Configuration - Agent Identification
 -
Select the network interface for monitoring the PostgreSQL instance. (So that the agent knows where the PostgreSQL instance is located and can monitor it.).
-
Select the network interface for PostgreSQL instance access.
-
Confirm the existence of the PostgreSQL instance.
-
Click
Avançar.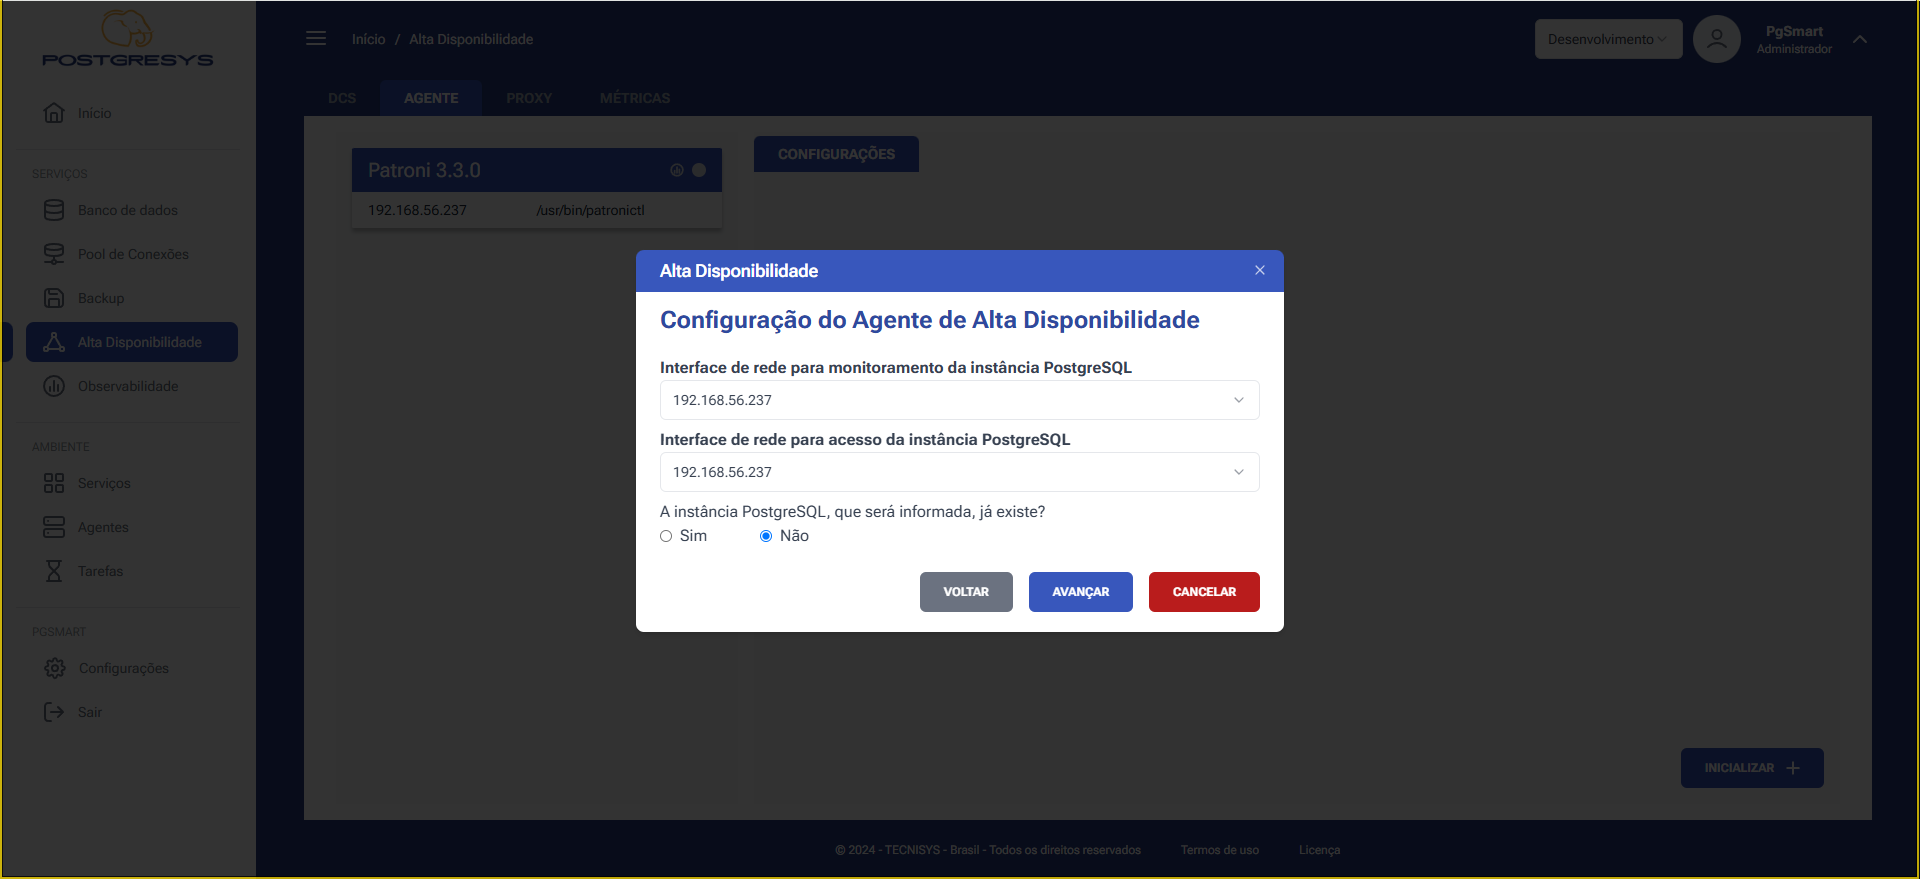 Figure 3 - High Availability Agent Configuration - Network Interface
 -
Enter the PostgreSQL instance connection Port.
-
Select the Major Version of the PostgreSQL instance.
-
Enter the PostgreSQL instance Data Directory.
-
Enter the PostgreSQL Database transaction log directory (WALDIR).
-
Enter the path to the PostgreSQL password file (PGPASS).
-
Confirm the existence of a PostgreSQL MASTER instance in the high availability environment.
-
Click
Avançar.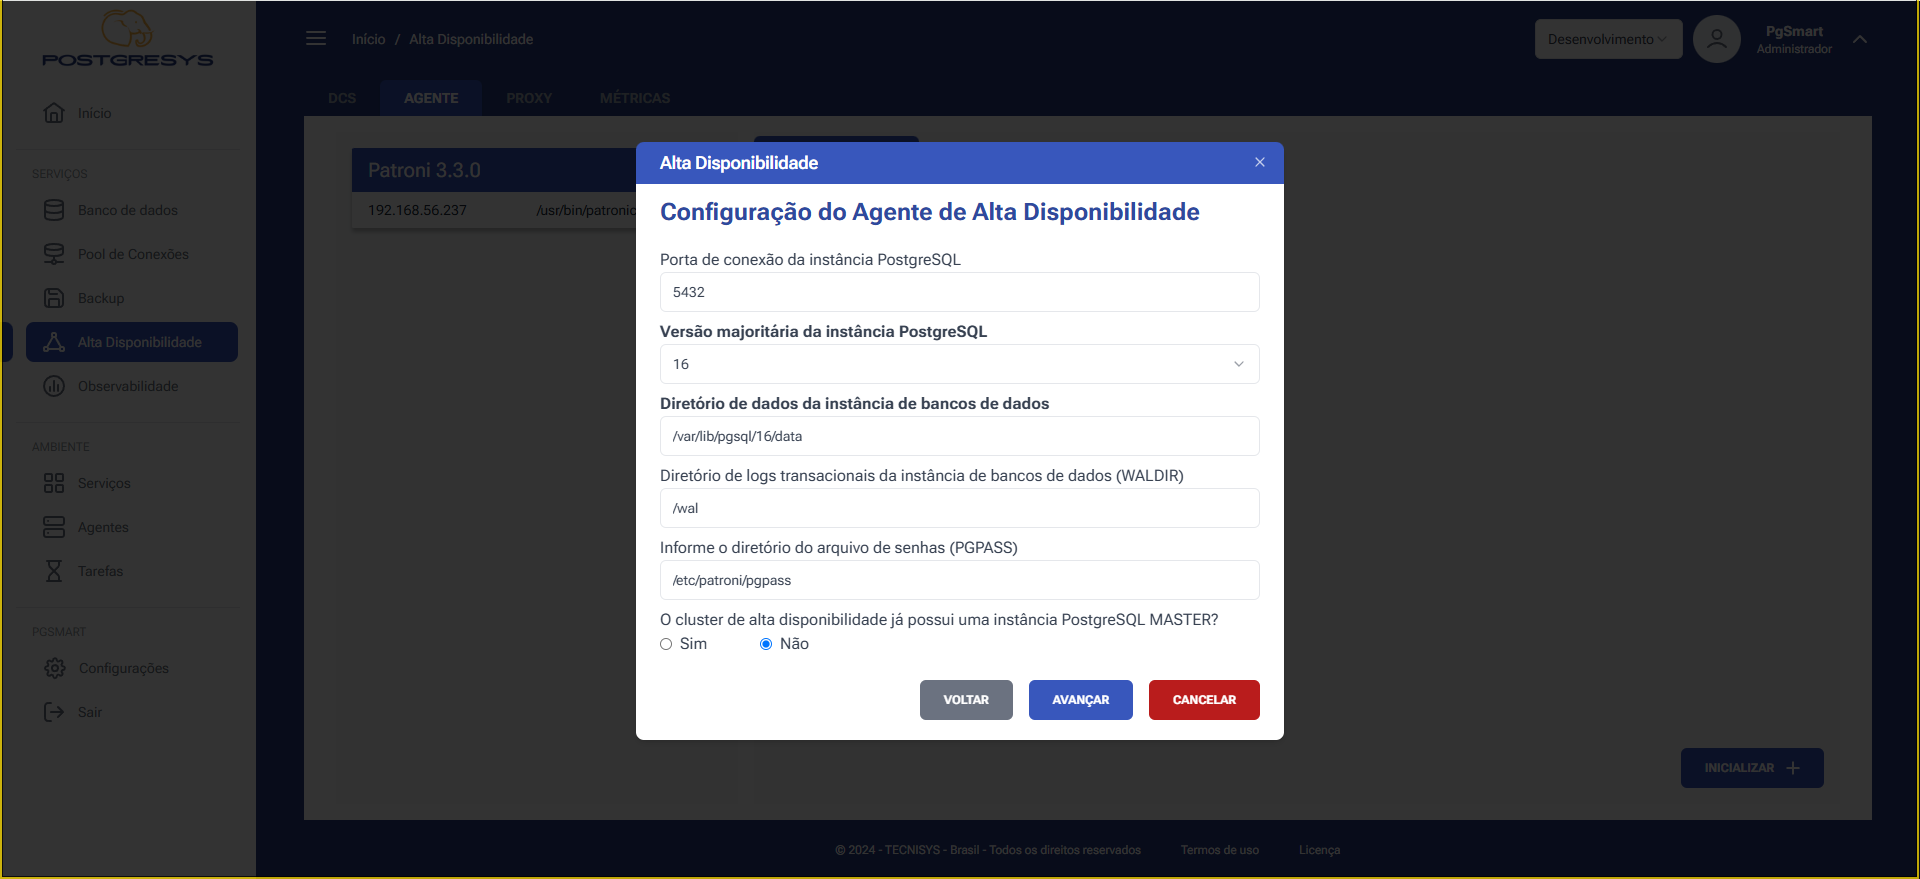 Figure 4 - High Availability Agent Configuration - Instance Identification
 -
Enter the
Replication Username. -
Enter the
Replication Userpassword. -
Enter the
High Availability Agentuser name. -
Enter the
High Availability Agentuser password. -
Click
Avançar.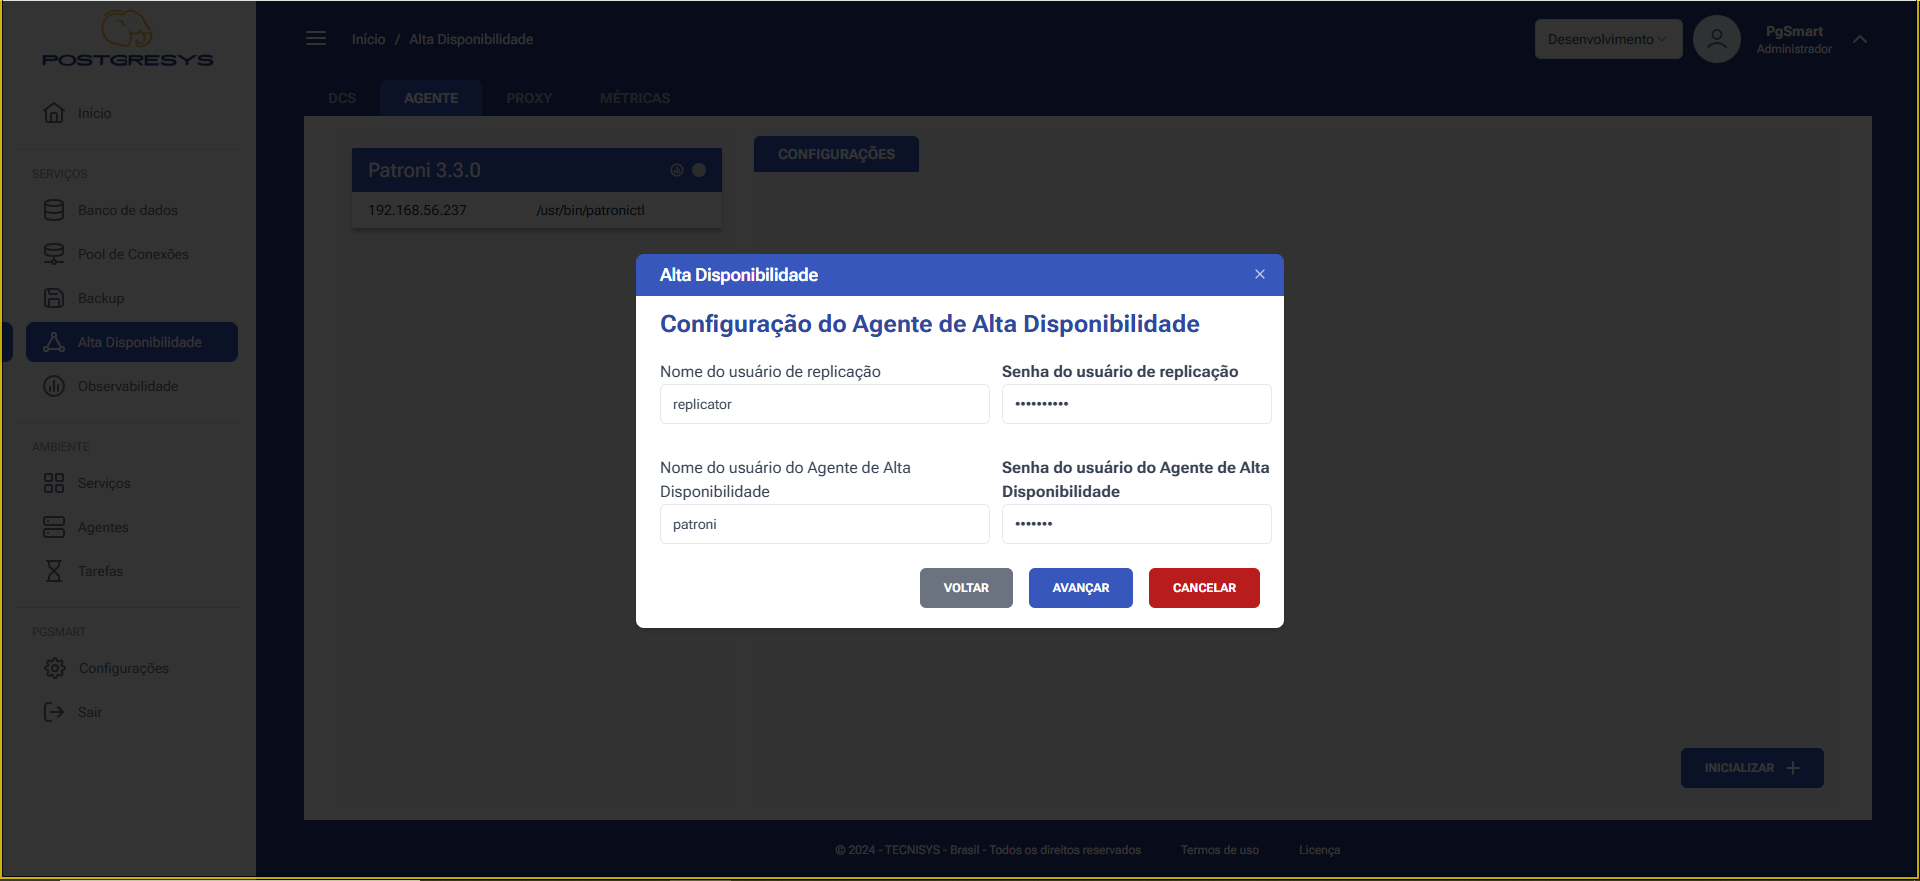 Figure 5 - High Availability Agent Configuration - Replication User
 -
Confirm if the PostgreSQL instance can be promoted to Master in a Failover.
-
Confirm if the instance can be cloned to automatically recreate others. (Requires database instance template).
-
Confirm if the instance supports synchronous replication.
-
Click
Avançar.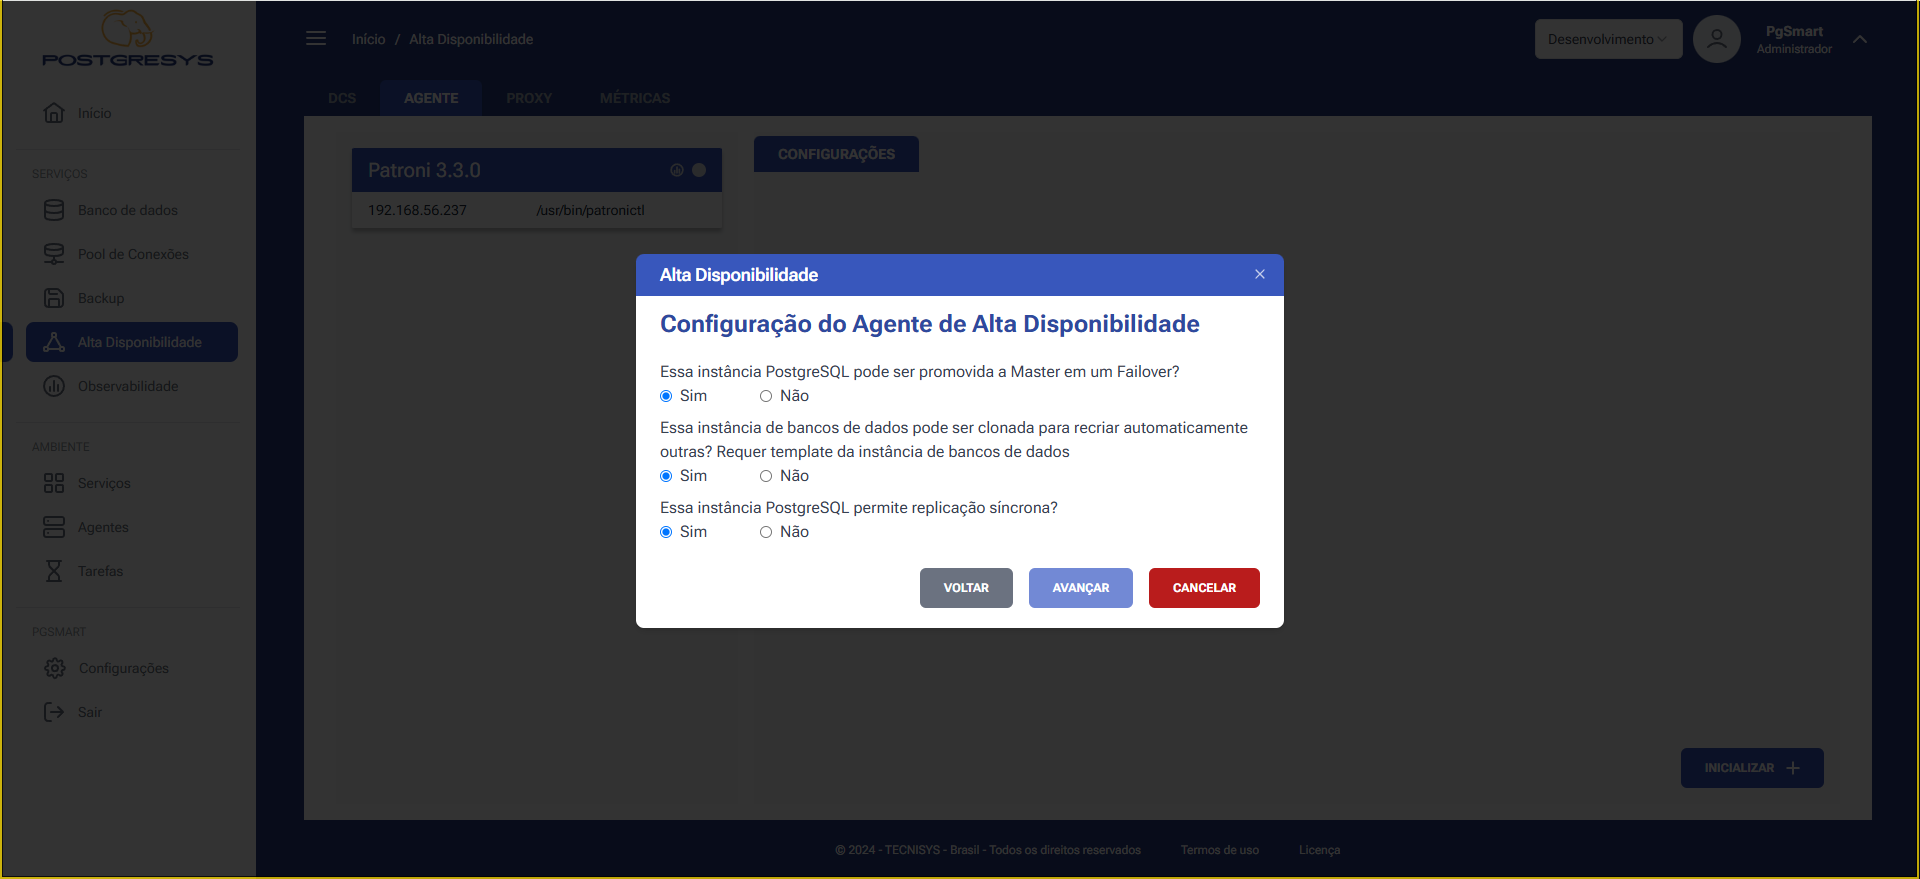 Figure 6 - High Availability Agent Configuration - Instance Details
 -
Select the default character encoding (ENCODING).
-
Select the default locale for date and currency representations (LOCALE).
-
Confirm if checksum for data pages should be enabled.
-
Select the network interface used for data replication.
-
Click
Avançar.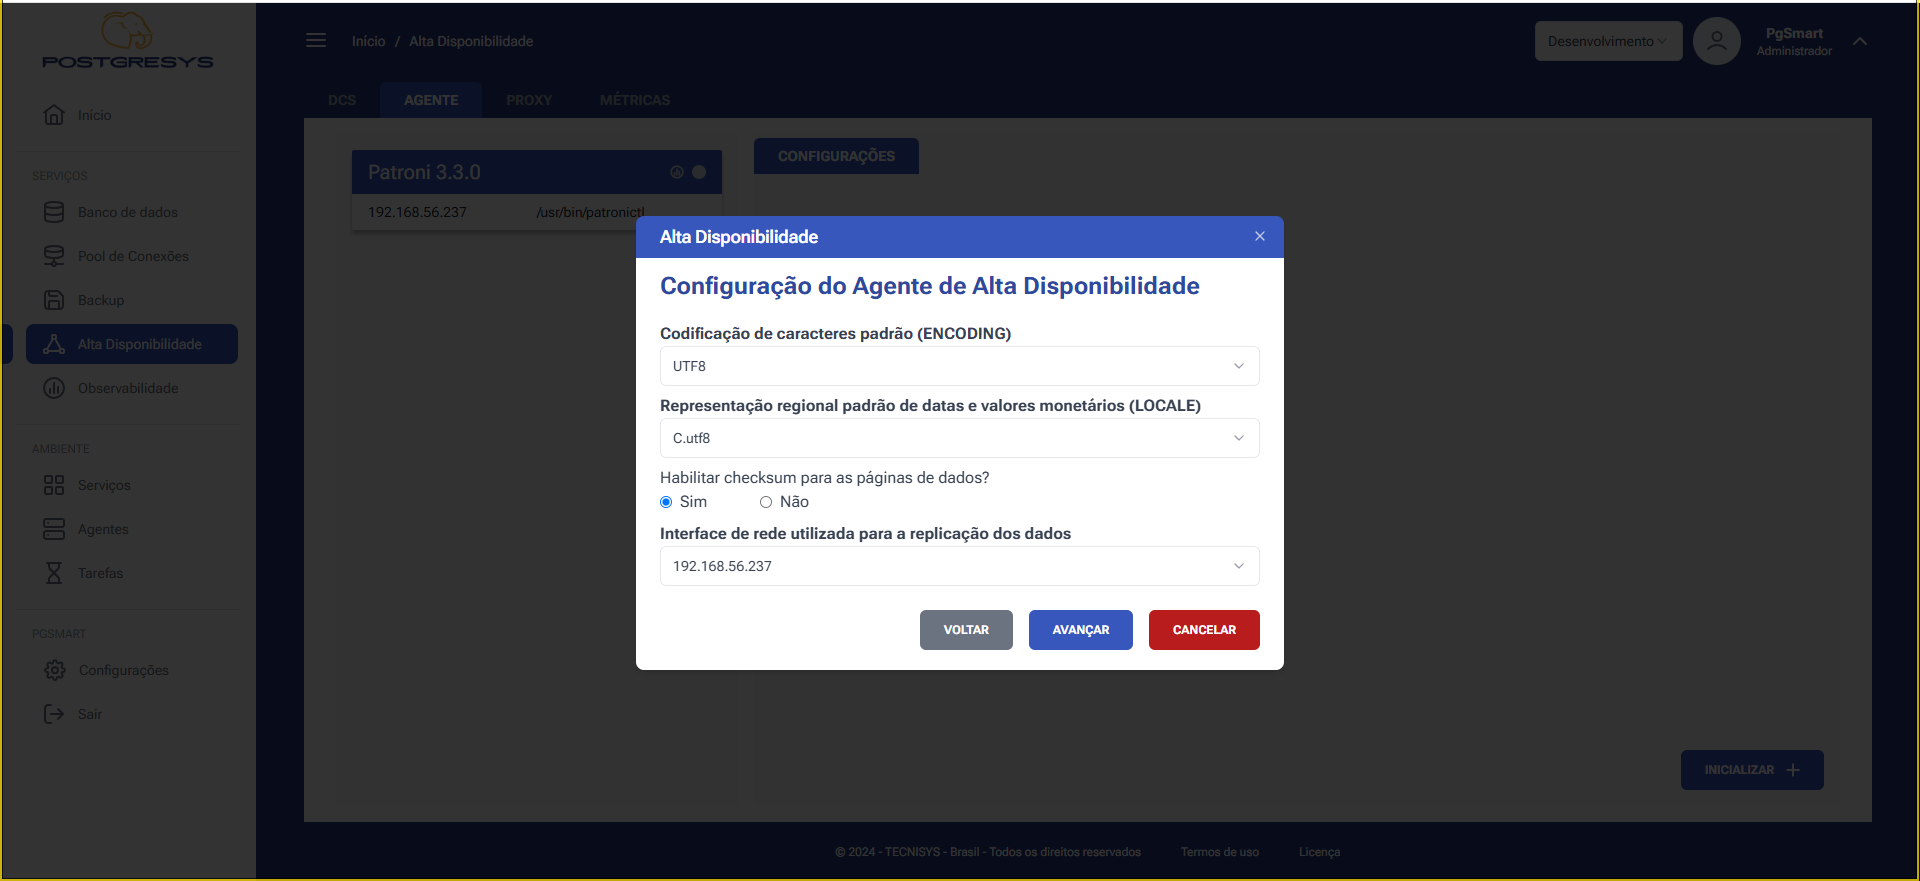 Figure 7 - High Availability Agent Configuration - Character Encoding, Locale
If you wish to add users to the initialization template: 33.1. Enter the name of the initialization template user. 33.2. Enter the password of the initialization template user. 33.3. Specify user privileges. 33.4. Click
Avançar.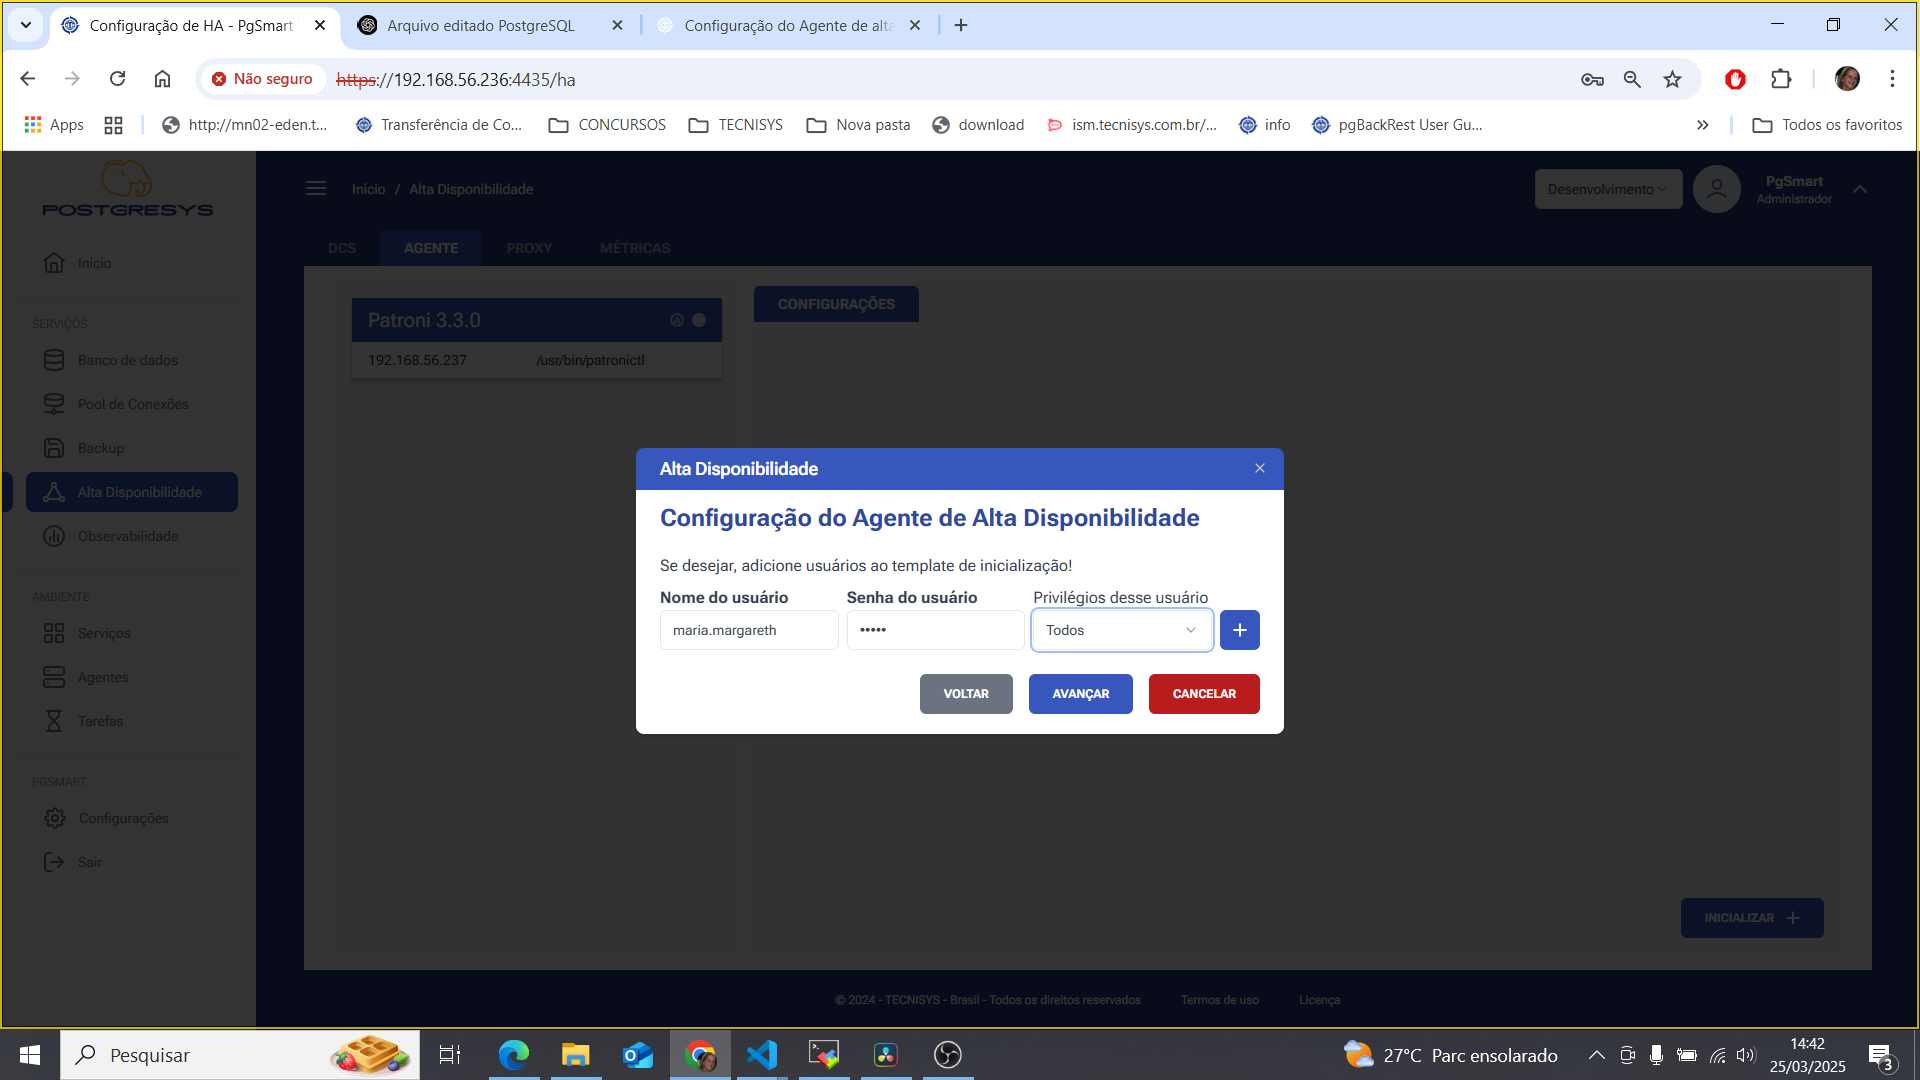 Figure 8 - High Availability Agent Configuration - Initialization Template
If you wish, add access rules to the PostgreSQL instance: 33.5. Select the Access Type. 33.6. Enter the Host or IP/CIDR. 33.7. Select the authentication method. 33.8. Enter the Database(s). 33.9. Enter the User(s) or Groups. 33.10. Click
Avançar.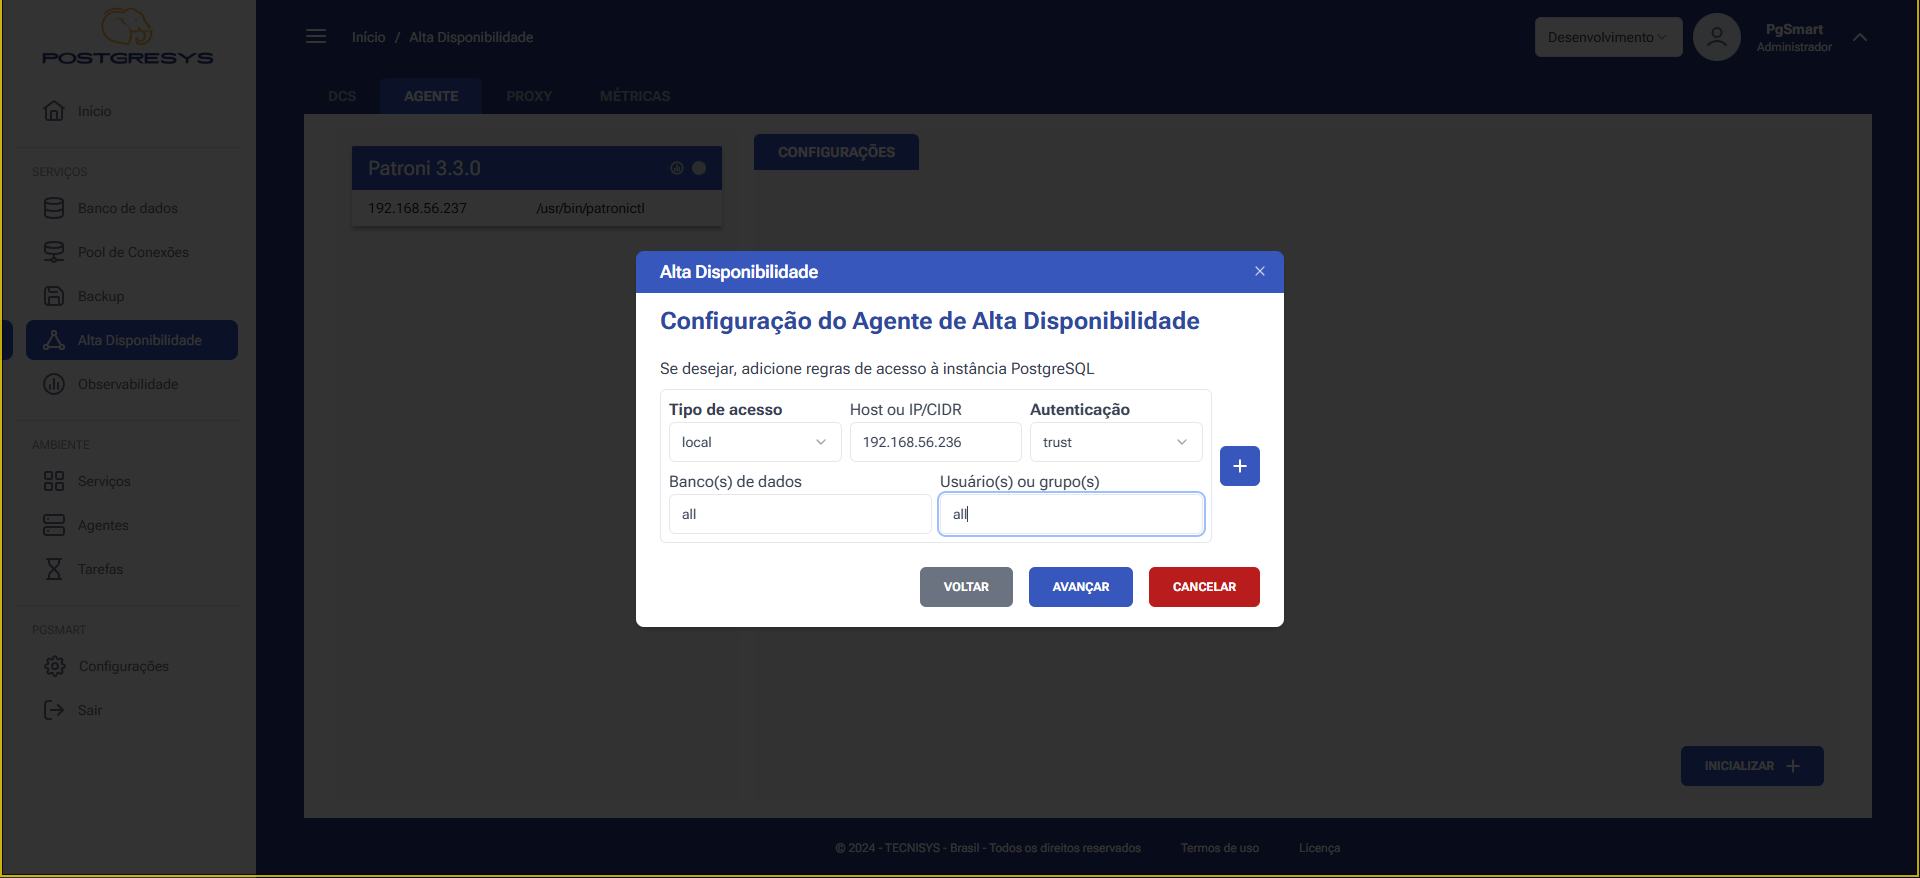 Figure 9 - High Availability Agent Configuration - Instance Access Rules
 -
Select the proxy servers that will connect to this instance.
-
Click
Avançar.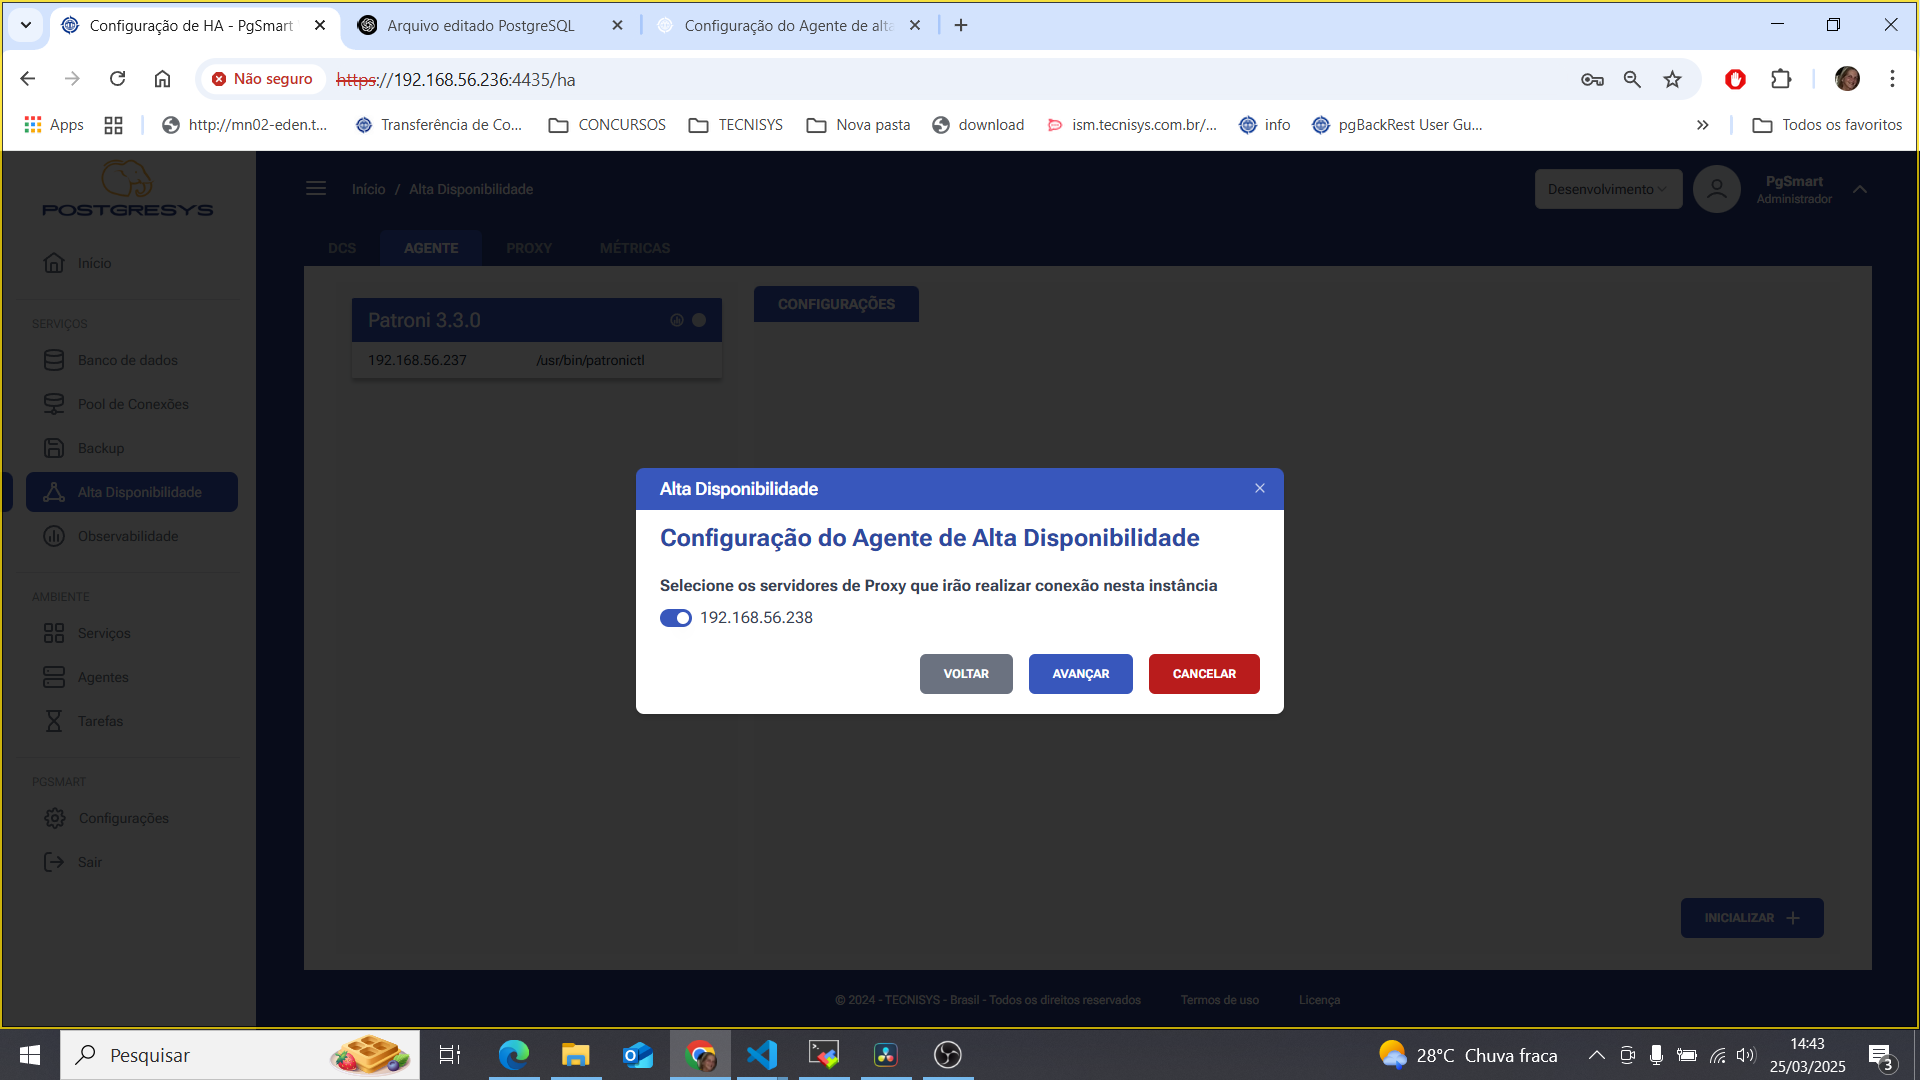 Figure 10 - High Availability Agent Configuration - Proxy Servers
 -
Review the summary screen and click
Concluirto initialize the high availability agent.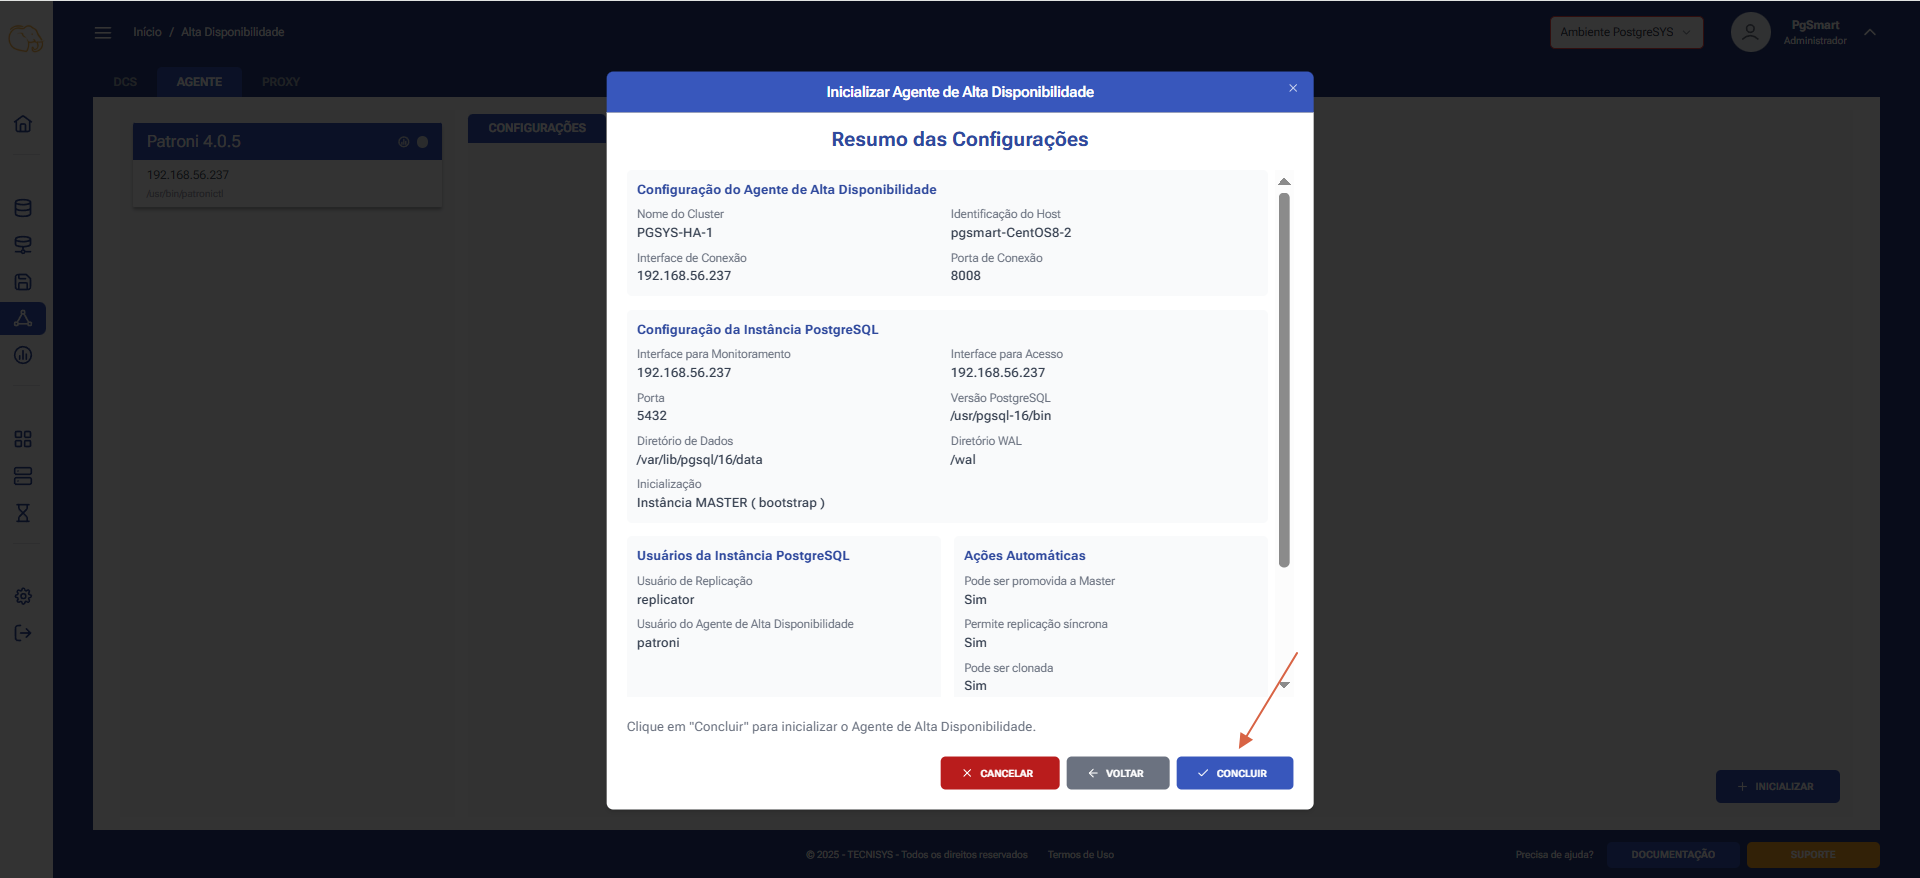 Figure 11 - High Availability Agent Configuration - Confirmationnote
-
To confirm the default values provided, simply fill in the additional fields and proceed to the next screens.
-
If you do not wish to initialize the cluster member, leave all fields blank.
-