Backup Site Configuration via PgSmart Web
In this option, it is possible to define the base directory of the database where the PostgreSQL cluster is located.
During backups, the provided path will be compared with the data directory of the running instance. If they are different, the backup will be interrupted with an error.
By default, in RHEL 7 and 8, clusters are stored in: /var/lib/pgsql/[version]/data.
- Backup Management Installed, following the minimum requirements.
- Instructions
- Insert
- Activate
- Update
- Remove
-
Select the desired
Environmentfrom the dropdown in the top bar. -
Select the
Backupoption in the side menu. If there are registered backups,cardsfor each registered backup in the selected environment will be displayed. -
Select the backup for which you want to configure the Sites.
-
Select the
Sitestab. The backup sites with their respective parameters will be displayed.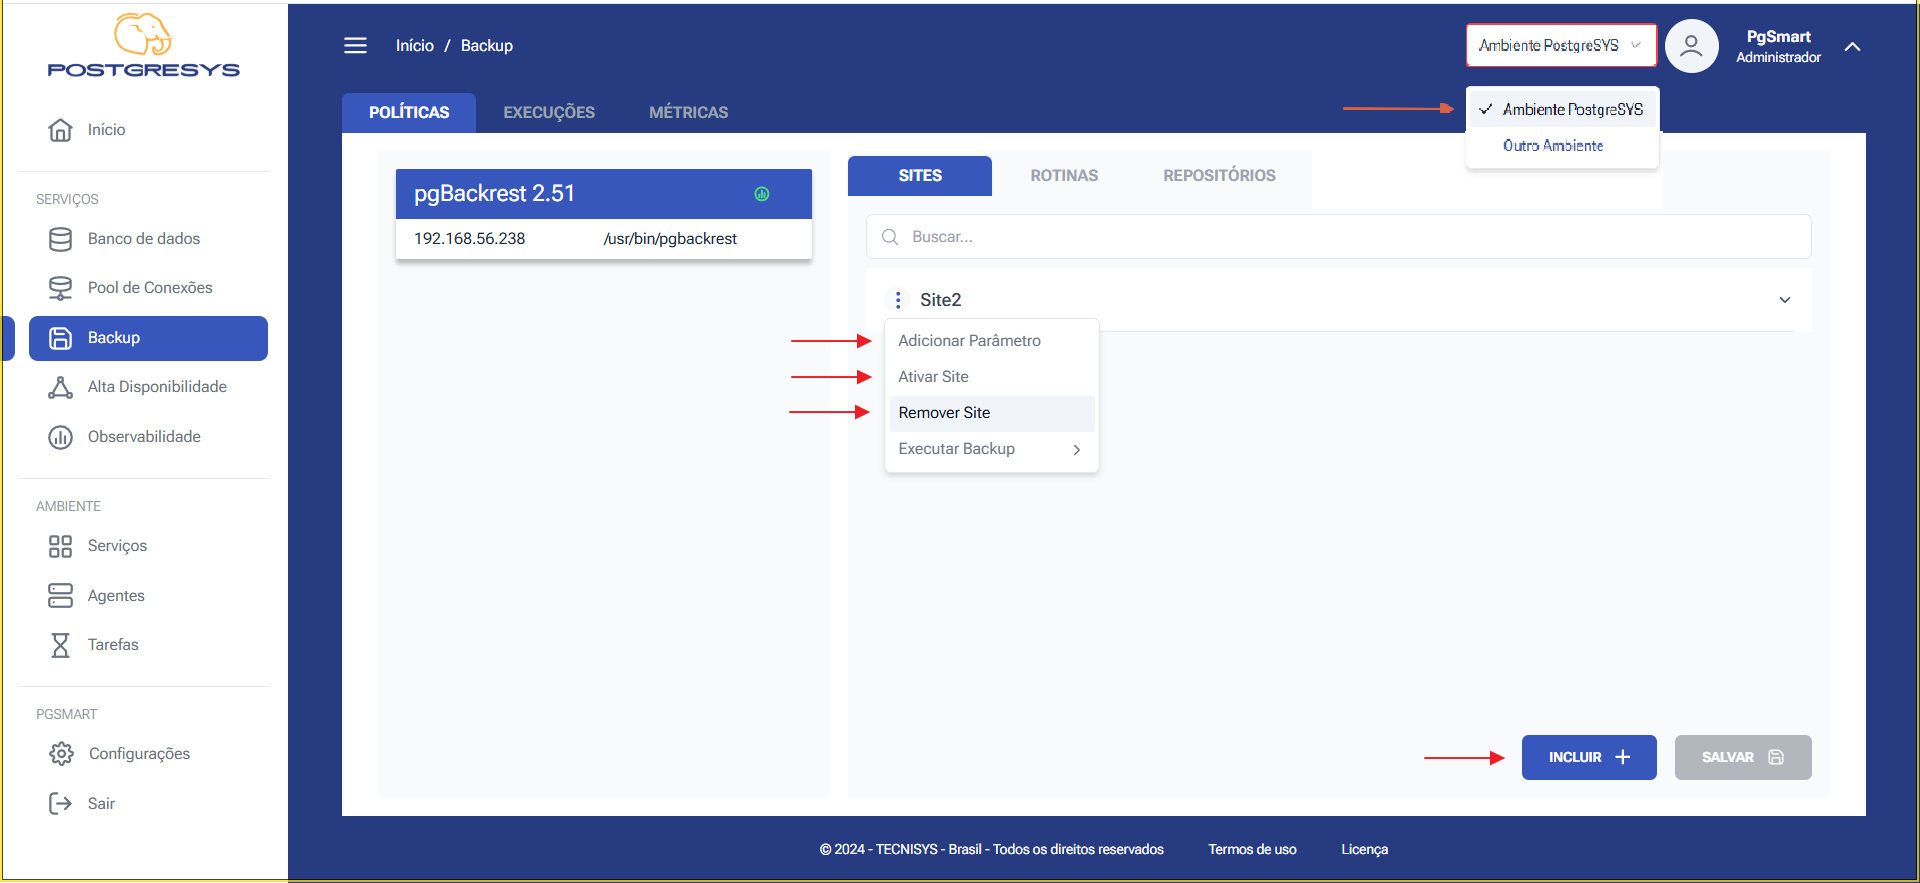 Figure 1 - Backup Site Configuration - Selecting the Option
Insert a New Site
-
To insert a new site: 1.1. Click on
Incluir. 1.2. Enter a name for the site. 1.3. Click onAvançar. 1.4. Enter theSite Instancesdata. (Select "New Instance" to add other instances.) 1.4.1. Enter the host or IP connection of the PostgreSQL instance. 1.4.2. Enter the SSH connection port for the PostgreSQL instance. 1.4.3. Enter the SSH connection user for the PostgreSQL instance. 1.4.4. Enter the connection port for the PostgreSQL instance. 1.4.5. Enter the data directory of the database instance. 1.4.6. Enter the connection user for the PostgreSQL instance.noteYou can add more database instances to the site. To do so, confirm this option and provide the requested data for the new instance.
1.5. Click on
Concluir.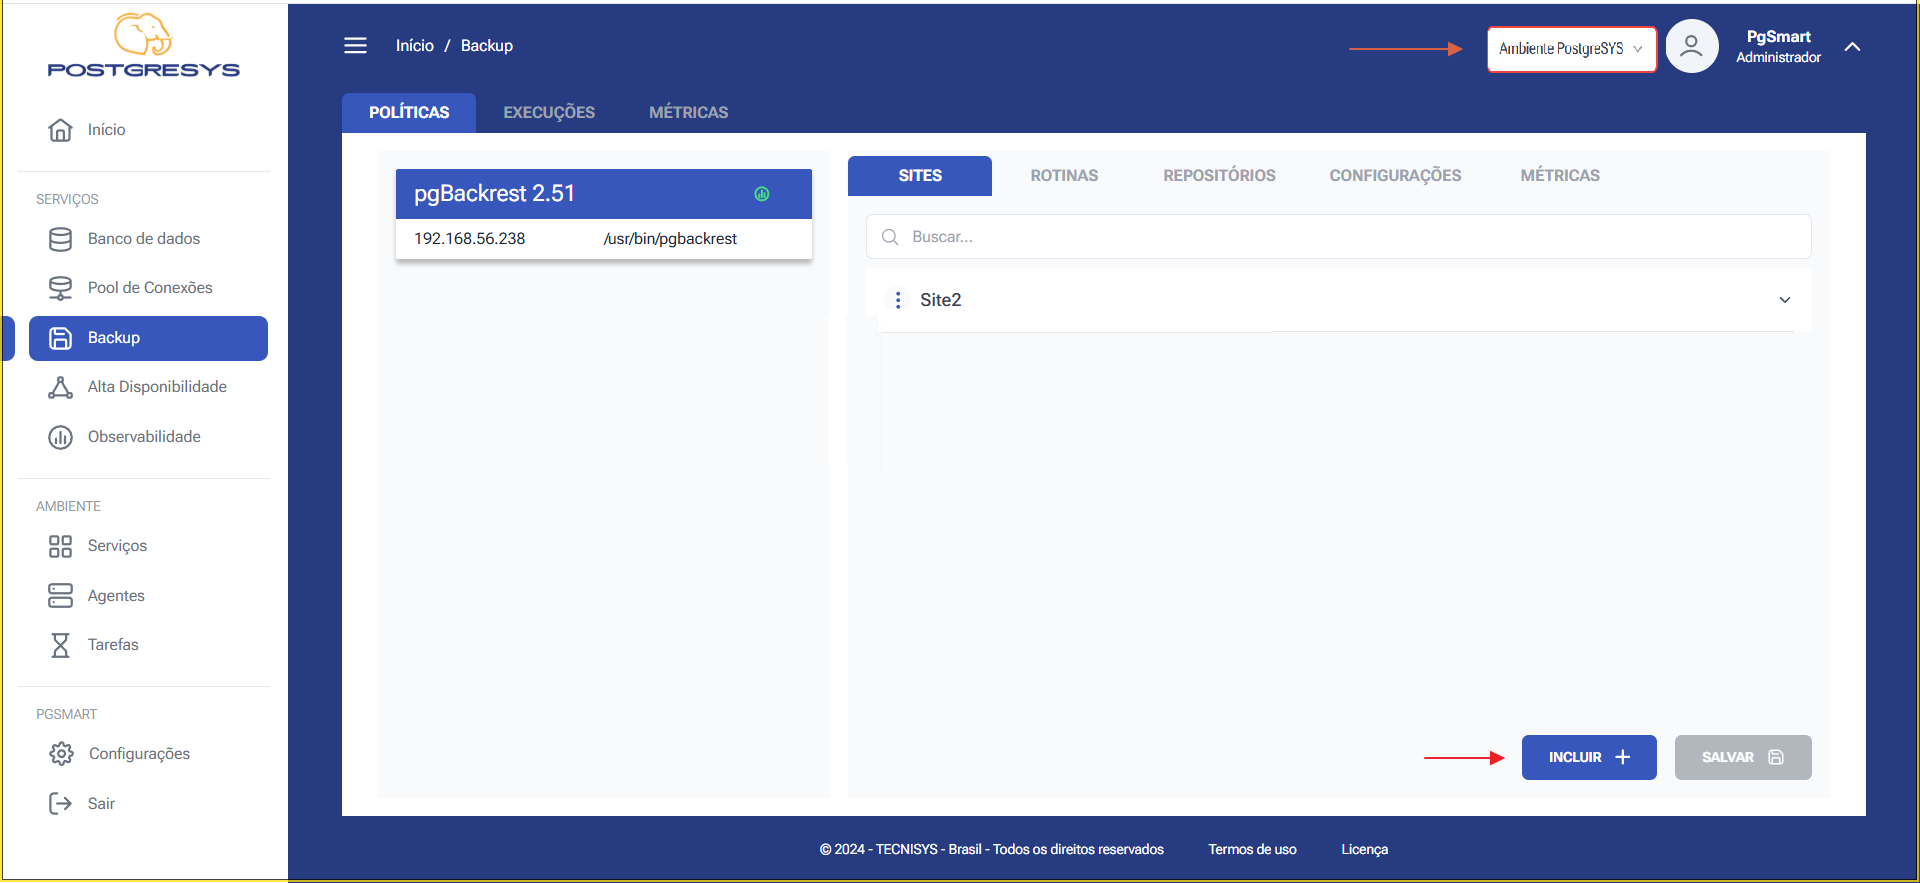 Figure 2a - Backup Site Configuration - Inserting Site
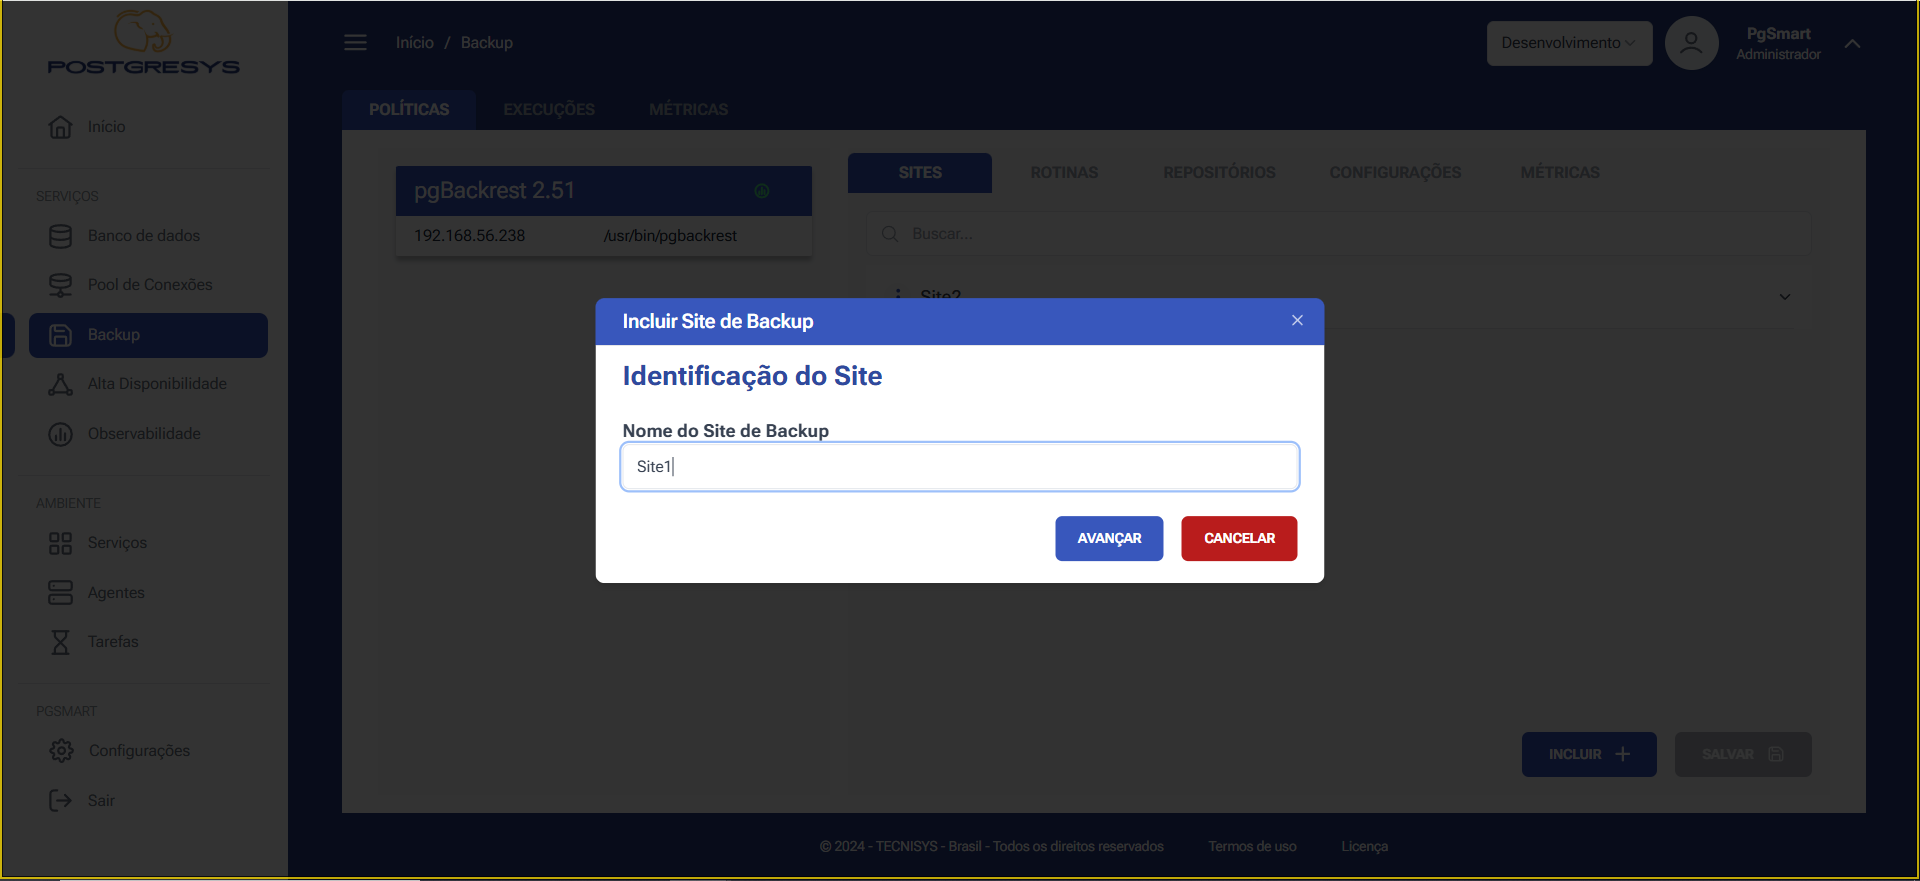 Figure 2b - Backup Site Configuration - Site Identification
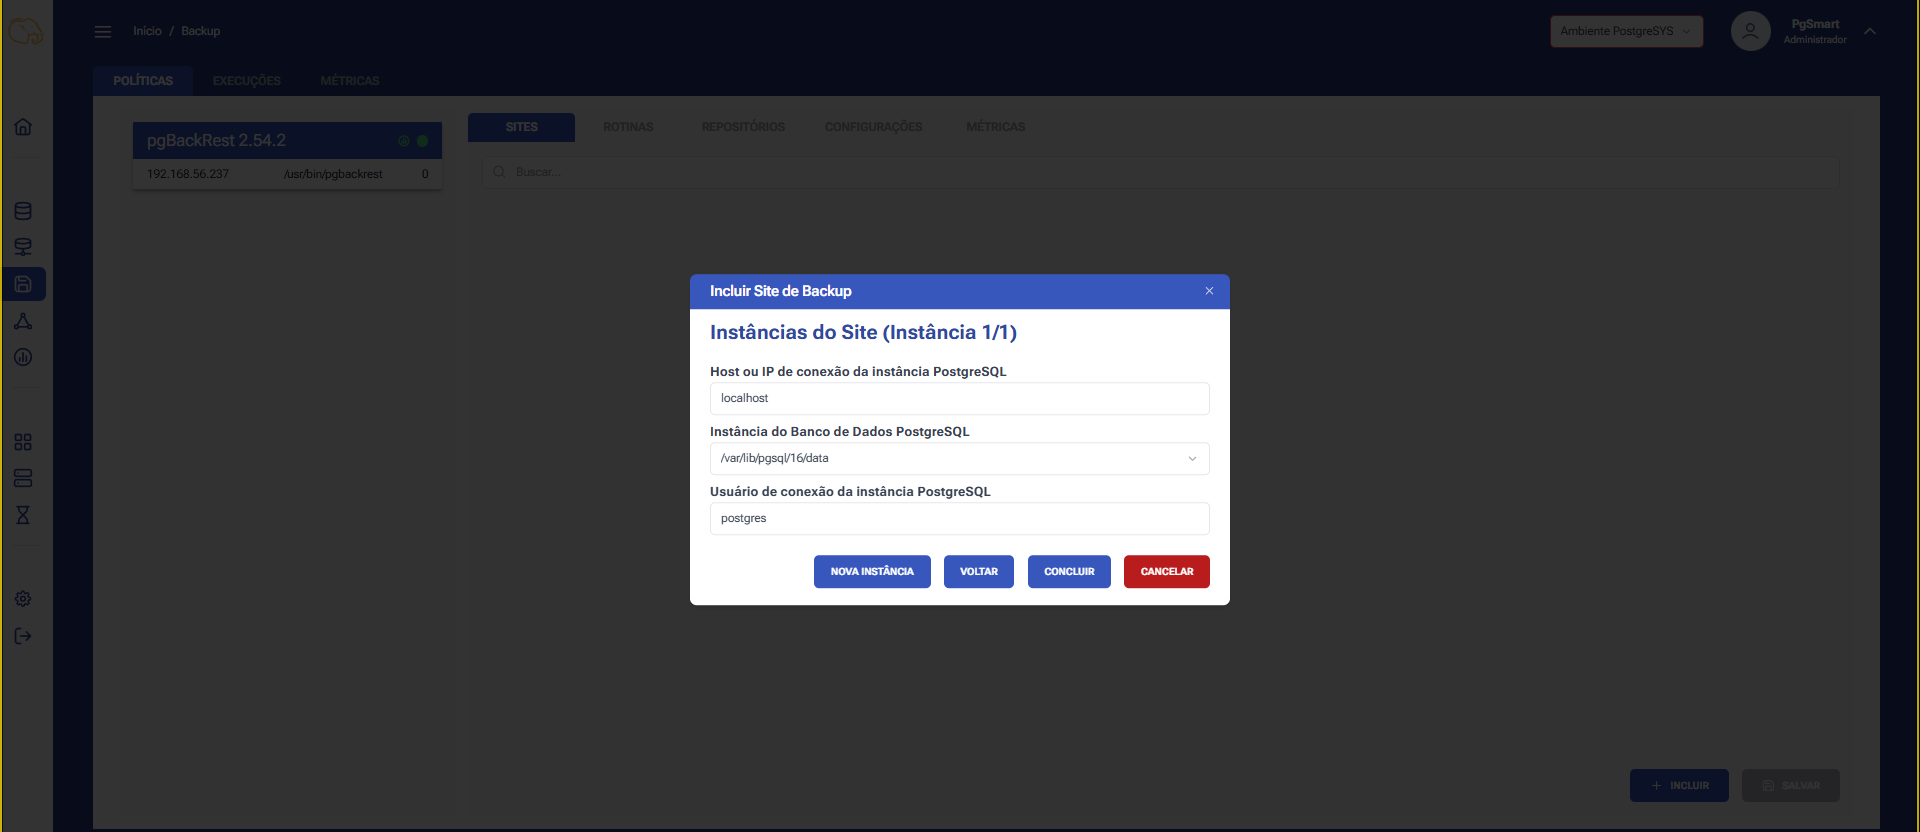 Figure 2c - Backup Site Configuration - Inserting Site Data
Activate a Site
-
To
Activatea backup site: 1.1. Click on the three dots (⋮) next to the site you wish to activate. 1.2. ClickAtivar Site. 1.3. Confirm if the WAL archiving for the database instances is configured for the site. 1.4. If No: 1.4.1. Confirm the activation of WAL archiving. 1.4.2. Confirm the restart of the instance so that WAL archiving takes effect.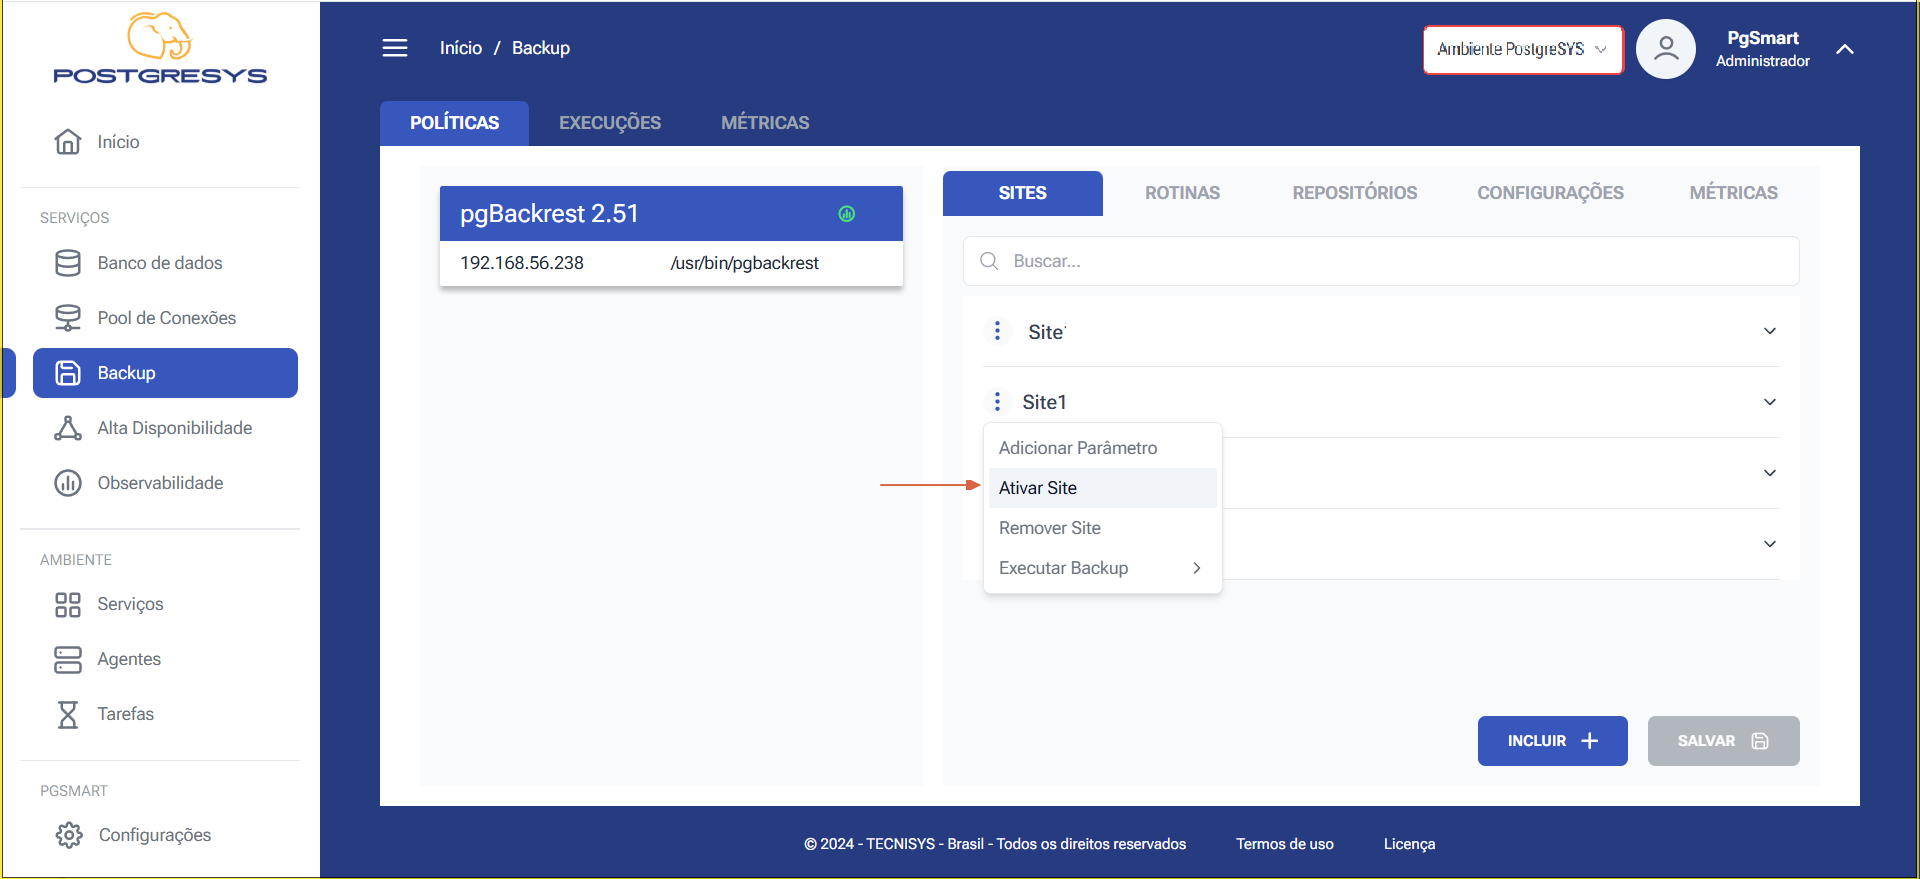 Figure 3 - Backup Site Configuration - Activate Site - Selecting the Option
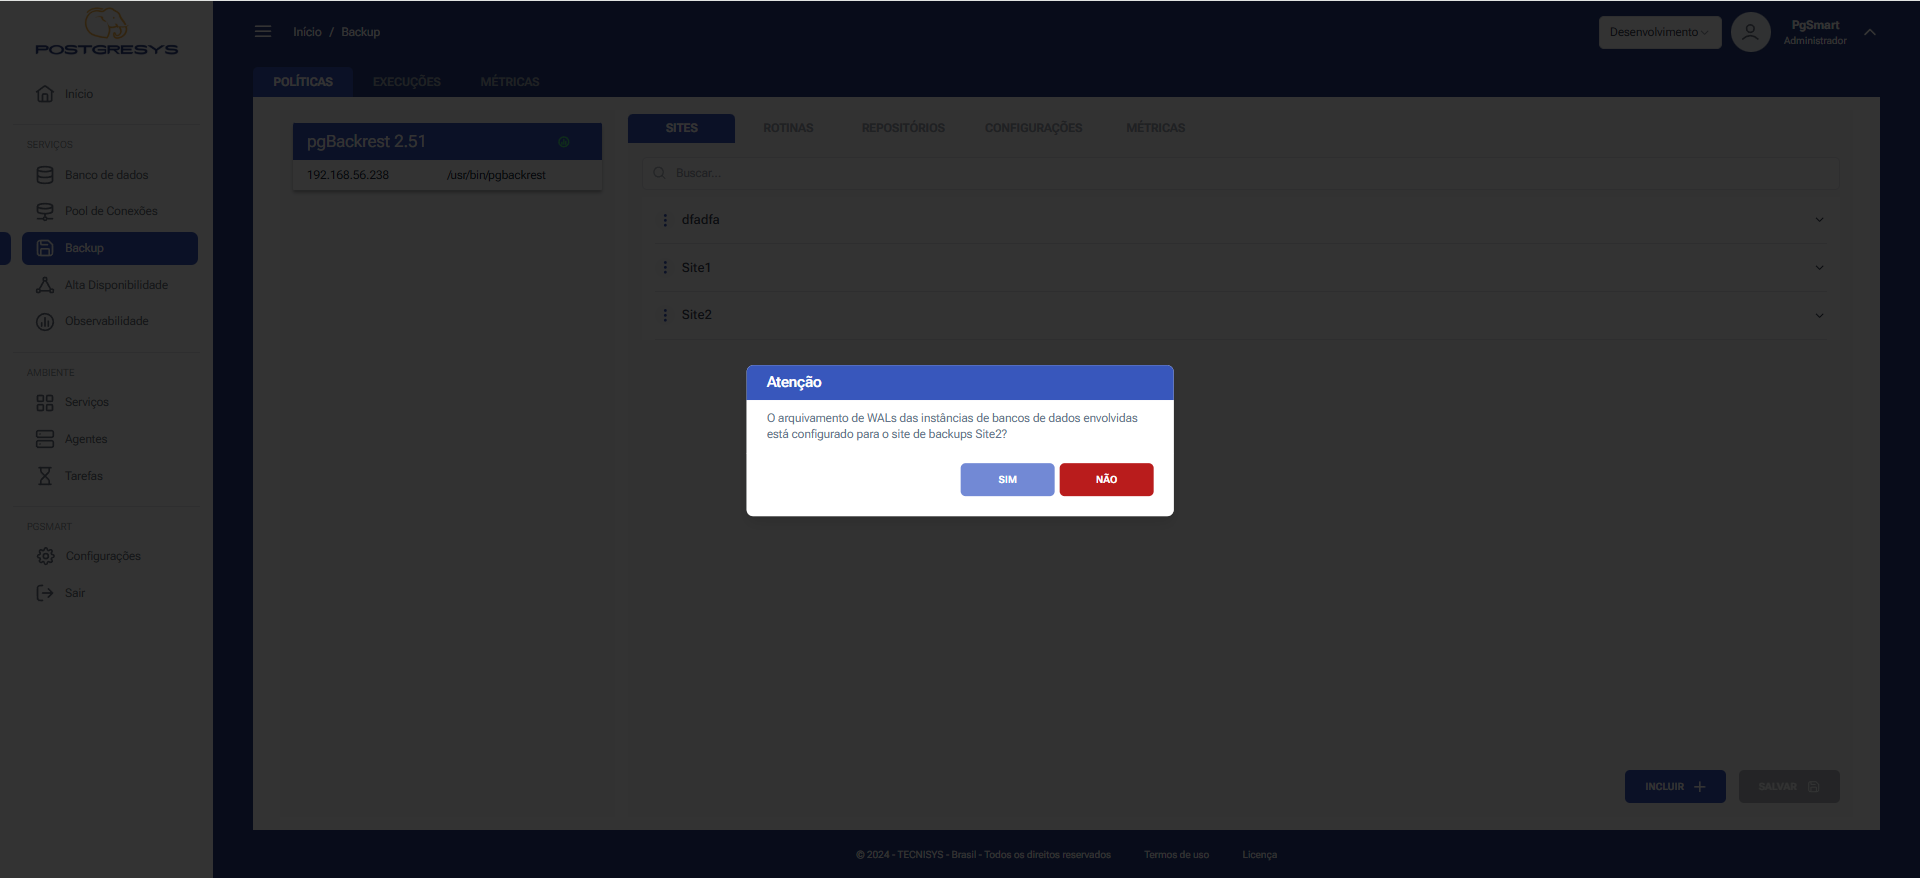 Figure 4 - Backup Site Configuration - Activate Site - Confirming WAL Archiving
 Figure 5 - Backup Site Configuration - Activate Site - Activating WAL Archiving
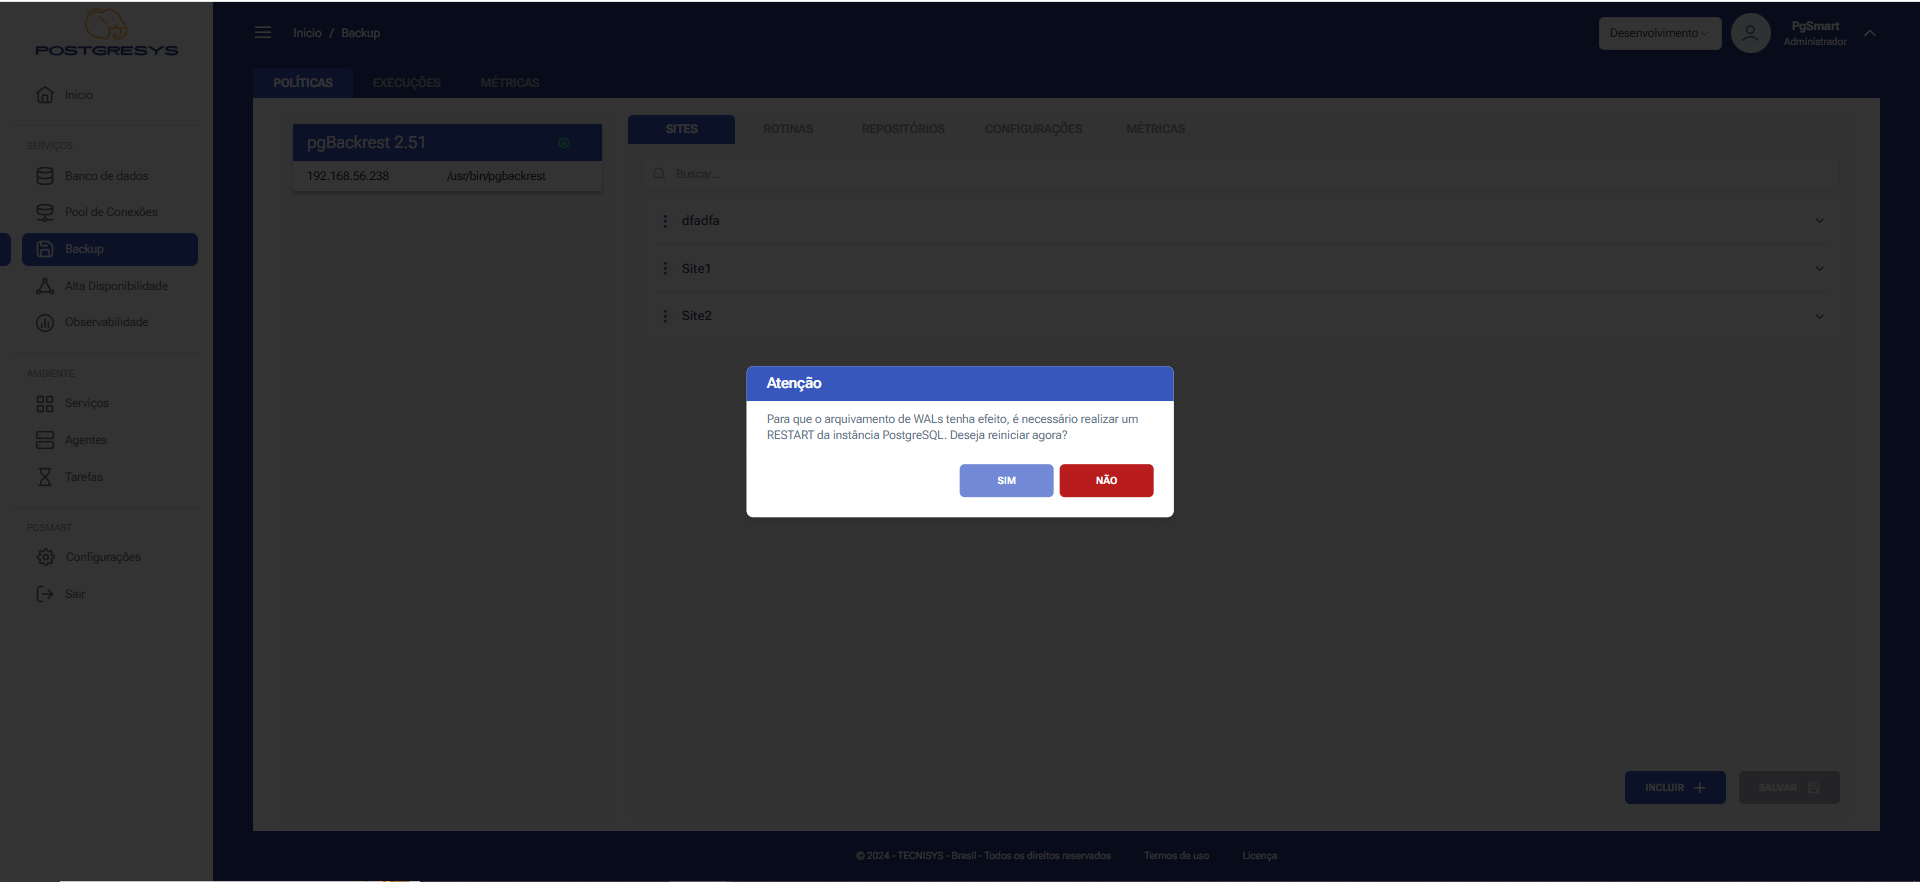 Figure 6 - Backup Site Configuration - Activate Site - Restarting the Instance
Remove a Site
-
To
Removea backup site: 1.1. Click on the three dots (⋮) next to the site you wish to remove. 1.2. ClickRemover Site.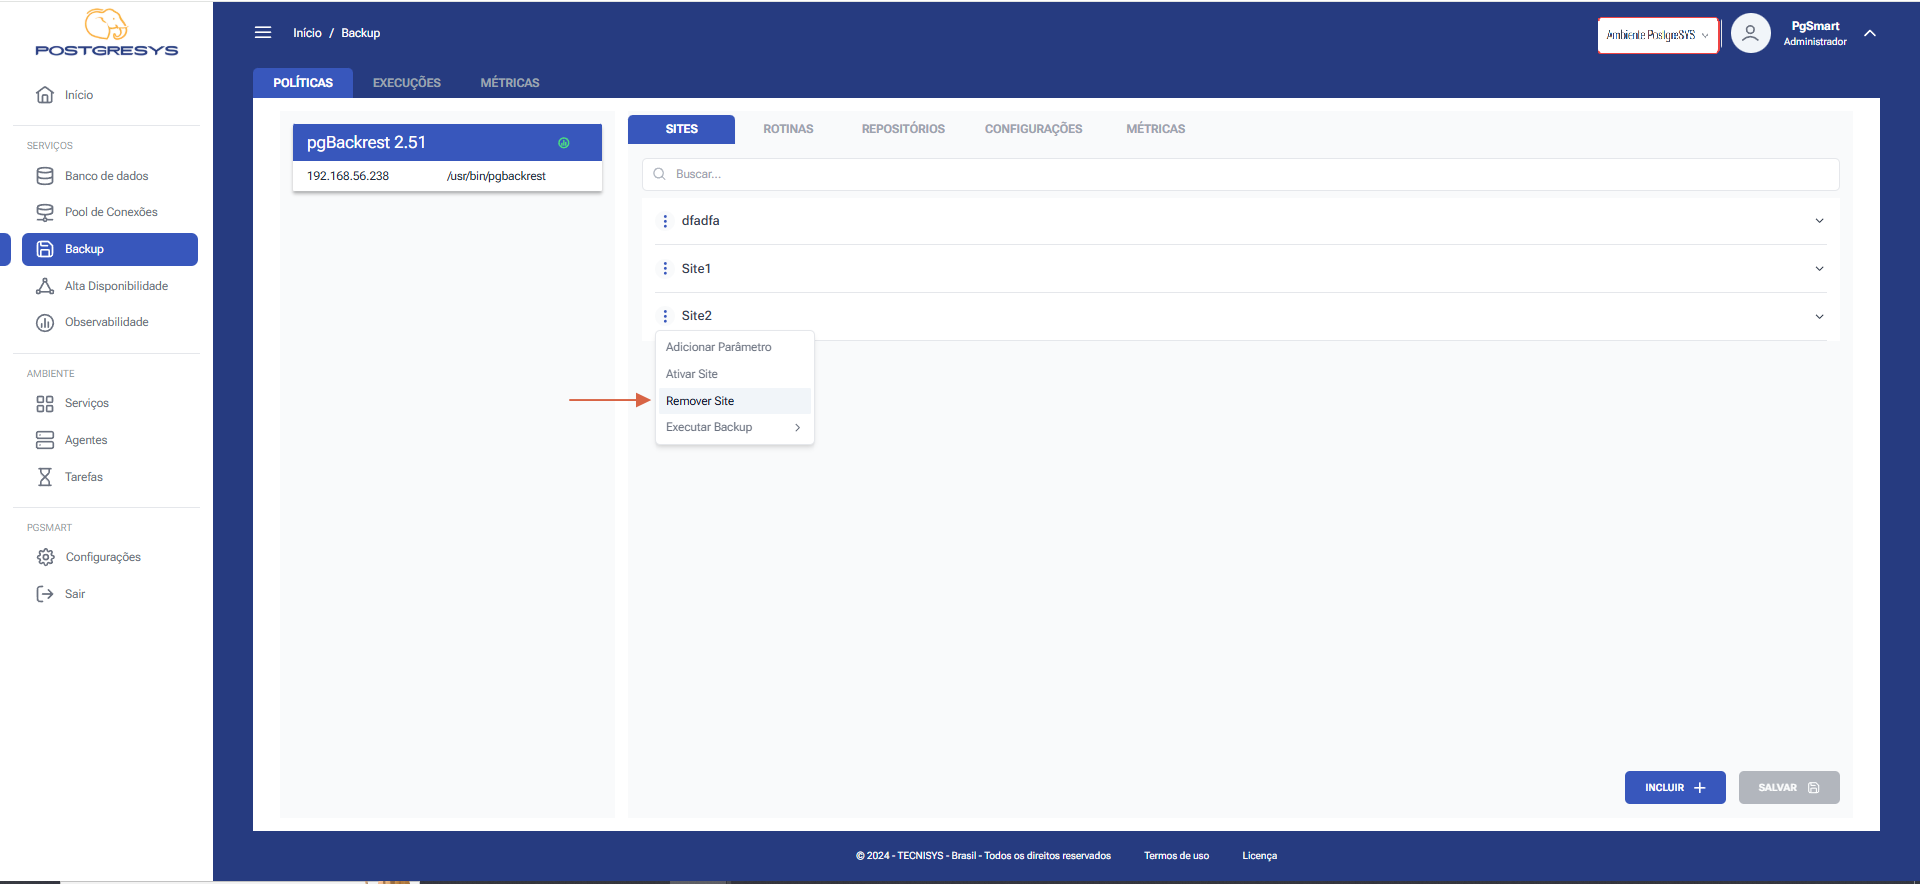 Figure 7 - Backup Site Configuration - Remove Site
Add Site Parameters
-
Add
Parametersto the site. 1.1. Click on the three dots (⋮) next to the site for which you want to configure parameters. 1.2. Configure the desired parameter. 1.3. Click onIncluir.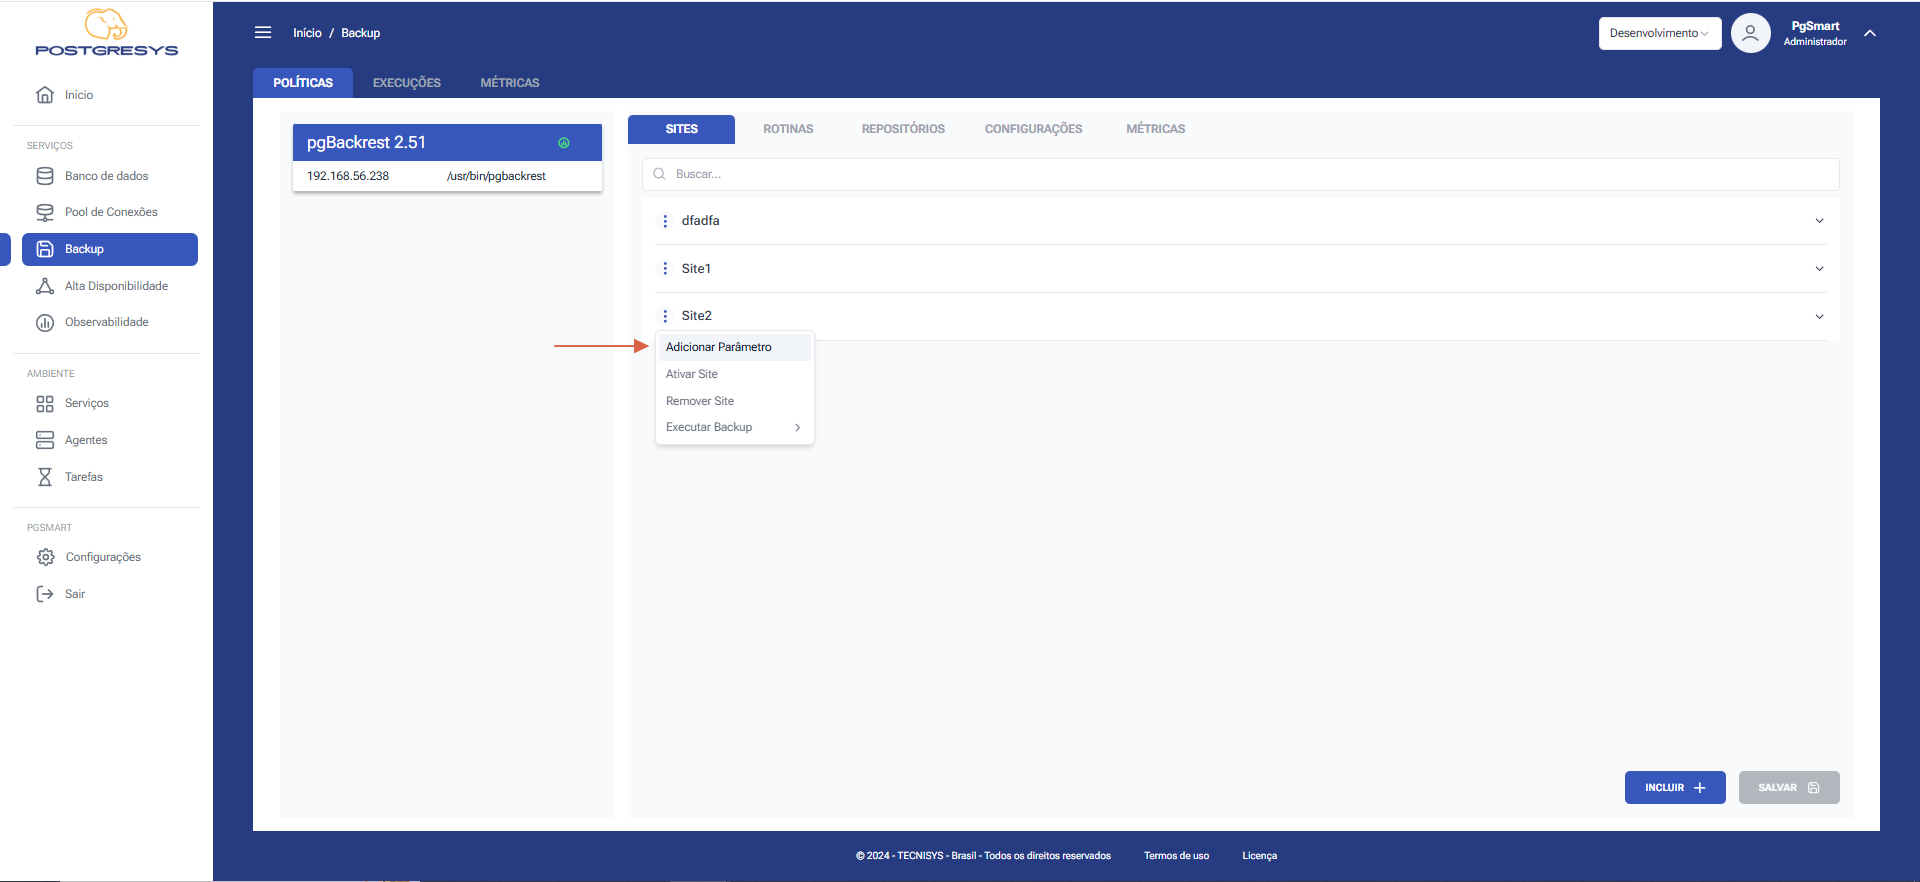 Figure 8 - Backup Site Configuration - Add Parameter
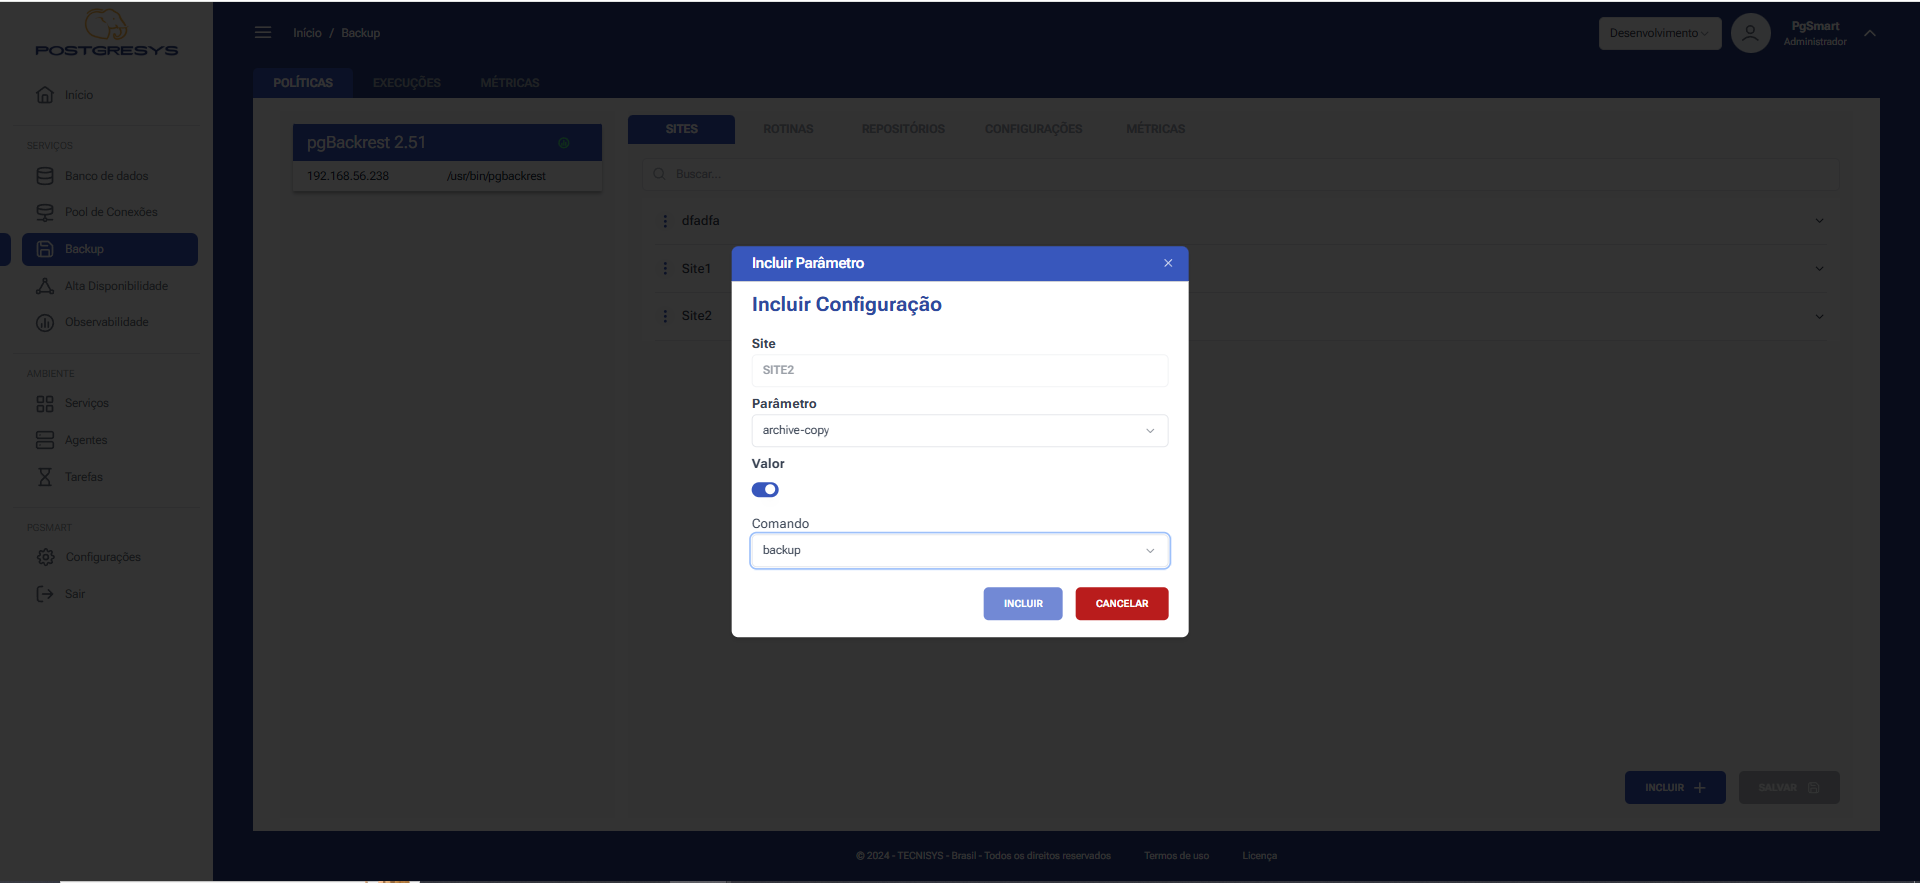 Figure 9 - Backup Site Configuration - Including Parameter Configuration